
Ruby Red Cherry Bars
When thawed cherries hit a warm saucepan, they release a surprising amount of juice. I watch that ruby liquid gather around the fruit as it simmers; it’s what turns the…

By Ava
•
•
Reading time: 9 min
Tip: save now, make later.
When thawed cherries hit a warm saucepan, they release a surprising amount of juice. I watch that ruby liquid gather around the fruit as it simmers; it’s what turns the filling for these Ruby Red Cherry Bars glossy instead of dry or pasty.
The crumb mixture does double duty here. Some goes into the pan as a sturdy base, and the rest stays loose for the oat topping. Baking the base before adding the cherries gives it a head start, so the fruit doesn’t soak straight through while the top turns golden.
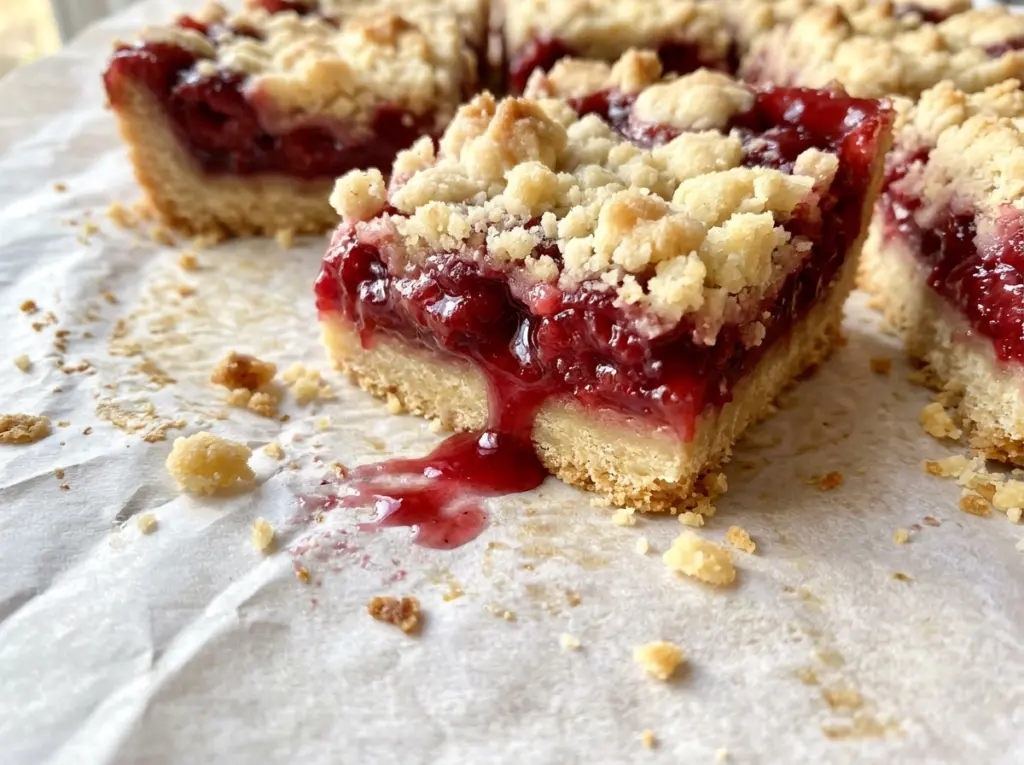
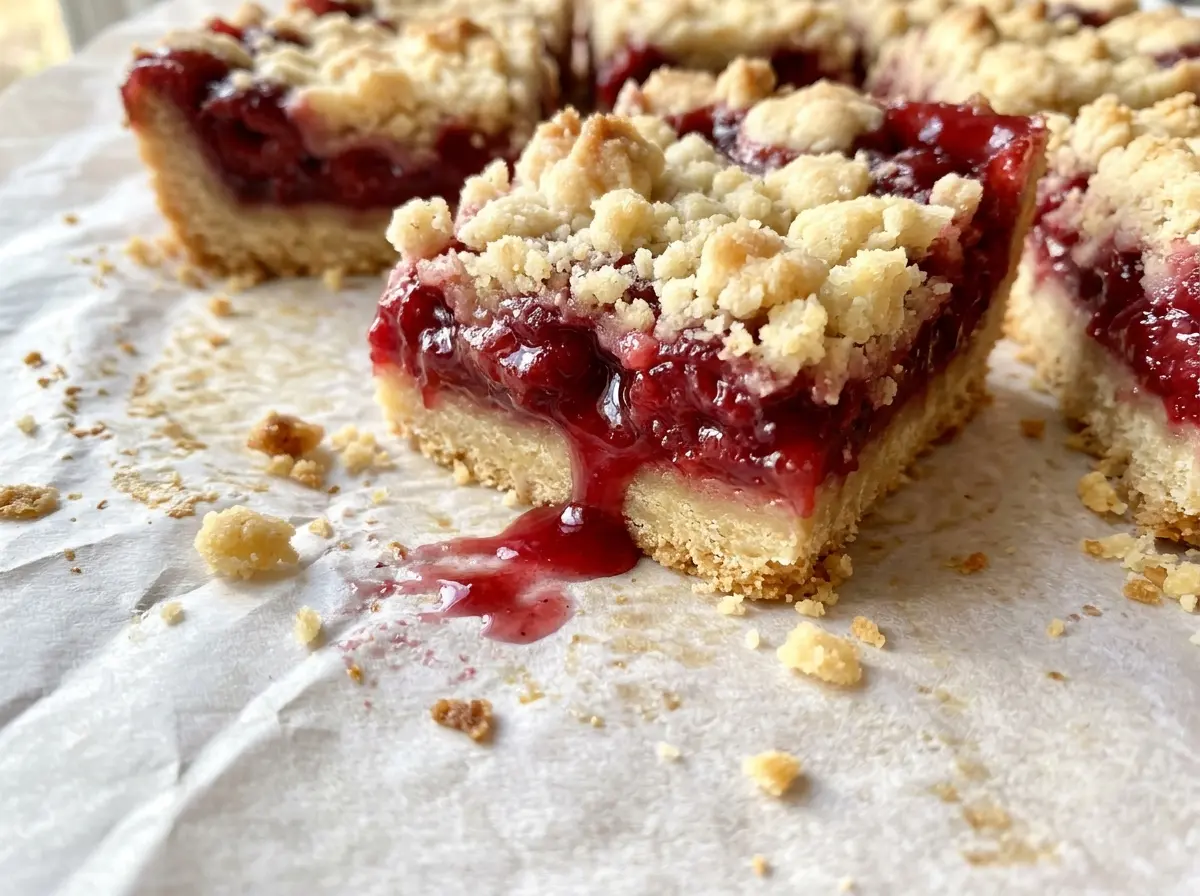
These bars take a little patience after baking, but the payoff is a clean cut and a soft, jammy center. The edges hold their shape beneath a buttery oat crumble, and every square tastes bright with cherry and lemon.
Kitchen Note
Cool the cherry filling in a shallow bowl for about 30 minutes before spreading it over the crust. I find it much easier to spread when it has cooled a bit, rather than sliding around on the warm base.
Save these Ruby Red Cherry Bars for a bake sale or coffee break: a jammy cherry middle tucked under golden oat crumbs.
Why the crust needs a head start before the cherries go on
Cherry filling brings plenty of moisture to the pan, and an unbaked oat crust would have to absorb that juice while it was still trying to set. Giving the base its own short bake changes the order of the job: the flour-and-oat crumbs begin to firm before the fruit is added. That’s what helps the bottom stay sliceable instead of turning soft beneath the filling.
The crumb mixture also gives you two different textures without making a second topping. Press most of it into an even layer, then keep the reserved portion loose so it bakes into distinct golden bits. If you press all of the crumbs down, you lose that contrast; if the base is patchy, filling can settle into the thinner spots and make the bars harder to lift.
- The crust gets a brief bake before it meets the wet filling.
- The top stays loose, so it browns as a crumble rather than another solid layer.
- The cherry layer is thickened separately, which keeps its juices from running freely through the crumb.
It’s a small bit of sequencing that makes these bars feel like bars, not a pan of fruit crisp you have to scoop.
The ingredients that keep the cherry layer bright and the oat crumbs tender

- Frozen pitted sweet cherries — Plain frozen cherries are a dependable, budget-friendly choice because the fruit is cooked into a filling. Thaw and halve them, keeping any juices; that liquid belongs in the saucepan with the cherries.
- Cornstarch — It thickens the cherry juices into a glossy layer that stays between the crust and crumb topping. Whisk it with the water until smooth before it goes into the fruit, so you don’t get dry starch pockets in the filling.
- Lemon juice — The tart note keeps sweet cherries from tasting flat. Bottled lemon juice works in place of freshly squeezed lemon juice without changing the amount.
- Old-fashioned rolled oats — Their larger flakes give the crumb a distinct, pleasantly chewy texture. A basic store-brand container is fine; the important part is using old-fashioned rolled oats rather than an instant oat product.
- All-purpose flour — Flour gives the base enough structure to hold the cherry layer and keeps the loose topping from falling apart. For this tested texture, stick with all-purpose flour rather than swapping in a different flour.
- Unsalted butter and the two sugars — Melted, cooled butter binds the crumb mixture without needing to cream it. Granulated sugar sweetens the fruit, while packed light brown sugar gives the crumbs a softer, richer bite; ordinary grocery-store brands work well.
From bubbling cherries to a golden, sliceable top
Simmer the cherries until their juices gather
Heat the oven to 350°F and line a 9×13-inch baking pan with parchment, leaving overhang on two sides. In a 3-quart saucepan, combine the thawed, halved cherries and their juices with the granulated sugar, lemon juice, and 1/4 teaspoon of the salt. Cook over medium heat, stirring often, until the fruit releases its juices and the mixture simmers, about 5 to 8 minutes. Stir steadily enough to keep the fruit from catching on the bottom.
Thicken the filling without leaving starch pockets
Whisk the water and cornstarch together in a small bowl until smooth, then stir the slurry into the simmering cherries. Keep the mixture at a steady simmer and stir for 1 to 2 minutes, until it looks glossy and thick. Transfer the filling to a shallow bowl to cool. It should be cool enough to spread over the crust without immediately loosening it.
Mix the crumbs and press in the base
In a large bowl, whisk the flour, rolled oats, brown sugar, baking powder, and remaining 1/4 teaspoon salt. Stir in the melted, cooled butter until moist crumbs form and no dry flour remains; stop once the mixture is evenly moistened instead of working it into a smooth dough. Set aside 2 cups of the crumbs. Press the rest evenly into the parchment-lined pan, taking a moment to fill the corners so the base bakes at a consistent thickness.
Layer the filling and bake until the edges bubble
Bake the crust for 15 to 18 minutes, until the edges are lightly golden. Spread the cooled cherry filling evenly over the warm crust, then scatter the reserved crumbs over the fruit. Bake for 35 to 40 minutes, until the topping is golden and the filling bubbles at the edges. Cool completely in the pan on a wire rack for at least 3 hours, then use the parchment overhang to lift the slab out and cut it into bars.
Two ways to change the cut without changing the bake
Make petite cherry bites
For a dessert tray or a smaller snack, cut the cooled slab into 32 pieces instead of 16. The recipe and bake stay the same; the smaller squares give you more crisp edge in each bite and are easier to arrange on a platter.
Cut long, narrow bars
For a slimmer bakery-style shape, cut the cooled slab into 16 narrow fingers rather than square bars. The crisp oat topping and cherry center stay in the same balance, but the longer pieces are easy to pick up and serve.
Storage and Reheating
- Refrigerator: Store the bars in an airtight container for up to 4 days. The oat crust softens a little as it sits against the fruit filling.
- Freezer: Freeze the cut bars in a single layer until firm, then pack them with parchment between layers in an airtight container for up to 2 months. Thaw in the refrigerator.
- Reheating: These are good at room temperature, but you can warm an individual bar in the microwave in 10-second bursts. Avoid a long blast, which can make the filling hotter than the crumb and soften the base.
What to know before swapping the cherries, oats, or sugar
Ruby Red Cherry Bars
Ingredients
Equipment
Method
- Preheat the oven to 350°F.
- Line a 9x13-inch baking pan with parchment, leaving overhang on two sides.
- Combine the cherries, granulated sugar, lemon juice, and 1/4 teaspoon of the salt in a 3-quart saucepan.
- Cook over medium heat, stirring often, until the cherries release their juices and the mixture simmers, about 5 to 8 minutes.
- Whisk the water and cornstarch in a small bowl until smooth.
- Stir the cornstarch mixture into the cherries and cook at a steady simmer, stirring, for 1 to 2 minutes, until the filling is glossy and thick.
- Transfer the filling to a shallow bowl and cool for about 30 minutes.
- Whisk the flour, oats, brown sugar, baking powder, and remaining 1/4 teaspoon salt in a large bowl.
- Stir in the melted butter until the mixture forms moist crumbs with no dry flour remaining.
- Set aside 2 cups of the crumb mixture.
- Press the rest evenly into the prepared pan.
- Bake the crust for 15 to 18 minutes, until lightly golden around the edges.
- Spread the cooled cherry filling evenly over the warm crust.
- Sprinkle the reserved crumbs evenly over the top.
- Bake for 35 to 40 minutes, until the topping is golden and the filling bubbles at the edges.
- Cool completely in the pan on a wire rack, at least 3 hours.
- Lift the bars out with the parchment and cut into bars.