
Mini Beef Wellington Bites
As the pastry puffs in the oven, the edges turn crisp and golden while the little parcels keep their filling tucked inside. Mini Beef Wellington Bites give you the tenderloin-and-mushroom…

By Ava
•
•
Reading time: 9 min
Tip: save now, make later.
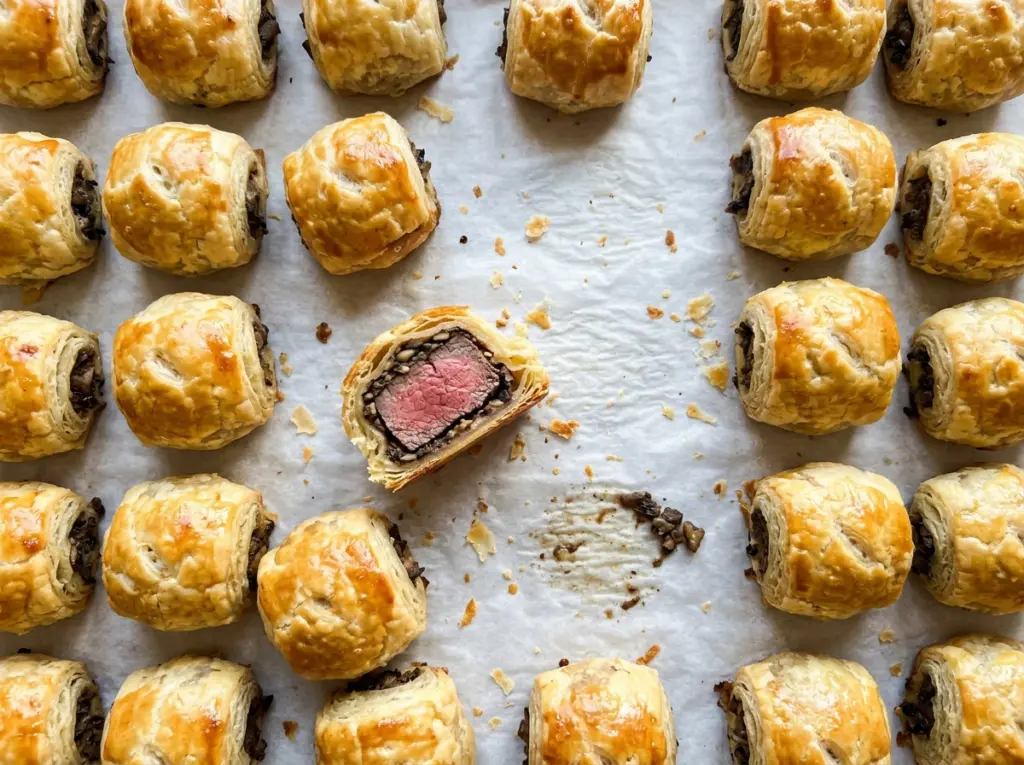
As the pastry puffs in the oven, the edges turn crisp and golden while the little parcels keep their filling tucked inside. Mini Beef Wellington Bites give you the tenderloin-and-mushroom combination of a classic Wellington in portions that are easy to pick up and serve. Each one has a bite of beef, a little savory mushroom filling, and a flaky pastry shell.
I like how the mushroom mixture adds depth without taking over the beef. The pieces are small enough to brown quickly, then finish cooking inside the pastry, so keeping their size consistent helps the batch bake evenly. The result is a neatly sealed bite with a tender center and a browned, puffed top.
Kitchen Note
Let the mushroom filling and seared beef cool before they touch the pastry. Warm filling softens the sheets and makes the corners harder to pinch shut.
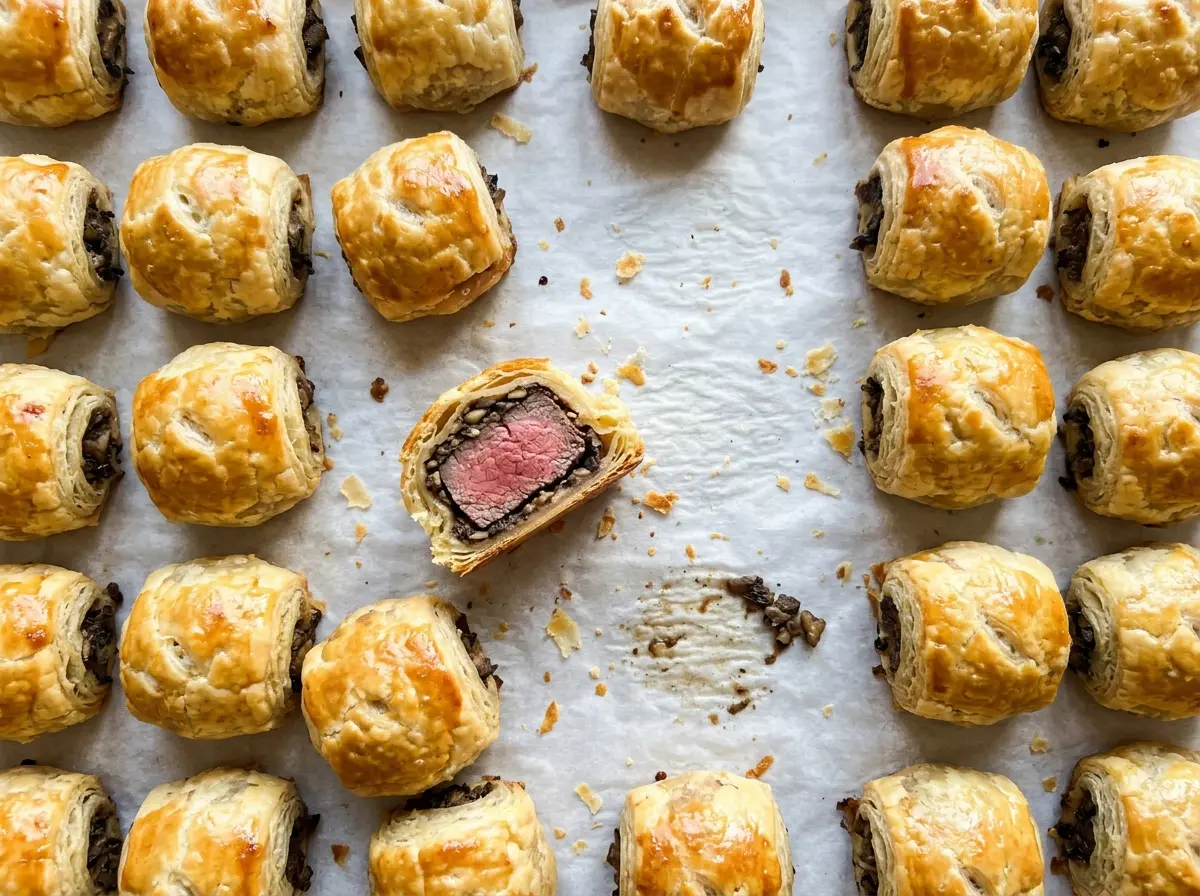
Save these Mini Beef Wellington Bites for a party spread: flaky pastry wrapped around seared beef and savory mushrooms.
The Moisture Check That Keeps Mushroom Filling Out of the Pastry
Mushrooms release a surprising amount of liquid as they cook. If that moisture stays in the filling, it has nowhere to go once each parcel is wrapped in pastry. The bottom can turn soft instead of crisp, and the filling may be harder to keep centered as you seal the corners.
Cooking the chopped mushrooms until they’re browned and the skillet has no liquid left does two jobs at once: it concentrates their savory flavor and gives the pastry a drier filling to hold. Keep stirring often so the shallot and mushrooms cook evenly rather than catching in one spot. The finished mixture should look cooked down, not glossy with pooled liquid.
This is why I give the mushrooms time in the skillet instead of rushing them into the pastry while they’re still wet. The filling is only a small part of each bite, but its texture makes a noticeable difference in the finished shell.
Why Tenderloin, Cremini, and Puff Pastry Each Matter Here

- Beef tenderloin — Its tenderness suits a small parcel that cooks quickly. Cut the pieces evenly so one isn’t noticeably larger than the others; a different cut can be chewier and may not finish on the same timing.
- Cremini mushrooms — They bring a deeper, earthier taste than a mild white mushroom, and chopping them finely helps the filling sit neatly on the beef. White button mushrooms work as a direct substitute in the same amount; chop them just as finely and cook away their liquid.
- Frozen puff pastry — Thawed pastry is pliable enough to roll, cut, and pinch around the filling, then puffs into the crisp shell. Keep the sheets cold enough to handle without letting them become stiff; pastry that’s too warm gets sticky and harder to shape.
- Shallot, thyme, and butter — The shallot and fresh thyme give the mushrooms their aromatic, savory base, while butter adds richness as they cook. Fresh thyme leaves are worth using here because they distribute through the finely chopped filling; the neutral oil, by contrast, keeps the beef sear from taking on a strong oil flavor.
- Egg and water — Beaten together, they give the edges a coating that helps them seal and the tops a golden finish. Brush a thin layer along the pastry edges rather than letting it pool in the corners.
The Four Stages That Keep Beef Wellington Bites Sealed
Cook the mushrooms down until browned
Melt the butter in a 12-inch skillet over medium heat and cook the minced shallot for 1 minute. Add the finely chopped cremini mushrooms, thyme, and salt, then cook for 8–10 minutes, stirring often. They’re ready when they’re browned and no liquid remains in the pan. Move the filling to a plate and refrigerate it until cool.
Sear the beef in manageable batches
Pat the tenderloin pieces dry, then season them with salt and black pepper. Heat the neutral oil in the same skillet over medium-high heat and brown the beef on all sides, working in batches so the pieces can make contact with the pan. Each batch takes about 3 minutes. Transfer the beef to a plate and refrigerate until cool, about 20 minutes.
Cut and seal the pastry parcels
Heat the oven to 425°F and line two 18×13-inch rimmed baking sheets with parchment paper. Beat the egg and water together, then roll each thawed pastry sheet on a clean work surface into a 9×12-inch rectangle and cut it into twelve 3-inch squares. Put one beef piece and an even portion of mushroom filling in the center of each square. Brush the edges with egg wash, bring the corners up over the filling, pinch to seal, and set each parcel seam-side up on the baking sheets.
Bake until the pastry is deep golden
Brush the tops with the remaining egg wash and bake for 18–22 minutes. Halfway through, swap the sheets’ rack positions and rotate them so they brown evenly. Look for puffed pastry with a deep golden color, and check that the beef reaches 145°F in the center; if it needs more time, continue baking in 2-minute increments. Rest the bites for 3 minutes before serving.
Two Useful Changes Without Losing the Wellington Shape
Make them gluten-free
Replace the regular puff pastry with gluten-free puff pastry sheets. Thaw and roll them according to the package guidance, aiming for the same 9×12-inch rectangles if the dough allows; gluten-free pastry can be more fragile and may puff less evenly, so pinch the seams carefully.
Leave out the thyme for a simpler filling
Omit the fresh thyme leaves and cook the shallot and mushrooms as usual. The mushroom mixture will taste cleaner and less herbal, while the beef and browned pastry remain the focus.
Storage and Reheating
- Refrigerator: Refrigerate leftovers within 2 hours in a covered container and eat within 3–4 days. The pastry will soften as it sits.
- Freezer: Freeze fully cooled bites in a single layer, then transfer them to an airtight container for up to 2–3 months. The pastry may lose some of its crisp texture after thawing.
- Reheating: Reheat in a 350°F oven until the centers reach 165°F. A microwave heats them quickly but softens the pastry further.
Questions That Come Up Before These Bites Go in the Oven
Mini Beef Wellington Bites
Ingredients
Equipment
Method
- Melt the butter in a 12-inch skillet over medium heat and cook the shallot for 1 minute.
- Add the mushrooms, thyme, and salt; cook for 8–10 minutes, stirring often, until the mushrooms are browned and no liquid remains.
- Transfer the mushroom mixture to a plate and refrigerate until cool.
- Pat the beef dry and season it with the salt and pepper.
- Heat the oil in the same skillet over medium-high heat and sear the beef in batches, turning to brown all sides, about 3 minutes per batch.
- Transfer the beef to a plate and refrigerate until cool, about 20 minutes.
- Heat the oven to 425°F.
- Line two 18x13-inch rimmed baking sheets with parchment paper.
- Beat the egg and water together in a small bowl.
- On a clean work surface, roll each pastry sheet into a 9x12-inch rectangle and cut it into twelve 3-inch squares.
- Put one piece of beef and an even portion of the mushroom mixture in the center of each square.
- Brush the edges with egg wash, then bring the corners up over the filling and pinch to seal; place seam-side up on the baking sheets.
- Brush the tops with the remaining egg wash and bake for 18–22 minutes, swapping the sheets’ rack positions and rotating them halfway through, until the pastry is puffed and deep golden and the beef reaches 145°F in the center; continue baking in 2-minute increments if needed.
- Rest for 3 minutes before serving.