
Oven Baked Pig Shots
As the bacon tightens around each kielbasa slice, it turns into a little collar that holds the filling instead of letting it slide onto the pan. That’s what makes these…

By Ava
•
•
Reading time: 8 min
Tip: save now, make later.
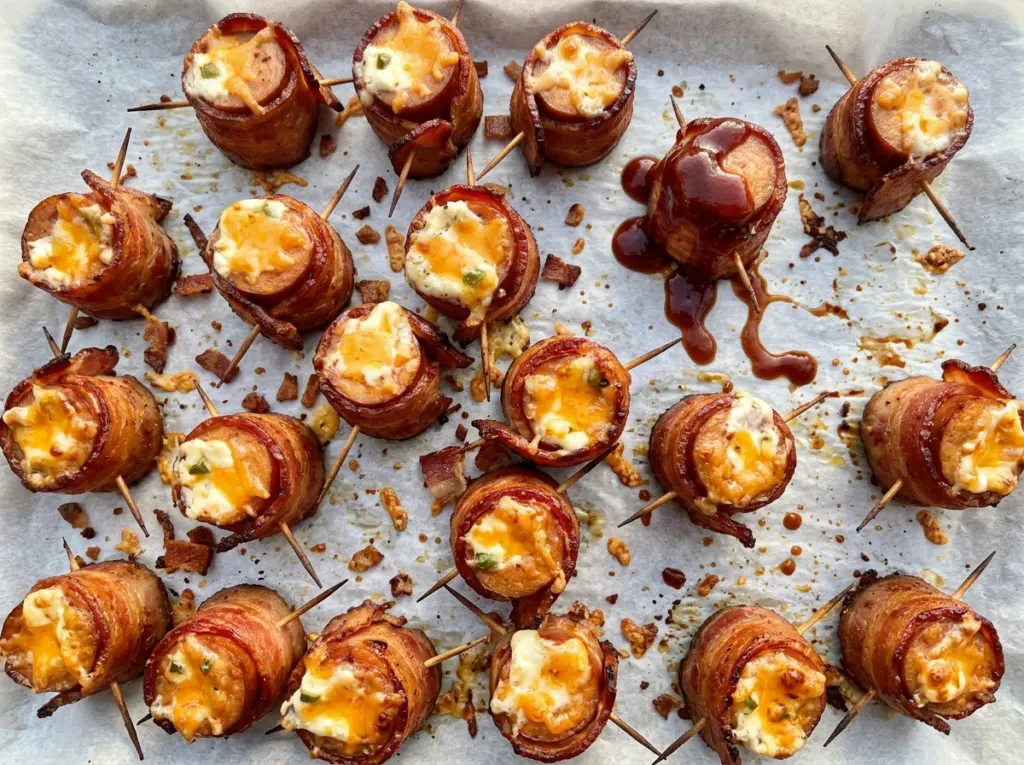
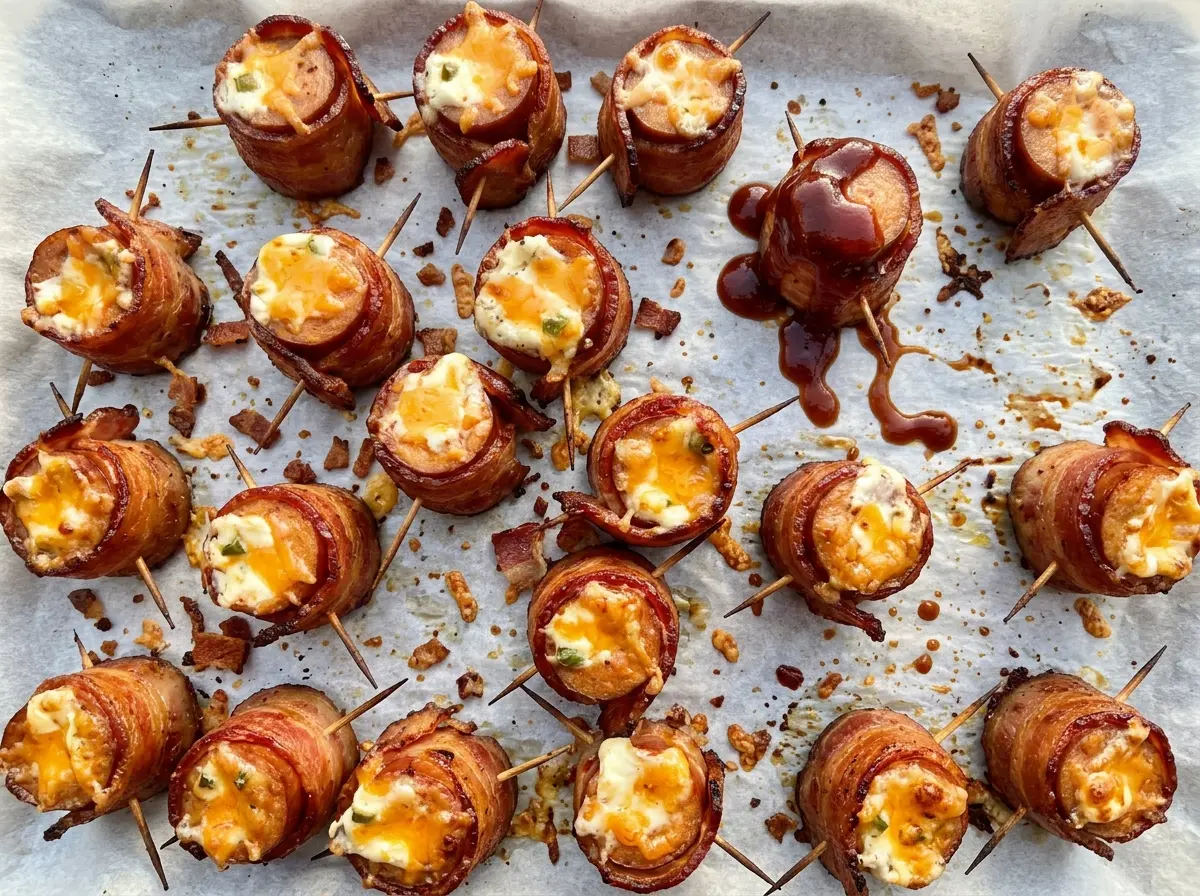
As the bacon tightens around each kielbasa slice, it turns into a little collar that holds the filling instead of letting it slide onto the pan. That’s what makes these oven baked pig shots easy to pick up and snack on: a smoky sausage base, crisp bacon around the edge, and a cheesy center with just a little jalapeño heat.
I set the bacon-wrapped kielbasa on a wire rack rather than directly on the baking sheet. Hot air can move underneath the bites, while the foil-lined pan catches the drippings. The filling takes only a few stirs to bring together, and the oven does the rest until the bacon is crisp and the tops are lightly browned. After a short rest, each bite is savory, creamy, and ready to pass around.
Kitchen Note
I use a wooden toothpick to hold each bacon collar snug while it bakes. Take the picks out before serving so nobody bites into one by surprise.
Save these oven baked pig shots for game day or your next snack spread—crisp bacon collars with a creamy, jalapeño-cheddar center.
Why the Wire Rack Helps the Bacon Crisp Instead of Steam
Bacon wrapped around a sausage slice has a lot of contact with the pan if it sits flat in its own drippings. A rack lifts each bite above the foil, so rendered fat can drain away and hot air can circulate underneath. The bacon still gets plenty of time in the oven to crisp, but it isn’t resting in a puddle as it cooks.
The kielbasa slices also give each pig shot a sturdy, flat base. Cutting them about a half inch thick keeps them substantial enough to support the bacon collar and filling without turning the sausage into the whole bite. Arrange each one flat side down, with a little space between pieces rather than stacking or crowding them. The foil underneath catches the drips, which makes cleanup easier once the pan has cooled.
If the bacon looks pale where it touches the sausage, give the bites the full bake and check for crispness rather than pulling them just because the filling has started to color. The bacon and filling finish at different speeds; both cues matter for the best texture.
How Kielbasa, Bacon, and Cream Cheese Shape Each Bite

- Smoked kielbasa — Its firm texture gives the filling a stable base, and its smoky, savory flavor stands up to bacon. Choose a package with slices that are close in diameter so each bacon collar fits around its sausage base. A similar smoked sausage can work, but a softer or much smaller sausage may be harder to wrap neatly.
- Bacon — Bacon supplies the salty, crisp outside and shrinks snugly around the kielbasa as it cooks. Use slices long enough to wrap around each coin and secure with a toothpick. The package brand matters less than having slices that are intact and easy to handle.
- Cream cheese — Softened cream cheese makes the filling easy to stir and spoon into the collars. Let it soften before mixing; cold cream cheese tends to leave lumps that are harder to blend evenly. Plain dairy-free cream cheese is a workable swap, though the filling may have a slightly different texture.
- Sharp cheddar — Sharp cheddar brings a more pronounced cheese flavor that doesn’t disappear beside the smoked sausage. Freshly shredded cheddar blends smoothly, while pre-shredded cheese is convenient and still works. Smoked cheddar is a good flavor variation if you want a deeper smoke note.
- Jalapeño and barbecue seasoning — Finely minced, seeded jalapeño spreads its heat through the filling instead of leaving large spicy bites. Barbecue seasoning adds a savory, smoky-sweet accent; the blend you choose will influence the final flavor, so use one you already enjoy.
How to Shape the Bacon Collars and Fill Them Without a Mess
Set Up the Rack and Cut the Bases
Heat the oven to 400°F, line a rimmed baking sheet with foil, and set a wire rack on top. Cut the kielbasa into 24 slices about a half inch thick, then cut each bacon slice in half crosswise. The bacon pieces should wrap around the sides of the sausage, not cover the top. Having the rack ready first gives you somewhere to set each finished collar as you work.
Wrap Each Kielbasa Slice
Wrap one piece of bacon around the side of each kielbasa slice, lining up the bottom edges so the base sits flat. Secure the bacon with a wooden toothpick and place the slice flat side down on the rack. If the bacon ends pull away before you secure them, bring the ends together around the sausage and fasten them before moving to the next one. Keep the sausage bases level so the filling has a stable place to sit.
Stir and Spoon in the Filling
Stir the softened cream cheese, shredded sharp cheddar, finely minced seeded jalapeño, and barbecue seasoning together until evenly combined. Scrape the sides of the bowl as you mix so the pepper and seasoning don’t stay in one spot. Spoon about 2 teaspoons of filling into each bacon collar. Keep the filling inside the bacon edge rather than piling it into a tall mound.
Bake Until the Bacon Is Crisp
Bake for 35 to 45 minutes, until the bacon is crisp and the filling is lightly browned. Check the bacon around the sides as well as the visible tops; a browned top doesn’t always mean the bacon collar is crisp yet. Rest the pig shots for 5 minutes before serving so the hot filling can settle. Remove the toothpicks before they reach the serving plate.
Three Flavor Changes That Still Let the Bacon Collar Do Its Job
Swap in Smoked Cheddar
Use smoked cheddar in place of sharp cheddar for a stronger smoke flavor that echoes the kielbasa and bacon. The filling stays cheesy, but the sharp, tangy cheddar note will be less prominent.
Choose a Milder Pepper
Replace the seeded jalapeño with finely minced, seeded poblano for a gentler pepper flavor and less heat. Keep the pieces small so they distribute through the filling instead of making individual bites chunky.
Make a Dairy-Free Filling
Use plain dairy-free cream cheese and dairy-free cheddar-style shreds instead of the dairy cheeses. The savory filling still fits inside the bacon collars, though it may not brown or melt quite like the original.
Storage and Reheating
- Refrigerator: Refrigerate leftovers within 2 hours in a covered container and eat within 3 to 4 days. The bacon softens as it sits.
- Freezer: Freeze cooled pig shots in a single layer, then transfer them to an airtight freezer container for up to 2 to 3 months. The bacon may be less crisp after thawing.
- Reheating: Reheat on a rack over a baking sheet in a 350°F oven until the centers reach 165°F. Avoid the microwave if you want to bring back some crispness; it tends to soften the bacon.
Questions About Making Oven Baked Pig Shots
Oven Baked Pig Shots
Ingredients
Equipment
Method
- Heat the oven to 400°F.
- Line a rimmed baking sheet with foil and set a wire rack on top.
- Cut the kielbasa into 24 slices, about 1/2 inch thick.
- Cut each bacon slice in half crosswise.
- Wrap one piece of bacon around the side of each kielbasa slice, aligning the bottom edges.
- Secure each bacon collar with a wooden toothpick and arrange the slices flat side down on the rack.
- Stir the cream cheese, cheddar, jalapeño, and barbecue seasoning together in a bowl until evenly combined.
- Spoon about 2 teaspoons of filling into each bacon collar.
- Bake for 35 to 45 minutes, until the bacon is crisp and the filling is lightly browned.
- Rest for 5 minutes before serving.