
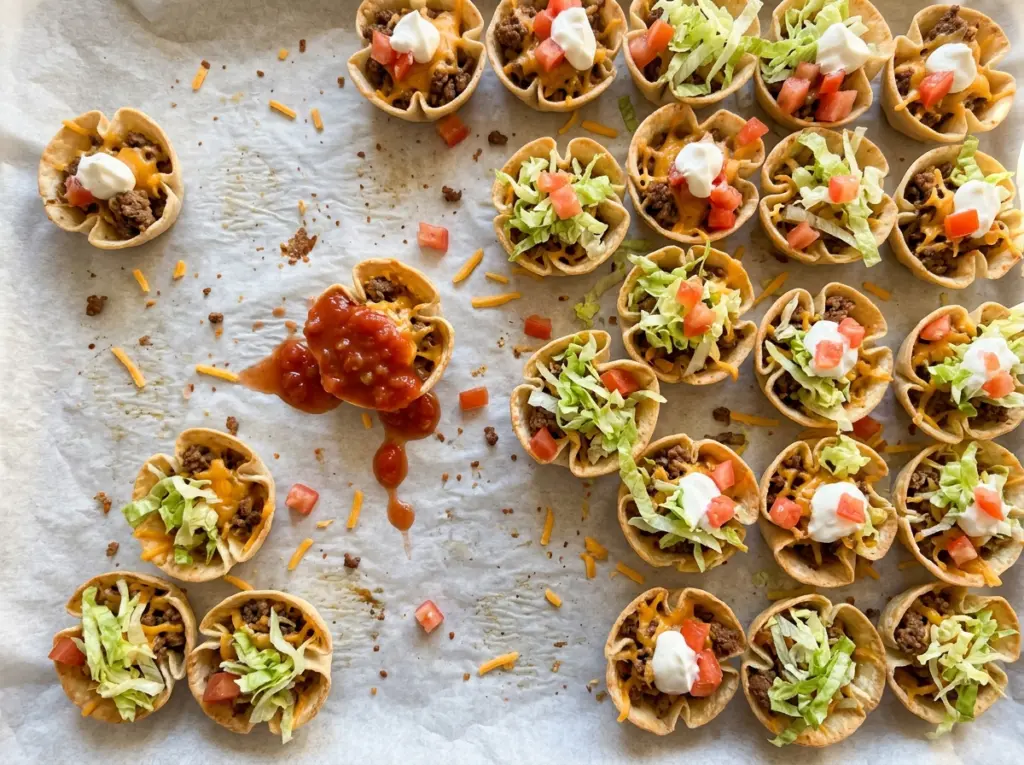
New Year’s Eve Mini Taco Cups
The first bake is where these little cups start to behave like cups: the wonton wrappers turn from floppy squares into shells that can hold a scoop of taco beef.…

By Ava
•
•
Reading time: 8 min
Tip: save now, make later.
The first bake is where these little cups start to behave like cups: the wonton wrappers turn from floppy squares into shells that can hold a scoop of taco beef. Skip that pause and the bottoms can soften before the cheese has time to melt. I like that this recipe turns familiar taco-night ingredients into two-bite New Year’s Eve Mini Taco Cups without asking you to fuss with a separate dough.
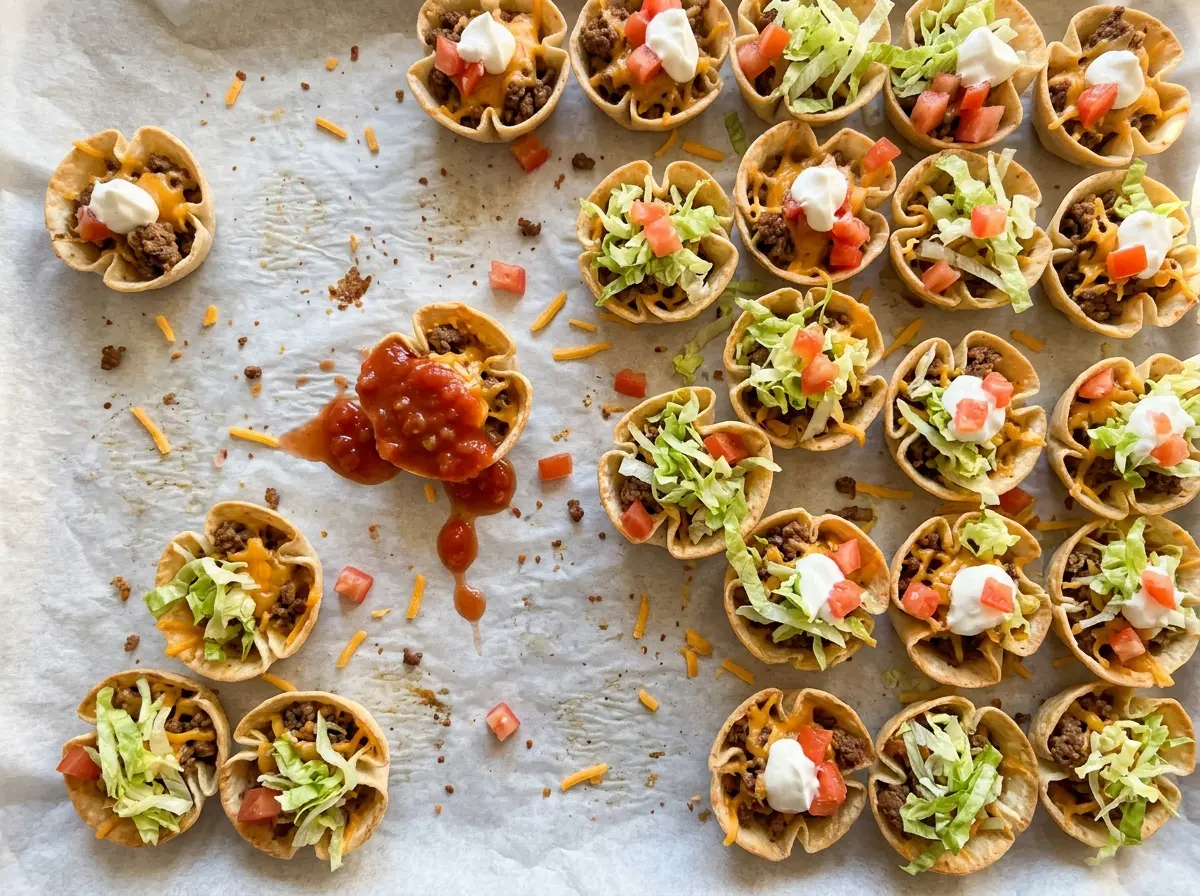
Pressing two wrappers into each muffin cup gives the shells enough structure to carry the filling, and turning the top wrapper keeps its corners from lining up with the bottom one. The edges bake up golden while the center stays sturdy. A short rest in the pan helps the cups release cleanly, so you can set them out with salsa, sour cream, and scallions ready for topping.
Kitchen Note
Give the cups the full 3-minute rest in the muffin pans before lifting them out. Their edges are delicate right out of the oven, and that brief pause makes them much less likely to crack when you move them.
Save these New Year’s Eve Mini Taco Cups for a party bite with crisp wonton edges, seasoned beef, and melty cheese.
Why the Wonton Shells Need a Head Start Before the Taco Beef
Taco filling is juicy by design, and a raw wonton wrapper doesn’t have much time to firm up once it is covered. Giving the wrappers a short bake first sets their shape and starts crisping the base before the beef goes in. The second bake then has one job: warm the filling and melt the cheese while the shell edges turn golden.
Two wrappers also make a more dependable little vessel than one. Set the first wrapper into the muffin cup, then turn the second slightly so the corners sit at different angles. That offset creates a layered rim rather than a stack of corners in one spot, and the shells are easier to fill without pushing through the bottom. Keep the first bake brief; the wrappers should look set, not deeply browned, because they still go back into the oven.
If the filling is loose, it can make the shell soggy before the cheese finishes melting. Simmer the beef mixture until it thickens and spoon it in with a little care. A dry-looking top is not the goal—the filling should still be moist—but you shouldn’t see liquid pooling in the skillet.
What the Beef, Seasoning, and Wonton Wrappers Each Bring

- Ground beef — The 85% lean beef gives the filling enough richness without leaving an excessive amount of fat in the skillet. Break it into small crumbles as it cooks so each cup gets an even scoop, and drain the excess fat before adding the seasoning mixture.
- Taco seasoning — The packet brings a balanced mix of spices and salt in one step. Using the full packet keeps the beef evenly seasoned; the water helps those seasonings coat the crumbles before the mixture thickens. There’s no need to buy a premium packet for this filling.
- Wonton wrappers — Their thin, square shape fits a standard muffin cup and crisps at the edges quickly. Choose wrappers that are pliable rather than dried or cracked, and keep the stack covered while you work so the edges don’t dry out. A different wrapper won’t give quite the same small, crisp shell.
- Mexican-blend cheese — Shredded blend melts across the beef and helps bind the filling into each cup. A fresh bag with loose shreds is easier to sprinkle evenly than clumps of cheese; pre-shredded cheese is convenient here and works well.
- Salsa, sour cream, and scallions — These are the cool, bright finish against the hot beef and cheese. Slice the scallions thinly so they distribute across small bites, and serve the salsa and sour cream alongside rather than weighing down the baked shells before they reach the table.
From Seasoned Beef to Golden, Cheese-Topped Cups
Brown the Beef Until the Crumbles Are Small
Cook the ground beef in a large skillet over medium heat for 7–9 minutes, breaking it into small crumbles as it browns. The pieces should be browned throughout, with no pink centers, and the beef should reach 160°F. Drain the excess fat before adding anything else; leaving it in can make the filling greasy and the shells heavy.
Simmer Until the Seasoning Clings
Stir in the taco seasoning and water, then simmer for 3–4 minutes, stirring occasionally. The mixture should thicken enough to cling to the beef instead of running freely across the skillet. If liquid still gathers between the crumbles, give it the full simmer rather than spooning a watery filling into the cups.
Set the Offset Wonton Layers
Heat the oven to 375°F and coat two 12-cup standard muffin pans with nonstick cooking spray. Press two wonton wrappers into each muffin cup, rotating the second wrapper so its corners are offset from the first. Bake for 5–6 minutes, just until the wrappers hold their shape; if the tips are already dark brown, they’ll have less room to color during the second bake.
Fill, Melt, and Let the Cups Set
Spoon about 2 tablespoons of taco filling into each cup and sprinkle with the shredded cheese. Bake for 6–8 minutes, until the cheese is melted and the wrapper edges are golden. Leave the cups in the pans for 3 minutes before removing them, then serve with salsa, sour cream, and thinly sliced scallions.
Two Ways to Change the Finish Without Losing the Crunch
A cheese-free, dairy-free-style finish
Leave out the cheese and sour cream, then use salsa and scallions to finish the cups. The result is less rich and more tomato-forward, without the melted cheese layer. This adaptation only suits you if the wonton wrappers and taco seasoning you choose are also dairy-free.
Put salsa beneath the beef
For a tangier, softer-bottomed cup, spoon a little of the salsa into each pre-baked shell before adding the beef and cheese. Keep the salsa portion modest so the wrappers don’t turn wet; serve any remaining salsa on the side. This version trades some crispness at the base for a brighter tomato bite in every cup.
Storage and Reheating
- Refrigerator: Store leftover filled cups in a covered container for 3–4 days. The wrappers soften as they sit, especially where they touch the filling and toppings.
- Freezer: The assembled cups lose their crisp texture after freezing, so freeze the cooked taco filling separately in an airtight container for up to 3 months instead.
- Reheating: Warm filled cups in a 375°F oven until hot throughout and the edges have crisped again. Avoid the microwave if you want crisp shells; it heats the filling but leaves the wonton wrappers soft.
Questions That Come Up When Making Mini Taco Cups
New Year's Eve Mini Taco Cups
Ingredients
Equipment
Method
- Cook the ground beef in a large skillet over medium heat for 7–9 minutes, breaking it into small crumbles, until browned and it reaches 160°F; drain excess fat.
- Stir in the taco seasoning and water, then simmer for 3–4 minutes, stirring occasionally, until the mixture is thickened.
- Heat the oven to 375°F and coat two 12-cup standard muffin pans with nonstick cooking spray.
- Press two wonton wrappers into each muffin cup, turning the second wrapper slightly so the corners are offset, and bake for 5–6 minutes until just set.
- Spoon about 2 tablespoons of taco filling into each cup, sprinkle with the cheese, and bake for 6–8 minutes until the cheese is melted and the wrapper edges are golden.
- Rest the cups in the pans for 3 minutes, then remove them and serve with the salsa, sour cream, and scallions.