
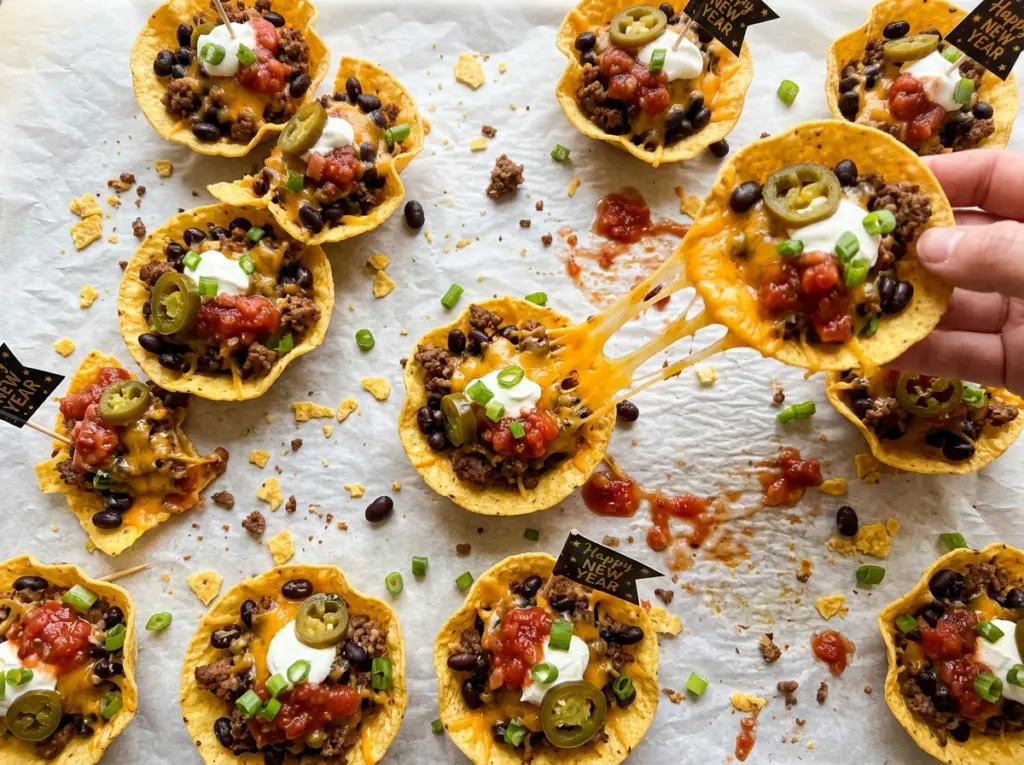
New Year’s Eve Loaded Nacho Cups
The first tray of nacho cups taught me how quickly a little extra filling can turn a neat appetizer into a baking-sheet cleanup. Scoop-shaped chips hold the beef and beans…

By Ava
•
•
Reading time: 8 min
Tip: save now, make later.
The first tray of nacho cups taught me how quickly a little extra filling can turn a neat appetizer into a baking-sheet cleanup. Scoop-shaped chips hold the beef and beans beautifully, but they work best as small, tidy bites rather than miniature mountains of nachos. These New Year’s Eve Loaded Nacho Cups give everyone their own crunchy chip, with melted cheese and cool toppings tucked right into the bowl.
I cook the filling until it’s thick enough to stay put, then add the fresh toppings only after the cheese has melted. That order keeps the chips crisp at the edges and gives each cup a bright finish instead of a soggy one. They’re easy to pass around while warm, with plenty of contrast between the savory filling, tangy pico, and pickled jalapeños.
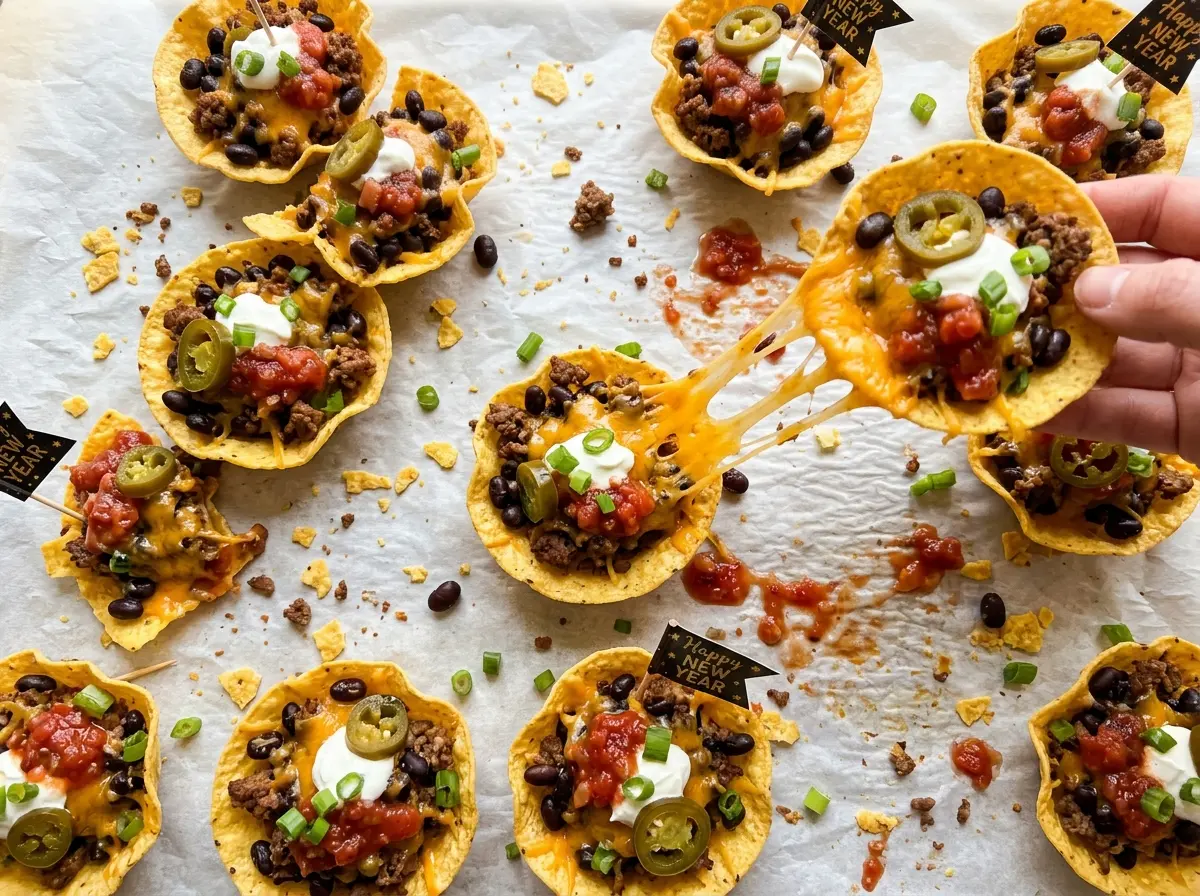
Kitchen Note
Give the baked cups their full 2-minute rest before adding the toppings. The melted cheese settles a little, so sour cream and pico stay where you spoon them instead of sliding off the top.
Save these New Year’s Eve Loaded Nacho Cups for a party snack with crisp chip bowls, melty cheese, and bright toppings.
Why These Nacho Cups Need Less Filling Than You Think
Full-size nachos invite you to pile everything high, but a scoop chip has a different job: it needs to stay easy to pick up with one hand. A modest layer of filling lets the chip keep its shape and leaves room for the cheese to melt across the top. Overstuffed cups tend to tip or spill when you move them from the tray, and the chips underneath soften faster.
Think of each chip as its own little serving, not as a base for a full plate of nachos. That’s what makes this appetizer easy to pass around; guests can grab one without pulling a whole layer of chips along with it. The toppings bring plenty of character, so the beef-and-bean filling doesn’t need to reach the rim. A little open space also keeps the cold toppings from sliding off once they’re added.
The Scoop Chips and Cheese That Hold Each Bite Together

- Ground beef — The 85% lean blend gives the filling enough fat for a savory texture without leaving a pool of grease in the skillet. Ground turkey can stand in, but cook it to 165°F; it’s leaner and has a milder, less beefy flavor.
- Taco seasoning — A ready-made blend keeps the filling quick and gives the beef its familiar chile-and-cumin flavor. If you have a preferred homemade taco seasoning, use that in its place; the exact salt and heat level will depend on your blend.
- Black beans — Drain them well so extra liquid doesn’t loosen the filling. Pinto beans work as a close swap and give the cups a similarly soft, creamy bite.
- Scoop-shaped tortilla chips — Their bowl shape is what makes these individual cups possible. Choose sturdy chips that can stand upright; flat tortilla chips won’t hold the filling in the same way.
- Mexican cheese blend — The shredded blend melts over the filling and helps hold it in place. Cheddar-jack is a useful substitute, with a slightly sharper taste; freshly shredded cheese is fine, though pre-shredded cheese is convenient here.
- Pico de gallo and sour cream — Pico brings fresh acidity, while sour cream cools the savory filling. Drain pico if it’s especially juicy, and plain Greek yogurt can replace sour cream for a tangier, thicker topping.
- Pickled jalapeños and green onion — Pickled jalapeños add sharp, vinegary heat; fresh jalapeño is a crisper, less tangy alternative. Thinly sliced chives can replace green onion for a milder finish.
How to Keep Each Chip Standing Through the Melt
Cook the beef until the pan is clear of pink
Set a 10-inch skillet over medium-high heat and cook the ground beef for 6–8 minutes, breaking it into small pieces as it browns. It should reach 160°F with no pink remaining. Drain off excess fat before seasoning; leaving a greasy layer can make the filling slide around inside the chips.
Simmer the seasoning into a thick filling
Stir the taco seasoning and water into the beef, then simmer for 2 minutes, stirring, until the mixture thickens. Add the drained black beans and heat them through. The filling should cling to a spoon rather than run like a sauce, which helps it stay inside the scoop chips.
Stand the chips up and melt the cheese
Heat the oven to 350°F and arrange the chips upright on a 13×18-inch rimmed baking sheet. Divide the filling among the chips, using about 1 tablespoon per chip, then sprinkle the cheese evenly over the tops. Bake for 5–7 minutes, just until the cheese is melted; the chips should still hold their shape when you lift them.
Rest briefly, then add the cool toppings
Let the baked cups rest for 2 minutes before dividing the sour cream, pico de gallo, chopped pickled jalapeños, and green onion among them. Keep the toppings on top rather than burying the cups, so each bite gets a little cool freshness against the warm filling. Serve them right away while the chips are crisp and the cheese is soft.
Three Smart Swaps for New Year’s Eve Nacho Cups
Make a meatless black bean filling
For a vegetarian version, skip the beef and use 1 cup drained black beans total. Warm them with the taco seasoning and water, mashing a few beans against the skillet to thicken the mixture; the filling will be softer and more bean-forward than the beef version.
Turn up the peppery heat
Use pepper jack in place of the Mexican cheese blend for a warmer, sharper melt. It pairs naturally with the pickled jalapeños, so keep those on top for extra heat or leave them off for a milder finish.
Make the cups gluten-free
Choose gluten-free, scoop-shaped corn tortilla chips and keep the filling and toppings the same. The cup shape still does the work, so you’ll get the same crisp, self-contained bite.
Storage and Reheating
- Refrigerator: Store cooked filling, toppings, and chips separately. The filling keeps for 3–4 days; assembled cups lose their crunch as they sit.
- Freezer: Freeze the cooked filling in an airtight container for up to 2 months. Thaw it in the refrigerator before reheating, and use fresh chips and toppings.
- Reheating: Warm the filling gently in a skillet or microwave until steaming hot, then build the cups on fresh chips. Don’t reheat fully assembled cups; the chips turn soft before the toppings warm well.
Questions About Keeping Nacho Cups Crisp and Easy to Serve
New Year's Eve Loaded Nacho Cups
Ingredients
Equipment
Method
- Cook the ground beef in a 10-inch skillet over medium-high heat for 6–8 minutes, breaking it up, until no pink remains and it reaches 160°F.
- Drain excess fat.
- Stir in the taco seasoning and water, and simmer for 2 minutes, stirring, until thickened.
- Stir in the black beans and heat through.
- Heat the oven to 350°F.
- Arrange the tortilla chips upright on a 13x18-inch rimmed baking sheet.
- Divide the filling among the chips, using about 1 tablespoon per chip.
- Sprinkle evenly with the cheese and bake for 5–7 minutes, until the cheese is melted.
- Let the cups rest for 2 minutes.
- Divide the sour cream, pico de gallo, jalapeños, and green onion among them and serve.