
Mom’s Christmas Jello Balls
The first ball I rolled held its shape, but the mixture still felt soft enough to leave a little pink on my fingers. After chilling, it turned into a tender,…

By Ava
•
•
Reading time: 8 min
Tip: save now, make later.
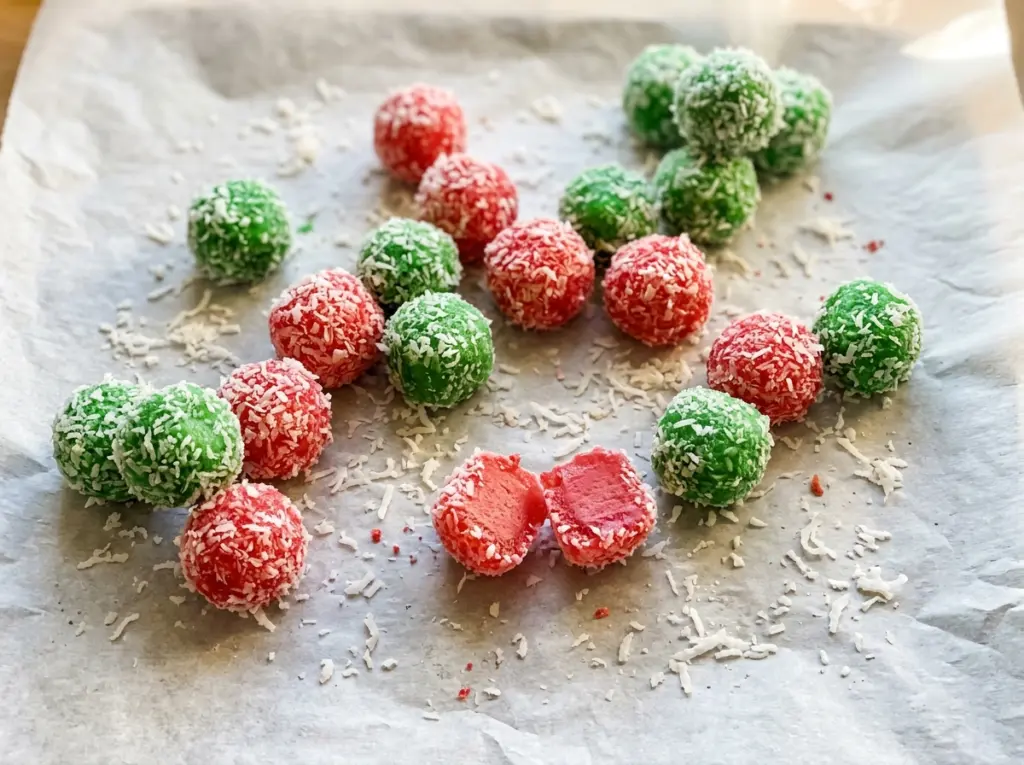
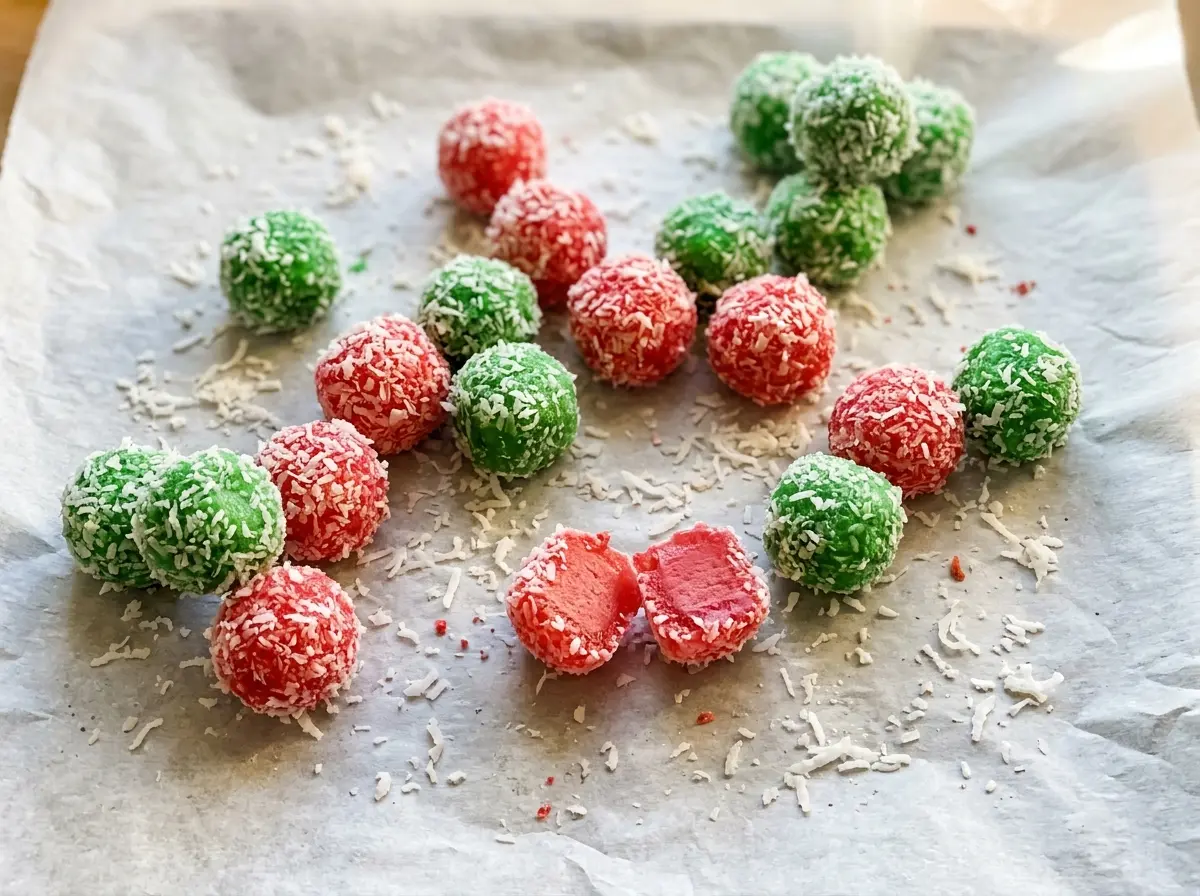
The first ball I rolled held its shape, but the mixture still felt soft enough to leave a little pink on my fingers. After chilling, it turned into a tender, sweet bite with a bright cherry center and a coconut finish. Mom’s Christmas Jello Balls are a no-bake treat that makes 48 pieces, and the cheerful color comes straight from the cherry gelatin mix.
I like that the texture comes from familiar pantry ingredients rather than a cooked candy base. Vanilla wafer crumbs give the centers their soft, fine crumb, while sweetened condensed milk brings everything together. There’s no stove to watch and no special equipment needed to shape them.
They’re at their best cold, when the outside stays lightly chewy and the center feels soft but holds together. Set a plate out for dessert, or tuck the balls into an airtight container for a make-ahead treat that’s ready when you are.
Kitchen Note
Stir the dry cherry gelatin into the condensed milk until the color looks even before adding the crumbs. Once the crumbs are mixed in, it’s much harder to spot a pale streak or a pocket of dry powder.
Save Mom’s Christmas Jello Balls for a cheerful cherry-and-coconut bite that needs no baking and makes 48 treats.
Why the Cherry Gelatin Has to Stay Dry
Cherry gelatin mix goes into this bowl as a dry powder, not as prepared gelatin. That distinction matters because the mixture needs to stay thick enough to scoop and roll. Adding liquid would loosen the condensed milk and crumbs, leaving you with a mixture that’s harder to shape into tidy balls.
The dry mix also spreads the cherry flavor and color through the batch without needing a separate syrup or extra liquid. Stirring it into the condensed milk first gives it a smooth base to disperse through; the crumbs and coconut then turn that base into a soft, moldable mixture. Use the full 3-ounce package of cherry gelatin mix, and keep it dry until it meets the condensed milk. If you’re used to making gelatin desserts, it’s easy to reach for water out of habit here, but that would take the mixture in the wrong direction.
Think of these as chilled, crumb-based sweets rather than set gelatin. The mixture firms in the refrigerator, while the finely crushed wafers help give each bite its shape and tender center.
What the Condensed Milk and Wafer Crumbs Are Doing in Every Bite

- Sweetened condensed milk — This thick, sweet milk binds the dry ingredients into a mixture you can roll. It isn’t interchangeable with a thinner milk; that would change both the sweetness and the consistency. Choose a 14-ounce can, and use the full amount for the intended balance.
- Cherry gelatin mix — The dry mix gives the centers their cherry taste and pink color. A standard 3-ounce package keeps the flavor present without adding liquid. Keep the powder dry until mixing; prepared gelatin won’t give you the same rollable texture.
- Vanilla wafer crumbs — Finely crushed crumbs make the center tender and help absorb the condensed milk. A finely crushed texture matters more than choosing a pricey brand: large pieces can make the mixture harder to shape evenly. If you crush the wafers yourself, aim for small, even crumbs rather than chunky bits.
- Sweetened shredded coconut — Coconut goes both into the mixture and around the outside, giving the balls their familiar sweet, chewy finish. Use shredded coconut rather than large flakes so it blends and coats neatly. Unsweetened coconut would make the result less sweet and change the texture, so I stick with sweetened for this version.
From Glossy Pink Mixture to 48 Chilled Coconut-Coated Balls
Mix the Cherry Base Before Adding the Crumbs
In a large bowl, stir together the sweetened condensed milk and dry cherry gelatin mix. Once the color is even, mix in the finely crushed vanilla wafer crumbs and the cup of shredded coconut. Keep stirring until the dry ingredients are evenly distributed and the mixture looks consistent throughout, rather than streaky or patchy.
Give the Mixture an Hour to Firm Up
Cover the bowl and refrigerate the mixture for 1 hour. When it’s ready, it should feel firm enough to scoop and roll instead of slumping as soon as you portion it. If it still feels too soft to handle, give it more time in the refrigerator before shaping; the point is a mixture that holds together in your hands.
Shape Rounded Tablespoon Portions
Scoop the mixture into rounded tablespoon portions, then roll each portion between your hands to make a ball. Keep the portions close in size so the batch looks uniform and each piece is easy to serve. If a scoop breaks apart, press the portion together gently before rolling rather than squeezing it hard.
Coat and Chill Before Serving
Roll each ball in the remaining shredded coconut until the outside is coated. Arrange the finished balls in a single layer in an airtight container so they don’t press into one another. Refrigerate for at least 1 hour before serving; that final chill helps the shaped treats stay neat on a plate.
Two Simple Ways to Change the Shape or Finish
Give the outside a wafer-crumb finish
For a less coconut-forward exterior, set aside some of the measured vanilla wafer crumbs and roll some of the balls in those instead of the coconut reserved for coating. Keep the crumbs fine so they cling evenly. The result is a softer, more wafer-like finish, while the coconut mixed into the centers remains part of the batch.
Make smaller party bites
Scoop portions smaller than a rounded tablespoon and roll them into petite bites. You’ll get more pieces than the 48-ball batch, and each one will be a little easier to pick up from a dessert plate. Keep an eye on the size as you work so the bites are similar enough to coat evenly.
Storage and Serving
- Refrigerator: Keep the balls in a single layer in an airtight container for up to 4 days. The coconut coating may soften a little as they sit.
- Freezer: Freeze the balls in a single layer until firm, then transfer them to an airtight container for up to 1 month. Thaw them in the refrigerator; the coating may be softer after thawing.
- Serving: Serve them chilled straight from the refrigerator. These are soft, no-bake treats, so reheating isn’t needed.
Questions That Come Up While Making These Cherry Jello Balls
Mom's Christmas Jello Balls
Ingredients
Method
- Stir together the sweetened condensed milk and dry cherry gelatin mix in a large bowl.
- Mix in the vanilla wafer crumbs and 1 cup coconut until evenly combined.
- Cover and refrigerate the mixture for 1 hour, until firm enough to roll.
- Scoop the mixture into rounded tablespoon portions.
- Roll each portion between your hands into a ball.
- Coat each ball in the remaining coconut.
- Arrange the balls in a single layer in an airtight container and refrigerate for at least 1 hour before serving.