
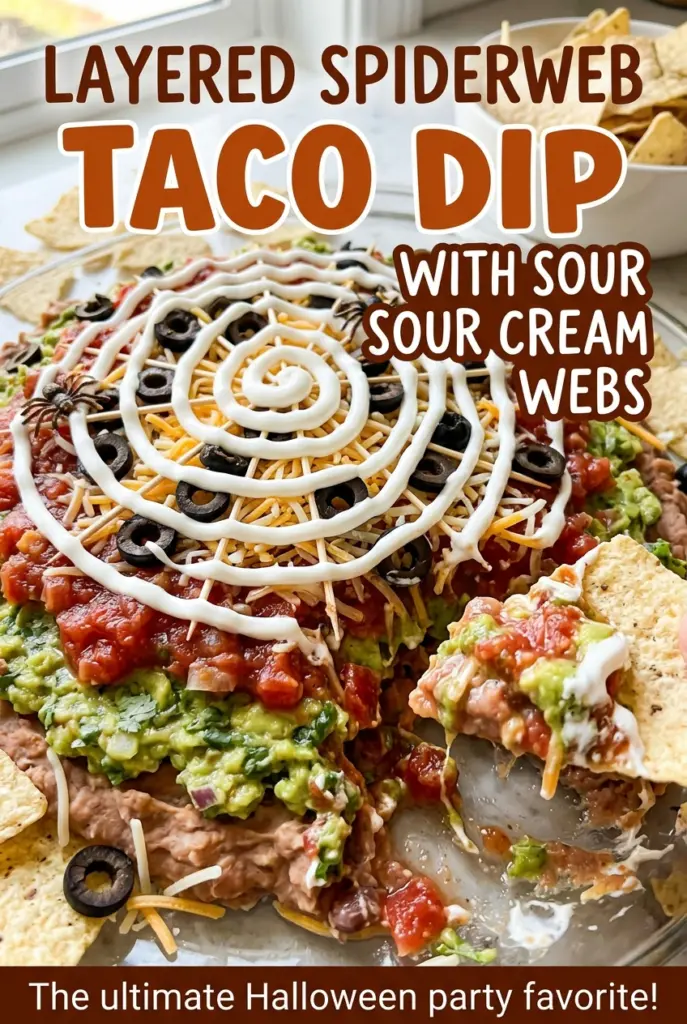
Layered Spiderweb Taco Dip with Sour Cream Webs
The first scoop is where a layered dip can go sideways: one wet layer and the beans, avocado, and creamy topping start sliding together. I drain the salsa before it…

By Ava
•
•
Reading time: 9 min
Tip: save now, make later.
The first scoop is where a layered dip can go sideways: one wet layer and the beans, avocado, and creamy topping start sliding together. I drain the salsa before it goes anywhere near the dish, which keeps each layer distinct and makes this spiderweb taco dip easy to scoop. The sour cream web gives the top a playful finish without changing the familiar taco-dip flavors underneath.
The creamy layer is more than a topping. Beating softened cream cheese with sour cream and taco seasoning makes a smooth layer that spreads easily over the beans and gives the avocado a steady surface to sit on. I mash the avocado with lime juice and salt until it still has a few small chunks, then let the layers show through instead of fussing over a perfectly smooth finish. The cheddar, olives, and scallions add color and a little salty crunch around the edge, while the white web stays front and center.
Kitchen Note
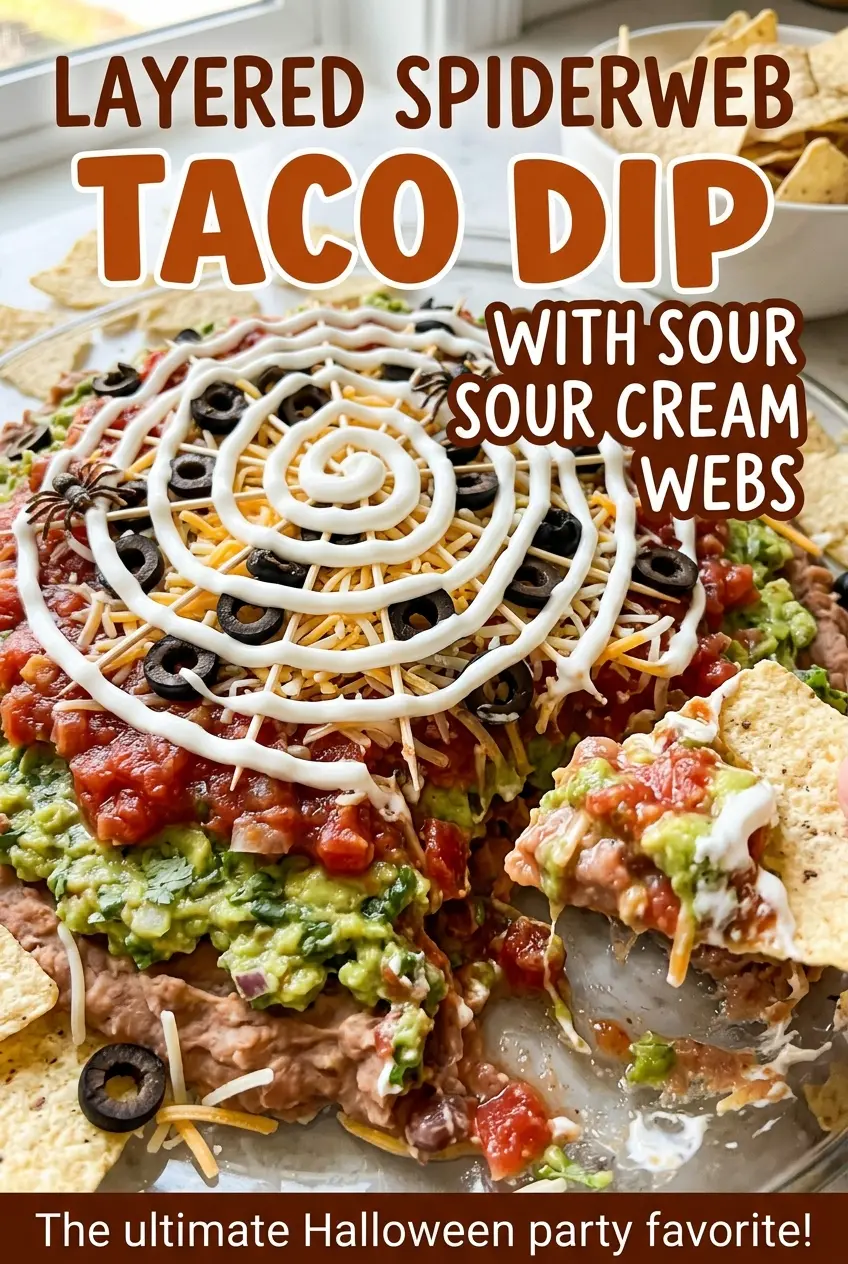
For clean web lines, snip just the very corner off the sour cream bag; you can always make the opening larger, but you can’t make it smaller. Draw each toothpick line from the center outward, wiping the tip between strokes if sour cream starts to drag.
Save this layered spiderweb taco dip for a party spread with creamy layers, bright toppings, and a sour cream web you can pipe right before serving.
Why the Salsa Has to Lose Its Extra Liquid Before It Hits the Avocado
Chunky salsa brings tomato pieces and a sharp, fresh contrast to the creamy layers, but its liquid is the one thing that can undermine the whole dish. If it goes on straight from the jar, that extra moisture can run down into the avocado and cream cheese, leaving the dip loose and the layers harder to distinguish. A fine-mesh strainer lets the liquid drain away while keeping the pieces that make the salsa layer substantial.
That small bit of prep also helps when you scoop from the edge toward the center: the cheddar stays on top, the avocado doesn’t turn into a slippery middle, and the beans remain a firm base. Don’t press or mash the salsa in the strainer; the goal is to let excess liquid escape, not crush the tomatoes into a thin sauce. The dip will still taste fresh and tangy, just with less loose liquid collecting in the serving dish.
There’s a visual payoff, too. The layers look especially clear through the sides of a glass serving dish, and the top remains neat enough for the sour cream design to stand out. Keep the salsa chunky and drained, and you get a dip that holds its shape without making the topping dry or stiff.
What Each Layer Needs from Its Main Ingredient

- Refried beans — They make a sturdy base that holds the softer layers above it. A smooth, spreadable canned version is convenient here; warm or cold, it should be easy to spread without tearing up the bottom of the serving dish.
- Cream cheese — Softening it first matters more than choosing a premium brand. Cold cream cheese tends to leave little lumps, while softened cream cheese beats smoothly with the sour cream and taco seasoning.
- Sour cream — It loosens the cream cheese into a spreadable layer and supplies the white web. Keep the portion for piping separate and chilled in its bag so it stays ready for decorating.
- Taco seasoning — This distributes the familiar taco flavor through the creamy layer rather than leaving seasoning concentrated in one spot. For a gluten-free version, replace it with gluten-free taco seasoning in the same amount.
- Avocados — Choose ripe fruit that gives slightly when pressed, not fruit that feels mushy. A few small chunks are welcome; turning the avocado completely smooth can make this layer feel more like a puree than a fresh mash.
- Chunky salsa — The tomato pieces give the dip its bright middle layer. If you prefer a different heat level, choose a chunky salsa you like, but keep the texture and drain it before layering.
- Sharp cheddar, olives, and scallions — Sharp cheddar gives the top a more pronounced cheese flavor than a mild cheese would, while the olives bring a salty bite and the scallions a fresh onion note. Pre-shredded cheddar is convenient; freshly sliced scallions and olives give you more control over the size of the pieces around the rim.
Build the Layers First, Then Draw the Sour Cream Web
Set down an even bean base
Spread the refried beans across the bottom of a 9×13-inch serving dish, reaching into the corners and smoothing the surface. An even base gives the creamy layer something level to sit on, so don’t leave a thick mound in the middle. If the beans catch on your spatula, use gentle strokes rather than pressing hard and pulling up the layer. Aim for a flat surface that reaches the edges.
Mix the creamy layer and mash the avocado
Beat the softened cream cheese with 1 cup of sour cream and the taco seasoning until the mixture looks smooth, then spread it over the beans. Spoon the remaining 1/2 cup sour cream into a small zip-top bag and refrigerate it for the web. In a separate bowl, mash the peeled, pitted avocados with the lime juice and kosher salt until mostly smooth with a few small chunks. Spread that mixture gently over the cream cheese layer so the layers stay separate.
Drain and add the salsa and toppings
Set the chunky salsa in a fine-mesh strainer for 10 minutes before spooning it over the avocado. Spread it evenly without digging into the layer below. Sprinkle the shredded sharp cheddar over the salsa, then arrange the sliced black olives and thinly sliced scallions around the outer edge. Keeping the olives and scallions toward the rim leaves a clear center for the web.
Chill the dip, then make the web
Refrigerate the assembled dip for at least 30 minutes before decorating. Snip a small corner from the bag of reserved sour cream and pipe 4 concentric circles over the center. Drag a toothpick from the center out through the circles at 1-inch intervals; each stroke pulls the circles into a web pattern. If the lines start to blur, pause rather than repeatedly tracing them.
Easy Ways to Adjust the Toppings and Seasoning
Make the dip gluten-free
Use gluten-free taco seasoning in place of the regular seasoning, keeping the same amount. The creamy layer keeps its texture and taco flavor; the substitution is the useful change for a gluten-free table.
Turn up the salsa’s heat
Choose a hotter chunky salsa for a spicier middle layer without changing the creamy base or the sour cream web. The salsa’s heat comes through in each bite, so pick a level you enjoy and drain it before using it.
Leave off the black olives
For a milder top, skip the olives and arrange the scallions around the outer edge on their own. You lose the olives’ salty bite, but the green scallions still frame the web and keep the top colorful.
Storage and Serving
- Refrigerator: Cover leftovers and refrigerate them for up to 3 days. The avocado layer may darken and soften, and the sour cream web can lose some definition.
- Freezer: Freezing isn’t a good fit; the sour cream and avocado layers can separate and turn watery when thawed.
- Serving: Serve chilled, and return the dish to the refrigerator within 2 hours rather than leaving it out on the table.
Questions That Come Up When Making Spiderweb Taco Dip
Layered Spiderweb Taco Dip with Sour Cream Webs
Ingredients
Equipment
Method
- Spread the refried beans evenly in the bottom of a 9x13-inch serving dish.
- Beat the cream cheese, 1 cup of the sour cream, and taco seasoning in a medium bowl until smooth.
- Spoon the remaining 1/2 cup sour cream into a small zip-top bag and refrigerate it.
- Mash the avocados with the lime juice and salt until mostly smooth with a few small chunks.
- Drain the salsa in a fine-mesh strainer for 10 minutes.
- Spread the cream cheese mixture evenly over the beans.
- Spread the avocado mixture over the cream cheese mixture.
- Spoon the drained salsa evenly over the avocado layer.
- Sprinkle the cheddar over the salsa.
- Arrange the olives and scallions around the outer edge.
- Refrigerate the dip for at least 30 minutes.
- Snip a small corner from the sour cream bag.
- Pipe 4 concentric circles over the center of the dip.
- Draw a toothpick from the center of the circles outward at 1-inch intervals to form the web.