
Hot Cocoa Brownie Bites
The chocolate and butter turn glossy together, then the whole bowl smells like a mug of cocoa before the batter even reaches the oven. These Hot Cocoa Brownie Bites bake…

By Ava
•
•
Reading time: 9 min
Tip: save now, make later.
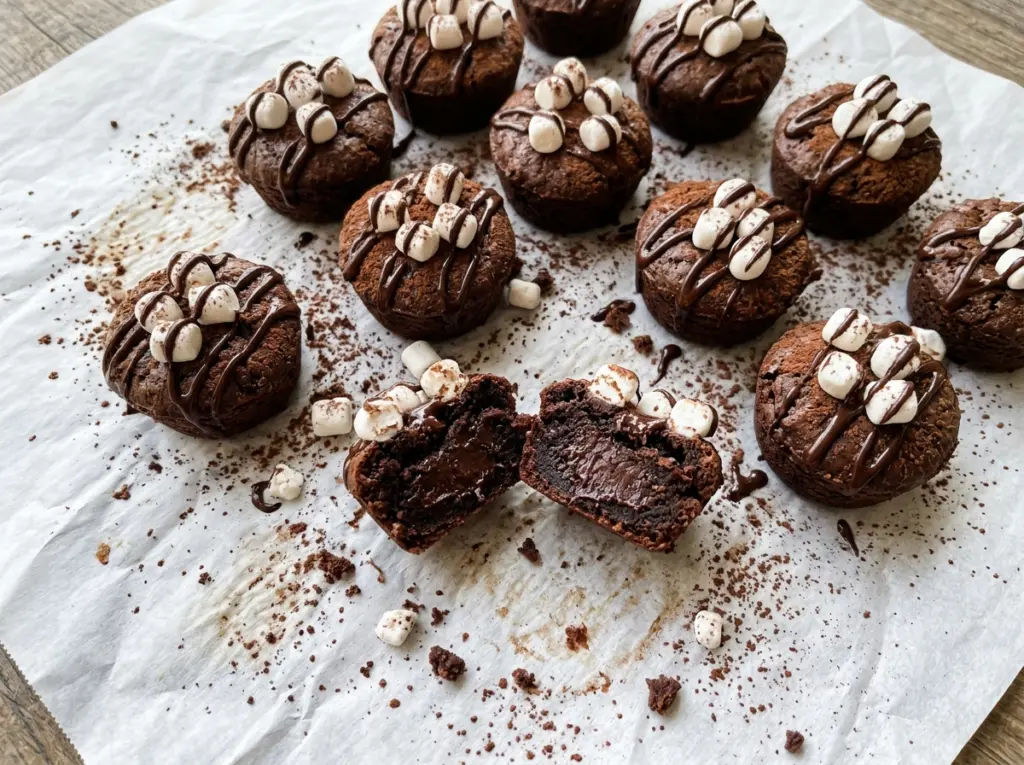
The chocolate and butter turn glossy together, then the whole bowl smells like a mug of cocoa before the batter even reaches the oven. These Hot Cocoa Brownie Bites bake in a mini muffin pan, so each one has a tender center and its own little edge. A few mini marshmallows on top turn them into a small, toasty version of hot chocolate.
I like this format because you don’t have to cut a pan of brownies or guess at serving sizes. The cocoa mix goes straight into the batter with the flour, and the melted semisweet chocolate keeps the bites rich. Let the chocolate mixture cool for five minutes before adding the eggs; it should still be fluid, not hot. The finished bites come out soft, with toasted marshmallows perched right on top.
Kitchen Note
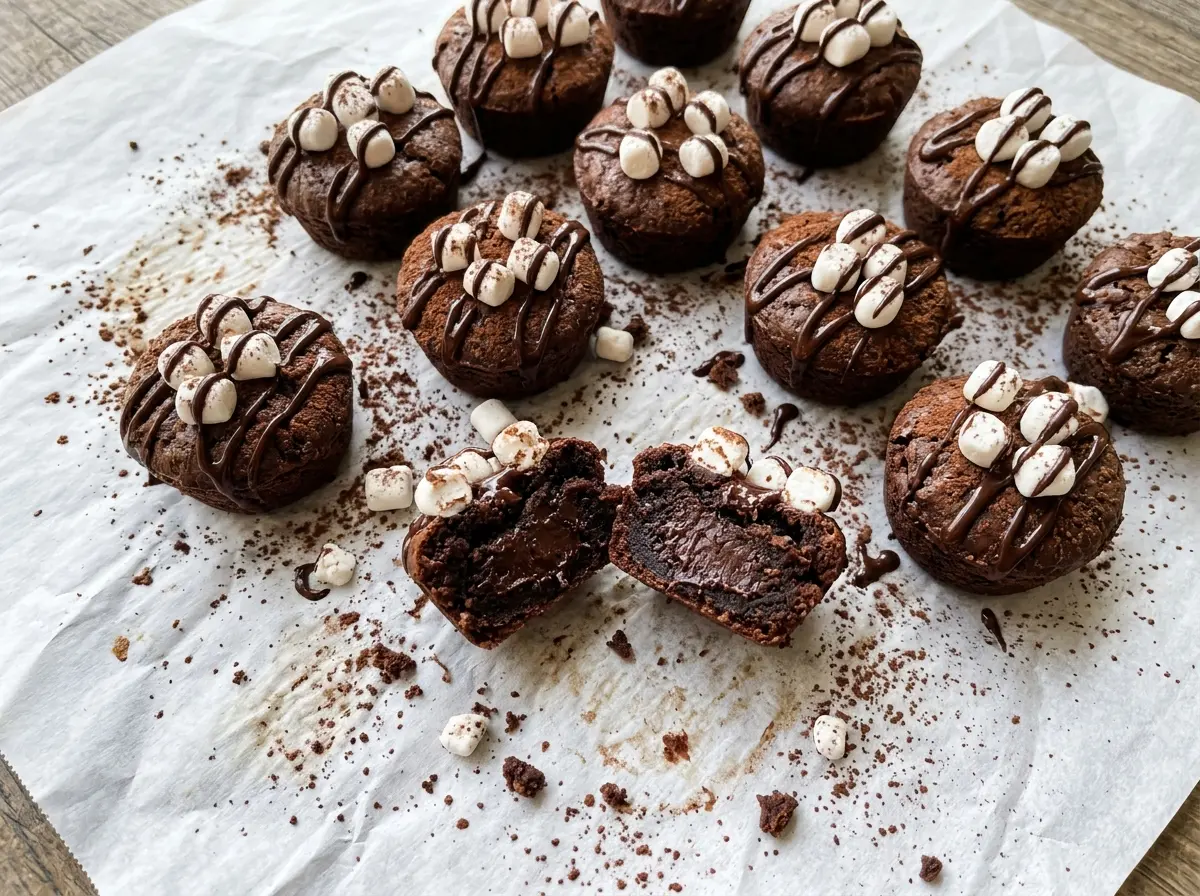
The marshmallows toast quickly once they’re under the broiler. I stay right by the oven and pull the pan as soon as they’re golden; even a short pause can take them from toasted to scorched.
Save these Hot Cocoa Brownie Bites for a batch of fudgy, cocoa-sweet minis topped with toasted marshmallows.
Why a Mini Muffin Well Gives You a Different Brownie Edge
A pan of brownies has a few corner pieces and plenty of soft middle slices. These bites change that balance: every portion bakes in its own little well, so you get a narrow edge around a small center instead of one large slab to portion later. That’s a useful difference when you want neat, individual servings with marshmallow on every one.
The small wells also mean the batter needs room to rise and set without spilling over. Filling each cup about two-thirds full leaves that space while keeping the baked bites tall enough to hold their topping. Don’t treat the mini pan like a shortcut for making full-size muffins; the shape and bake time are built around the smaller portions. The best texture comes from letting each bite stay compact and soft, rather than baking a larger portion until its outside is dry.
What the Cocoa Mix Adds That Plain Cocoa Doesn’t

- Sweetened hot cocoa mix — This brings cocoa flavor and sweetness in one ingredient, so it behaves differently from unsweetened cocoa powder. Use a mix you enjoy drinking; there’s no need to buy a premium brand for the batter. A plain cocoa powder swap isn’t a straight replacement because it lacks the mix’s sweetener.
- Semisweet chocolate and butter — Together they create the glossy, rich base that gives these bites their brownie texture. Chopped baking chocolate melts smoothly, but semisweet chocolate chips also work if you measure them by weight. If you use salted butter instead of unsalted, leave out the added salt.
- Eggs, sugar, and vanilla — The eggs help bind the batter, while sugar adds sweetness and supports a soft center. Standard granulated sugar works well here; no special variety is needed. Use vanilla extract you like, since its flavor is easy to notice in a small bite.
- All-purpose flour — Flour gives the batter enough structure to hold its shape in the mini cups. Spoon it into the measuring cup and level it rather than packing it down, which can make the bites heavier. A one-to-one gluten-free baking blend is a workable swap; the finished texture may be a little more delicate.
- Mini marshmallows — Their small size lets you put three or four on each bite and toast them without covering the whole top. Choose fresh, soft marshmallows so they brown evenly. Regular large marshmallows are awkward on these small portions, so stick with minis for the topping.
From Glossy Chocolate Batter to Toasted Tops
Melt the Chocolate Without Overheating It
Heat the oven to 350°F and line a 24-cup mini muffin pan with paper liners, lightly greasing the liners. Melt the butter and chopped chocolate together in a microwave-safe bowl in 30-second bursts, stirring between each burst. When the mixture looks smooth, let it cool for five minutes. If a few small pieces remain, stirring helps them melt in without leaving the bowl in the microwave too long.
Whisk the Batter Until It’s Just Combined
Whisk the sugar into the cooled chocolate mixture, then whisk in the eggs one at a time and stir in the vanilla. Fold in the hot cocoa mix, flour, and salt only until no dry streaks remain. The batter should look thick and even, not worked until it turns elastic. Overmixing after the flour goes in can make the bites less tender.
Fill the Mini Cups and Bake to Moist Crumbs
Divide the batter evenly among the prepared cups, filling each about two-thirds full. Bake for 12–15 minutes, until the tops are set and a toothpick comes out with a few moist crumbs. A completely clean toothpick can mean the centers have gone farther than you want for a soft brownie bite. If your oven runs hot, start checking at the early end of the bake time.
Add the Marshmallows and Toast
Cool the bites in the pan for five minutes, then set three or four mini marshmallows on each one. Place an oven rack about six inches below the broiler and turn the broiler to high. Broil for 30–60 seconds, watching closely, until the marshmallows are toasted. Cool the bites in the pan for 10 minutes before lifting them out so the warm brownie bases have time to firm up.
Easy Changes for a Different Batch
Use bittersweet chocolate for a darker bite
Replace the semisweet chocolate with the same weight of bittersweet chocolate. The cocoa mix and sugar still bring sweetness, while the chocolate tastes more intense and less candy-sweet.
Make a gluten-free batch
Swap the all-purpose flour for an equal amount of a one-to-one gluten-free baking blend. The bites may be a little more fragile, so let them cool fully in the pan before lifting them out.
Use salted butter instead
Use salted butter in place of the unsalted butter and leave out the added salt. The chocolate flavor will still come through, with a slightly more seasoned finish.
Storage and Reheating
- Refrigerator: Store the cooled bites in an airtight container for up to 4 days. The brownie centers will firm up, and the marshmallows may become a little tacky.
- Freezer: Freeze the bites without marshmallows in an airtight container for up to 2 months. Thaw them in the refrigerator, then add the marshmallows and toast them under the broiler before serving.
- Reheating: Warm an un-topped bite in the microwave for 8–10 seconds, then add marshmallows and toast under the broiler. Don’t microwave a topped bite; the marshmallows can melt before the brownie warms evenly.
Questions That Come Up With These Brownie Bites
Hot Cocoa Brownie Bites
Ingredients
Equipment
Method
- Heat the oven to 350°F.
- Line a 24-cup mini muffin pan with paper liners and lightly grease the liners.
- Melt the butter and chocolate together in a microwave-safe bowl in 30-second bursts, stirring between bursts.
- Let the chocolate mixture cool for 5 minutes.
- Whisk the sugar into the chocolate mixture.
- Whisk in the eggs one at a time.
- Stir in the vanilla.
- Fold in the hot cocoa mix, flour, and salt just until no dry streaks remain.
- Divide the batter evenly among the prepared cups, filling each about two-thirds full.
- Bake for 12–15 minutes, until the tops are set and a toothpick comes out with a few moist crumbs.
- Cool the bites in the pan for 5 minutes.
- Place 3 or 4 mini marshmallows on each bite.
- Set an oven rack about 6 inches below the broiler.
- Turn the broiler to high.
- Broil the bites for 30–60 seconds, watching closely, until the marshmallows are toasted.
- Cool the bites in the pan for 10 minutes.
- Lift the bites out.