
Cranberry Pear Galette
The dough always looks a little too small once the fruit is piled in the middle, then those wide edges fold up into the relaxed, pleated rim that makes a…

By Ava
•
•
Reading time: 10 min
Tip: save now, make later.
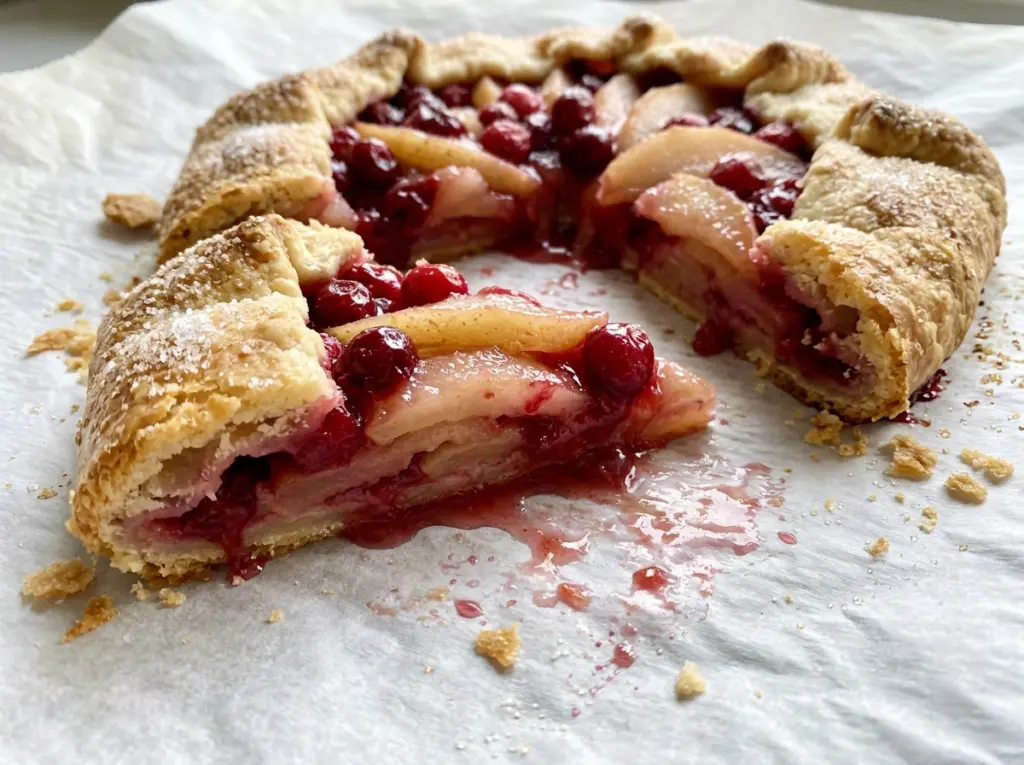
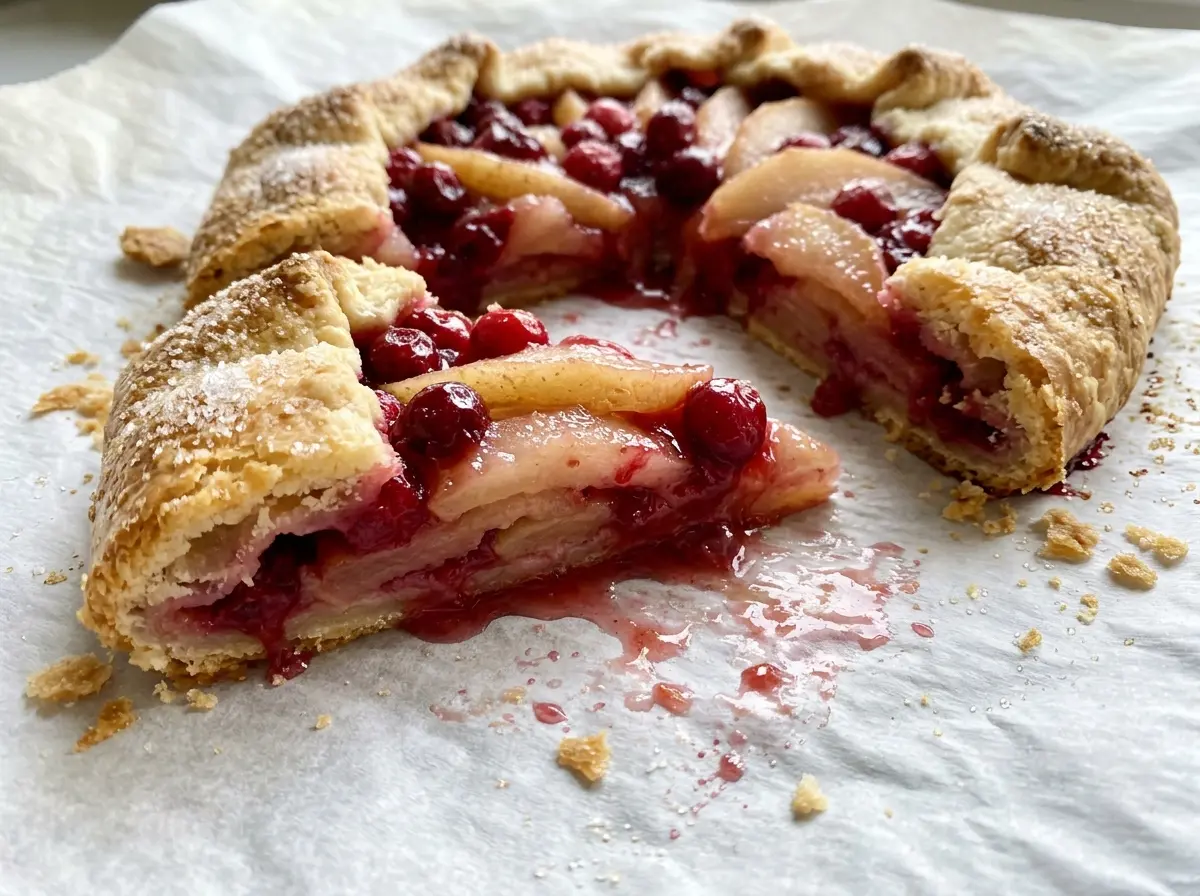
The dough always looks a little too small once the fruit is piled in the middle, then those wide edges fold up into the relaxed, pleated rim that makes a galette feel less fussy than pie. Cranberry Pear Galette has a buttery crust around tender pear slices and bright cranberries, with just enough cinnamon to warm the filling without taking over.
I like this dessert because the fruit gets to stay visible while it bakes, and the crust doesn’t need to be perfectly round or evenly crimped. Cold butter and a proper rest give the pastry enough structure to roll and fold without turning tough. The finished galette is lovely served after it has cooled, when the juices have settled and each slice holds its shape.
Kitchen Note
Use a rimmed baking sheet, not a flat cookie sheet. If any cranberry juices slip past the folded edge, the rim keeps them contained on the parchment.
Save this Cranberry Pear Galette for its flaky folded crust and tart cranberry filling tucked around sweet pears.
Why the Open Center Needs Room Around It
A galette isn’t a pie with a missing top crust. The open center lets the fruit bake directly, while the folded pastry edge acts as a low wall around the filling. That balance matters here: pears and cranberries release juice as they soften, and crowding the fruit right to the edge leaves less dough available to hold it in.
Leave the full border of dough clear before folding. The pleats don’t need to match; they just need to overlap enough to keep the filling in the middle. This gives the crust room to brown while the fruit cooks, and it keeps the galette looking rustic rather than strained or overstuffed. A little unevenness is part of the charm, but a crowded edge can make the pastry harder to fold and more likely to let juices escape.
There’s also a useful visual check during baking: a browned crust by itself isn’t the whole story. The filling should be bubbling, and the pear slices should be tender too. Those cues tell you the fruit has cooked through and the filling has had the heat it needs to thicken.
What the Pears, Cranberries, and Pastry Each Bring

- Firm-ripe pears — They soften in the oven but still hold their shape, so the center doesn’t become a soft puree. Choose pears that give slightly when pressed, rather than fruit that already feels very soft. Peel, core, and slice them evenly so they cook at a similar pace.
- Fresh or frozen cranberries — Their tartness keeps the sweet pear filling lively, and the recipe works with either form. Fresh berries tend to hold their shape a little more; frozen ones soften into the filling as they bake. There’s no need to seek out an expensive brand.
- Cold unsalted butter — Butter creates the pastry’s rich flavor and flaky texture. Keep it cold until it goes into the flour; softened butter blends in too thoroughly to leave the small pieces that help make the crust tender. A standard grocery-store unsalted butter works well.
- All-purpose flour — It gives the dough enough structure to roll into a broad round and fold around the fruit. Regular all-purpose flour is the right choice here; specialty flour doesn’t add anything the pastry needs. Whisk it with the sugar and salt before adding the butter.
- Cornstarch and lemon juice — Cornstarch helps the fruit juices thicken as the filling bakes, while lemon juice adds a bright edge to the sweet pears. Coat the fruit evenly so the starch isn’t left in a dry pocket. I wouldn’t leave the cornstarch out; the open filling needs that thickening help.
- Cinnamon — A little ground cinnamon rounds out the fruit without burying the cranberry’s sharper taste. Use a fresh-smelling jar; old cinnamon can taste flat, though there’s no need for a specialty brand.
- Egg wash and coarse sugar — The beaten egg and water help the exposed pastry brown, and coarse sugar adds a crisp, sparkling finish. If coarse sugar isn’t in your pantry, granulated sugar can be sprinkled over the wash; it won’t give quite the same crunchy finish.
Making a Folded Crust That Bakes Through
Bring the pastry together without working it smooth
Whisk the flour, granulated sugar, and kosher salt in a medium bowl, then cut in the cold butter with a pastry cutter or your fingertips. Stop when you see pea-size pieces; the mixture shouldn’t look like a uniform paste. Sprinkle the ice water over it and toss until a squeeze of the dough holds together. Shape it into a disk without kneading it smooth, which can make the crust tougher.
Give the dough its full chill
Wrap the disk and refrigerate it for at least 1 hour. This rest gives the flour time to absorb the water and firms the butter back up, making the dough easier to roll. While it chills, toss the pear slices and cranberries with the sugar, cornstarch, lemon juice, and cinnamon in a large bowl. Turn the fruit until it’s evenly coated, rather than leaving all the sugar and starch at the bottom.
Roll, fill, and pleat the edge
Heat the oven to 400°F and line a rimmed baking sheet with parchment. On a lightly floured surface, roll the chilled dough into a 13-inch round and transfer it to the sheet. Mound the fruit in the center, keeping a 2-inch border clear, then fold the dough over the edge of the filling and pleat as needed. If the round isn’t perfectly even, don’t stretch it thin to force a tidy shape; the folds can vary.
Brush, bake, and let the juices settle
Beat the egg with the water and brush it over the exposed dough, then sprinkle the crust with coarse sugar. Bake for 40 to 50 minutes, until the crust is golden brown, the filling is bubbling, and the pears are tender. If the pastry is already golden but the fruit isn’t tender, use the fruit cues rather than color alone to judge doneness. Cool the galette on the baking sheet for 20 minutes before serving so the filling can settle.
Simple Ways to Adapt This Cranberry Pear Galette
Use fresh or frozen cranberries
Both work in the filling. Fresh cranberries keep a slightly firmer bite, while frozen cranberries soften more as they bake and blend into the pear juices. Either choice keeps the sweet-tart balance that makes this galette distinctive.
Cut the butter in by hand
If you don’t have a pastry cutter, use your fingertips to rub the cold butter into the flour mixture until pea-size pieces remain. Work briskly so the butter stays cold. This makes the same pastry with a little more hands-on feel and no extra equipment.
Make the finish egg-free
For an egg-free finish, brush the exposed dough with the water from the egg-wash ingredients and sprinkle on the coarse sugar. The crust won’t brown as deeply or look as glossy, but the galette still bakes and the sugar can cling to the damp pastry.
Storage and Reheating
- Refrigerator: Cover leftover galette and refrigerate for up to 3 days. The pastry softens as it sits with the fruit.
- Freezer: Freeze individual slices wrapped tightly for up to 2 months. Thaw them in the refrigerator; the crust may be less crisp than when freshly baked.
- Reheating: Warm slices in a 400°F oven until the filling is hot. Keep an eye on the crust so it doesn’t get too dark; the microwave warms it quickly but leaves the pastry soft.
Questions That Come Up While Baking This Galette
Cranberry Pear Galette
Ingredients
Equipment
Method
- Whisk the flour, granulated sugar, and salt together in a medium bowl.
- Cut in the cold butter with a pastry cutter or your fingertips until the mixture has pea-size pieces.
- Sprinkle the ice water over the flour mixture and toss until the dough holds together when squeezed.
- Shape the dough into a disk, wrap it, and refrigerate for at least 1 hour.
- Toss the pears, cranberries, granulated sugar, cornstarch, lemon juice, and cinnamon in a large bowl until evenly coated.
- Heat the oven to 400°F.
- Line a rimmed baking sheet with parchment paper.
- Roll the chilled dough on a lightly floured surface into a 13-inch round, then transfer it to the prepared baking sheet.
- Mound the filling in the center, leaving a 2-inch border, then fold the dough edge over the filling, pleating as needed.
- Beat the egg with the water in a small bowl, brush it over the exposed dough, and sprinkle the crust with coarse sugar.
- Bake for 40 to 50 minutes, until the crust is golden brown and the filling is bubbling and the pears are tender.
- Cool the galette on the baking sheet for 20 minutes before serving.