
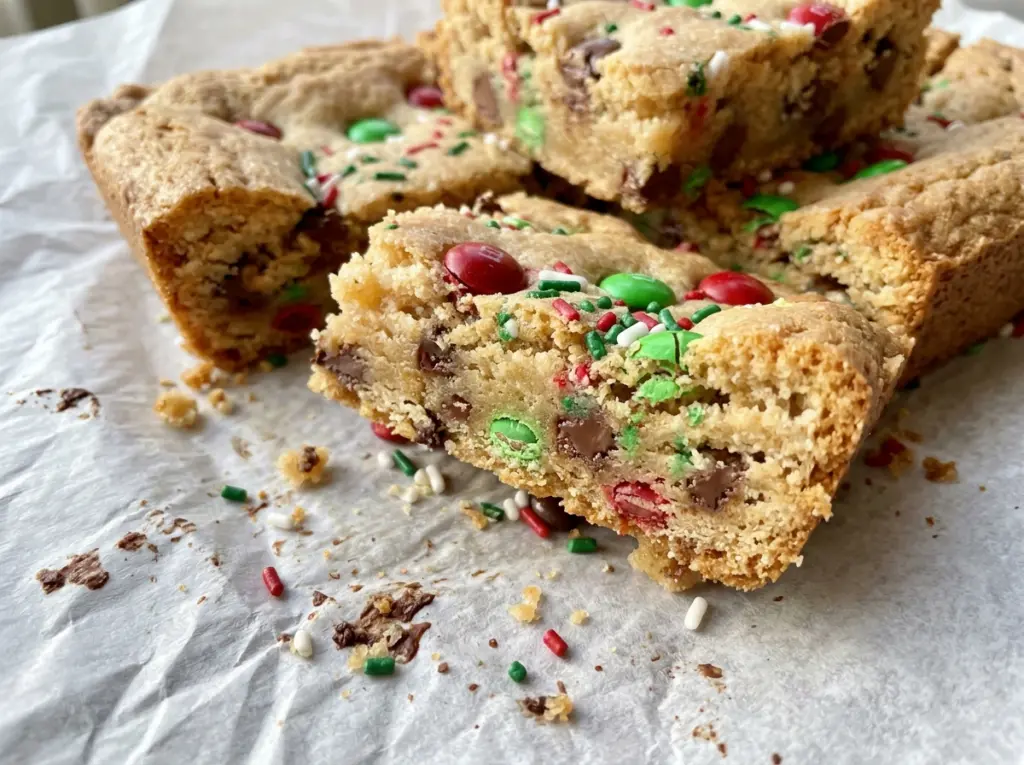
Christmas Cookie Bars
The edges turn golden first, while the middle still looks soft, and that’s the moment that can make a pan of cookie bars feel uncertain. These Christmas cookie bars bake…

By Ava
•
•
Reading time: 9 min
Tip: save now, make later.
The edges turn golden first, while the middle still looks soft, and that’s the moment that can make a pan of cookie bars feel uncertain. These Christmas cookie bars bake as one thick slab, so you don’t have to portion individual cookies or keep track of multiple trays. The red and green candy-coated chocolates bring color to every bite, and white chocolate chips add creamy pockets throughout. One 9×13-inch pan makes 24 servings, which is handy when you want a festive treat that’s easy to cut and share.
I like the contrast between the candies folded into the dough and the few pressed on top. The ones inside give you colorful chocolate in each bite; the ones on the surface make the bars look cheerful before you even slice them. Brown sugar keeps the cookie base tender, while the granulated sugar helps it bake up with golden edges. Let the pan cool completely before cutting, and you’ll have neat bars with soft centers and bright candy on top.
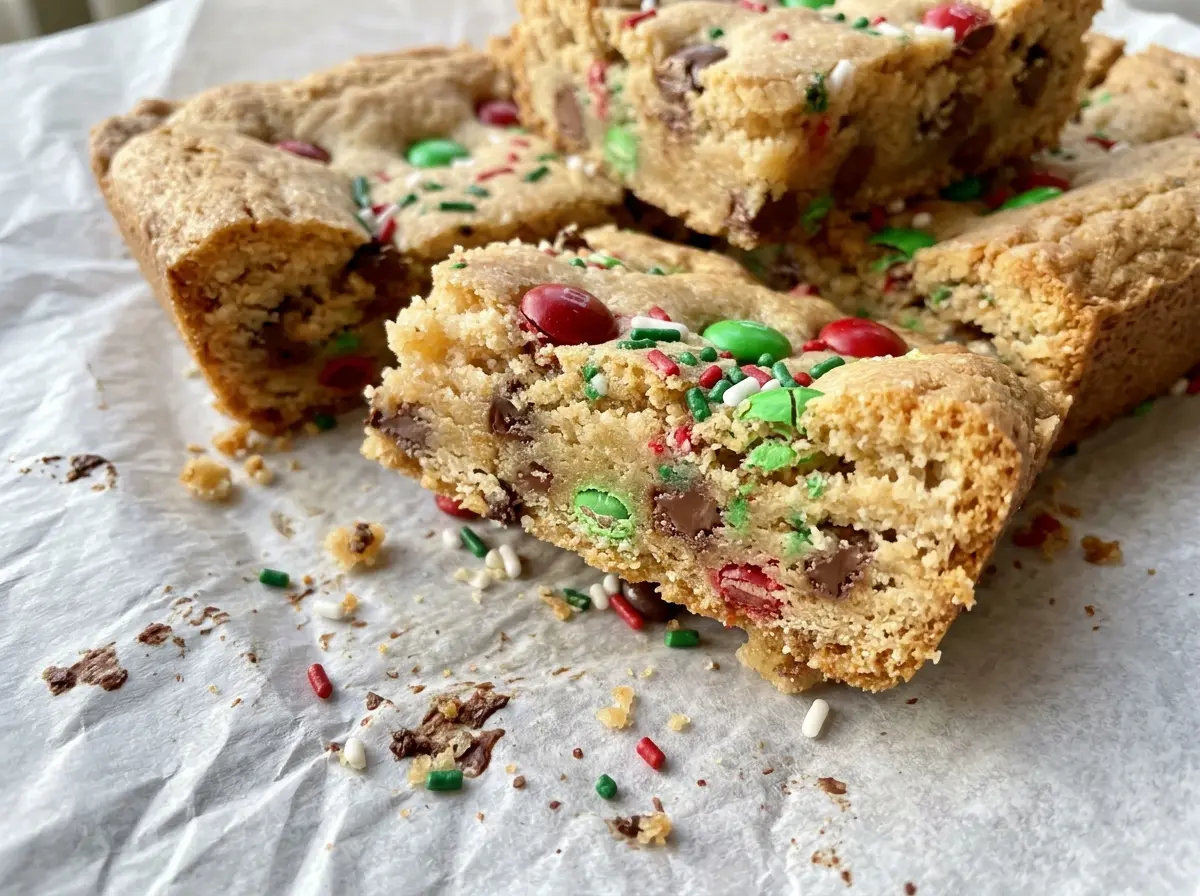
Kitchen Note
Wait until the bars are completely cool before lifting them from the pan. Cutting while the middle is still warm can press the soft crumb instead of giving you clean edges.
Save these Christmas Cookie Bars for a holiday bake — colorful candy-coated chocolates, soft cookie centers, and a simple 9×13-inch pan.
Why the candies on top make each bar look more festive
Folded-in candy gives the cookie base its little bursts of color, but the dough covers most of those pieces as you spread it in the pan. A few extra candies pressed onto the surface stay visible after baking, so the finished slab looks colorful before it’s cut. That small detail matters more in a bar cookie than in individually shaped cookies, where each portion is already exposed on several sides.
There’s also a practical benefit: the top candies give you a visual guide as you portion the cooled slab. You can aim for cuts that leave color across the bars instead of ending up with a few plain-looking pieces and a candy-heavy corner. Keep the extra pieces on the surface rather than mixing them all into the dough. The inside stays evenly dotted, and the top gets the bright finish that makes these feel like Christmas cookies.
What each ingredient contributes to these cookie bars

- All-purpose flour — It gives the bars their structure without making them as delicate as a cake. Don’t replace it with self-rising flour; baking soda and salt are already measured separately. If you need a gluten-free version, a cup-for-cup gluten-free baking blend made for replacing wheat flour is the most practical swap, though the texture may be a little more tender.
- Baking soda — This is the leavener that helps the cookie dough rise and brown. Check that it’s fresh if your bars seem unusually dense; baking soda that has lost its strength won’t give the same lift.
- Unsalted butter — Softened butter creams smoothly with the sugars and gives the bars their familiar buttery cookie texture. Use a brand you like, but don’t melt it; melted butter changes how the dough comes together.
- Light brown and granulated sugars — Brown sugar brings moisture and a gentle molasses note, while granulated sugar balances it and supports golden edges. Dark brown sugar can stand in for light brown if that’s what you have, but expect a deeper molasses flavor.
- Eggs — They bind the dough and help it set into sturdy bars. Use large eggs, and add them one at a time so they blend into the creamed butter and sugar instead of leaving the mixture uneven.
- Vanilla extract — Vanilla rounds out the buttery dough and works with both kinds of chocolate. Pure vanilla is lovely, but a less expensive vanilla extract is fine here because the candy and white chocolate also bring plenty of flavor.
- Red and green candy-coated chocolates — Their firm shells hold their color in the dough, and the chocolate centers give each bite a little crunch followed by a melt. Use fresh candies that still have crisp coatings; crushed or stale pieces won’t give the same clean color.
- White chocolate chips — These add a sweeter, creamy contrast to the candy-coated chocolates. Choose chips that taste good on their own; there’s no need for a premium brand, but avoid chips with a waxy texture.
Mixing and baking the bars without drying them out
Prepare the pan before mixing
Heat the oven to 350°F. Coat a 9×13-inch baking pan with nonstick cooking spray, then line it with parchment paper and leave an overhang on two sides. Those parchment handles give you a way to lift the cooled slab out cleanly. Whisk the flour, baking soda, and kosher salt together in a medium bowl so the leavener is distributed before it meets the wet ingredients.
Cream the butter and sugars until smooth
In a large bowl, beat the softened butter with the light brown sugar and granulated sugar until creamy, about 2 minutes. The mixture should look blended rather than like separate streaks of butter and sugar. Beat in the eggs one at a time, then add the vanilla. Adding the eggs individually helps the mixture come together evenly instead of turning slick or separated.
Stop mixing as soon as the flour disappears
Add the flour mixture and mix on low just until no dry streaks remain. The dough will be thick, and that’s what you want for bars that hold their shape after baking. If you keep mixing once the flour is incorporated, the bars can turn tougher than they need to be. Fold in the candy-coated chocolates and white chocolate chips gently so the pieces stay intact.
Spread, top, and bake to the right cue
Spread the dough evenly in the prepared pan; an uneven layer can leave one side more done than the other. Press the extra candies onto the top, then bake for 24 to 28 minutes. Look for golden edges and a center that is just set, not wet-looking. The middle should still seem soft, so don’t wait for the whole surface to turn deeply golden.
Cool the slab before slicing
Set the pan on a rack or other heat-safe surface and let the bars cool completely in the pan, about 1 hour. The center continues to settle as it cools, so an early cut can leave you with soft, compressed edges. Once cool, use the parchment overhang to lift the slab out and cut it into bars.
Two simple ways to adapt these Christmas cookie bars
Make a gluten-free pan
Replace the all-purpose flour with a cup-for-cup gluten-free baking blend formulated for baking, using the same measure. The bars may be a little more tender or crumbly, so let them cool fully before lifting and cutting.
Make them less sweet
Leave out the white chocolate chips and keep the candy-coated chocolates. The bars will have fewer creamy-sweet pockets and a more straightforward cookie-and-chocolate bite.
Storage and Reheating
- Refrigerator: These don’t need refrigeration. Keep them in an airtight container at room temperature for up to 4 days; if your kitchen is warm, refrigerate them for up to 1 week, though the bars will feel firmer when cold.
- Freezer: Freeze completely cooled bars in a sealed freezer-safe container, with parchment between layers, for up to 3 months. Thaw at room temperature before serving.
- Reheating: They’re best at room temperature. If you want a warm bar, microwave it briefly until just soft; longer heating can melt the candy coating and white chocolate.
Questions that come up with Christmas Cookie Bars
Christmas Cookie Bars
Ingredients
Equipment
Method
- Heat the oven to 350°F.
- Coat a 9x13-inch baking pan with nonstick cooking spray.
- Line the pan with parchment paper, leaving an overhang on two sides.
- Whisk the flour, baking soda, and salt together in a medium bowl.
- In a large bowl, beat the butter, brown sugar, and granulated sugar until creamy, about 2 minutes.
- Beat in the eggs one at a time.
- Beat in the vanilla extract.
- Add the flour mixture and mix on low just until no dry streaks remain.
- Fold in the candy-coated chocolates and white chocolate chips.
- Spread the dough evenly in the prepared pan.
- Press the extra candies on top.
- Bake for 24 to 28 minutes, until the edges are golden and the center is just set.
- Cool completely in the pan, about 1 hour.
- Lift the bars out using the parchment.
- Cut into bars.