Campfire Egg Cups with Ham
Ham-lined egg cups turn breakfast into something that feels a little special without asking much back from you. The ham crisps at the edges, the egg sets into a tender…
By Ava
•
•
Reading time: 9 min
Tip: save now, make later.
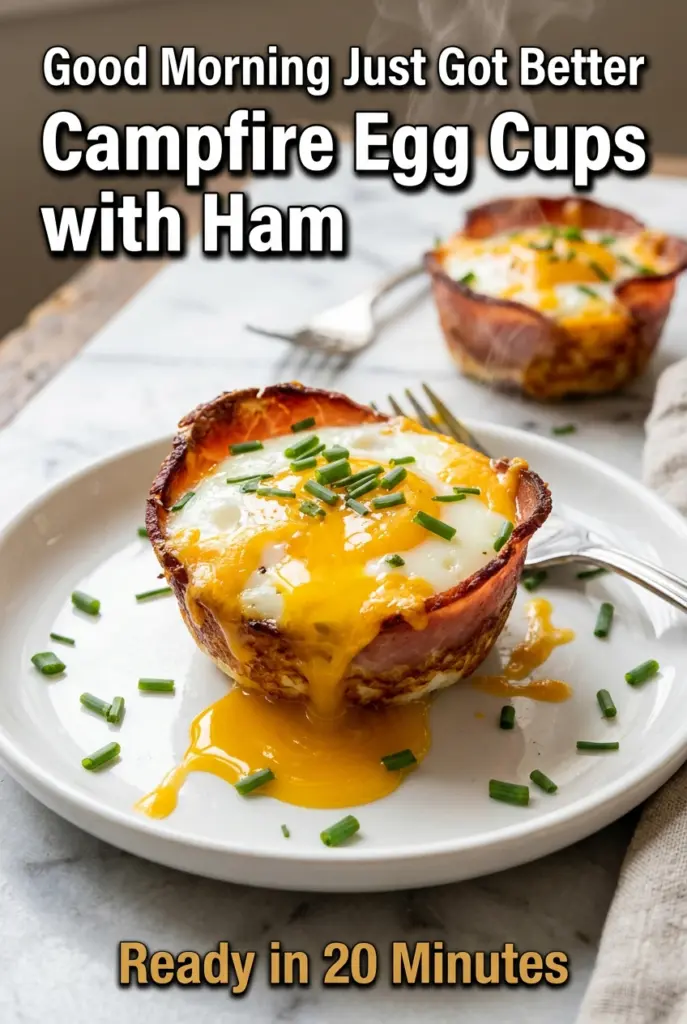
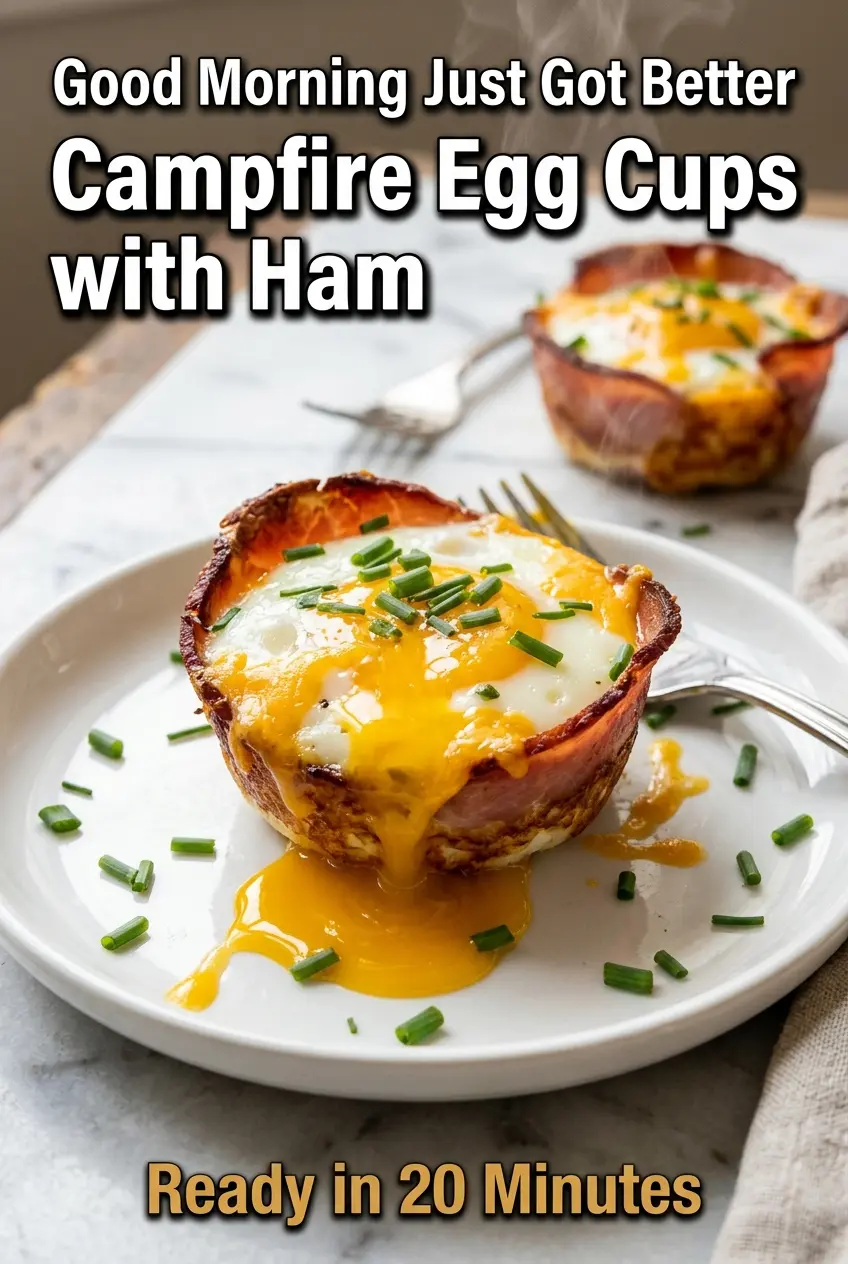
Ham-lined egg cups turn breakfast into something that feels a little special without asking much back from you. The ham crisps at the edges, the egg sets into a tender little nest, and the yolk stays rich and golden if you pull them at the right moment. A sprinkle of cheddar melts over the top and brings the whole thing together with just enough salt and sharpness to keep each bite interesting.
What makes this version work is the balance between structure and timing. Thick-cut deli ham holds its shape better than thin slices, which keeps the egg from spreading too wide in the muffin cup. The egg cooks gently from the sides inward, so the whites set before the yolk hardens, and a little cheese on top helps protect the surface from drying out. If you’re cooking over a campfire or grill, indirect heat matters more than speed — too much direct flame and the bottoms will tighten before the center is ready.
Below, I’ve included the little details that keep the eggs neat, the yolks soft, and the ham cups from collapsing. There are a few smart swaps too, plus the timing I trust whether I’m using an oven, grill, or campfire setup.
The ham held its shape perfectly and the eggs came out with set whites and soft yolks exactly like you described. I made these in the oven for a cabin breakfast and everyone went back for seconds before I even sat down.
Save these smoky ham and egg cups for a campfire breakfast that sets up beautifully and comes out with tender whites, melty cheese, and soft yolks.
The Trick to Keeping the Egg in the Ham Cup Instead of Letting It Spread
The ham needs to act like a liner, not a wrapper. If you press it too flat, it sticks to the pan and loses its shape; if you leave gaps at the bottom, the egg can leak underneath and bake unevenly. The goal is a loose, sturdy little bowl with the ham edges rising just above the rim of the muffin cup.
Thick-cut deli ham gives you the best structure here. Thin slices can go leathery before the egg finishes cooking, and they tear more easily when you lift the cups out. If your ham slices are a little larger than the cups, that’s fine — let them fold naturally at the corners instead of trimming them into perfect circles. Those folds crisp up in the heat and give the cups a better bite.
- Ham: Thick-cut deli ham holds the cup shape and gives the edges a smoky, meaty bite. If yours is square instead of round, overlap the corners and press them into the bottom so the egg has a solid base.
- Eggs: Fresh eggs stay neater in the cup because the whites hold together better. Older eggs still work, but the white can spread a little more, which makes the cups look less tidy.
- Cheddar: Sharp cheddar melts fast and brings enough punch to balance the ham. Monterey Jack works if you want a milder finish, but it won’t give you the same savory edge.
- Bacon or bell pepper: These add texture, but keep the amount small. Too much filling crowds the egg and keeps the white from setting cleanly.
Building the Cups Without Overcooking the Yolks
Greasing and Shaping the Pan
Coat the muffin tin well, including the sides. Ham releases better from a slick surface, and that extra step saves you from tearing the bottom when you lift the cups out. Press each slice into the tin just enough to form a bowl, but don’t mash it down so hard that the center becomes paper-thin.
Adding the Fillings and Cracking the Eggs
If you’re using bacon or bell pepper, tuck a small amount into the bottom first so the egg sits slightly elevated. Crack each egg into a small bowl before adding it to the ham cup if you want to protect the yolk; that one move cuts down on broken yolks and shell fragments. Season lightly at this stage, because the ham and cheese already bring salt.
Watching for the Set
Bake until the whites are just opaque and the centers still wobble faintly when you nudge the pan. That’s the sweet spot for a soft yolk. If you wait until the whole surface looks firm, the yolk will keep cooking after you pull the pan and turn chalky by the time you serve.
Three Ways to Adapt These Egg Cups Without Losing What Makes Them Good
Gluten-Free Breakfast That Still Feels Substantial
These are naturally gluten-free as long as your deli ham is certified gluten-free. Serve them with roasted potatoes, fruit, or gluten-free toast and you’ve got a full breakfast without changing the method at all.
Dairy-Free Version
Leave out the cheese and add a pinch of smoked paprika or a few chopped chives for extra flavor. You’ll lose the creamy, salty melt on top, but the ham and egg still carry the dish well.
Extra-Hearty Version for Bigger Appetites
Add a few crumbles of cooked bacon or a spoonful of finely diced pepper to the bottom of each cup before the egg goes in. Don’t overload them, or the whites won’t have enough room to set cleanly and the cups can turn messy.
Making Them on the Grill or Campfire
Use indirect heat and cover the pan loosely with foil so the tops cook through before the bottoms dry out. If the heat is uneven, rotate the pan once during cooking; campfire heat shifts fast, and that small turn keeps the edges from overbrowning.
Storage and Reheating
- Refrigerator: Store cooked egg cups in an airtight container for up to 3 days. The yolks will firm up a bit after chilling, but the texture still holds up well.
- Freezer: These don’t freeze well if you want a soft yolk, since the eggs turn rubbery after thawing. If you need to freeze anything, freeze the ham cups without the eggs and add fresh eggs before baking.
- Reheating: Warm in a 300°F oven for 8 to 10 minutes or until heated through. The microwave works in a pinch, but it’s the fastest way to overcook the yolk and make the ham tough.
Answers to the Questions Worth Asking
Campfire Egg Cups with Ham
Ingredients
Equipment
Method
- Preheat your oven to 375°F (190°C), or prepare your campfire/grill for medium heat.
- Lightly grease a 6-cup muffin tin with cooking spray or butter, coating the sides well.
- Press one slice of ham into each muffin cup, pressing gently against the sides so it forms a rustic cup shape.
- If using diced bell pepper or bacon, scatter a small amount into the bottom of each ham cup.
- Crack one egg carefully into each ham cup, keeping the yolk intact.
- Season each egg with salt and black pepper, and add smoked paprika if using.
- Sprinkle shredded cheddar cheese evenly over each cup.
- Bake in the oven at 375°F (190°C) for 12–15 minutes, until the whites are just set and the yolk is still slightly runny.
- For fully cooked yolks, continue baking at 375°F (190°C) for an additional 3–4 minutes.
- For campfire or grill cooking, place the muffin tin over indirect heat, cover loosely with foil, and cook for 14–18 minutes, checking after 12 minutes.
- Carefully remove the egg cups from the tin using a spoon.
- Garnish with fresh chives or green onion and serve immediately with hot sauce for serving.