
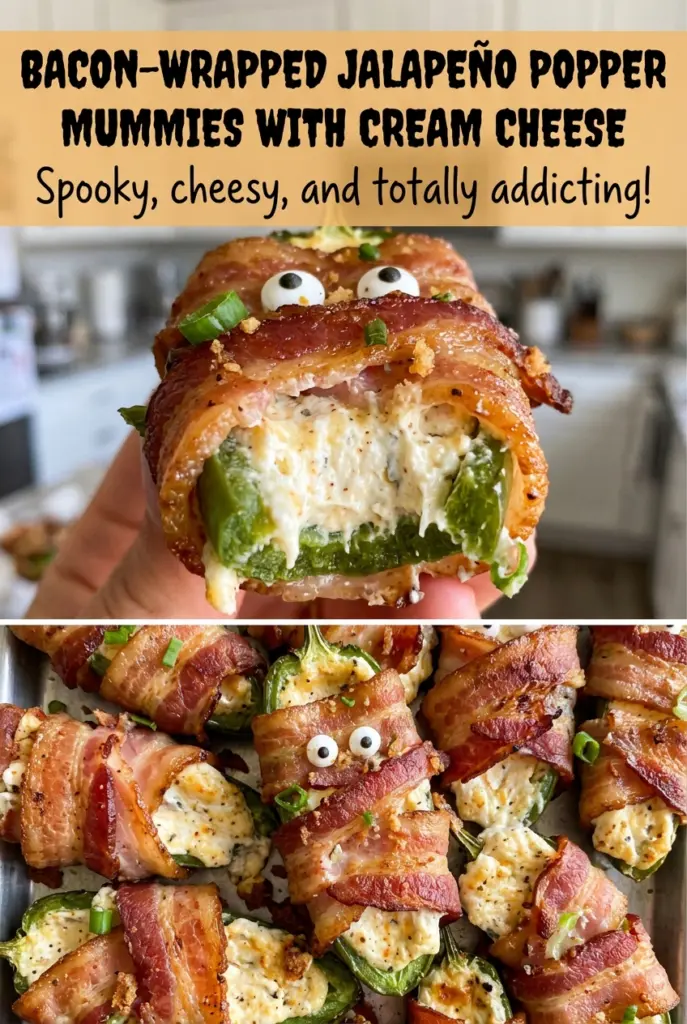
Bacon-Wrapped Jalapeno Popper Mummies with Cream Cheese
The first thing you notice is how the bacon curls around each pepper half while a little stripe of cheese stays visible. That open spot gives the candy eyes somewhere…

By Ava
•
•
Reading time: 8 min
Tip: save now, make later.
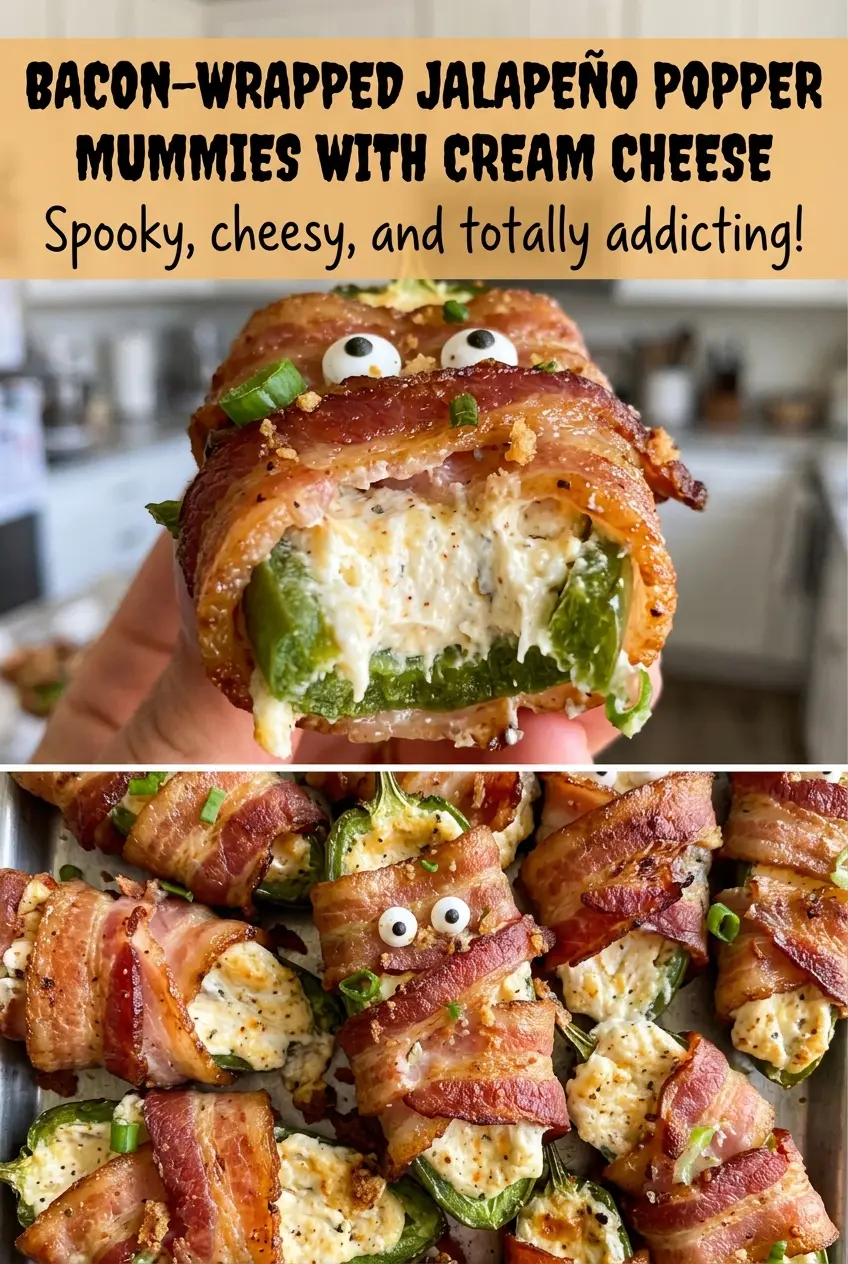
The first thing you notice is how the bacon curls around each pepper half while a little stripe of cheese stays visible. That open spot gives the candy eyes somewhere to sit, and it keeps these bacon-wrapped jalapeno popper mummies with cream cheese looking like little mummies instead of fully covered poppers.
I like the filling mixed until the cheddar is spread evenly through the softened cream cheese, so every bite has a sharp, savory edge. The bacon needs a loose spiral, not a tight casing, and the peppers go cut-side up on the lined sheet. Once the bacon is browned and the jalapenos are tender, five minutes of cooling is enough before the eyes go on. You get crisp-edged bacon, tender pepper, and a creamy center in one small, festive bite.
Kitchen Note
Give the poppers the full 5-minute cool before adding the candy eyes. The cheese is still hot when they come out of the oven, and that short wait helps the eyes keep their shape when you press them in.
Save these bacon-wrapped jalapeno popper mummies for a party platter with browned bacon, creamy cheddar filling, and candy eyes.
Why the Bacon Needs to Leave a Little Cheese Showing
It’s easy to think the bacon should cover every inch of a stuffed pepper. Here, a complete wrap works against both the look and the finish. The bacon is cut into narrow strips and spiraled around each half, so it can brown across the pepper without hiding the filling altogether.
That small exposed patch near the wider end has a job: it gives the candy eyes a place to sit after baking. The loose spiral also leaves the cheese filling visible, which makes the finished poppers read as little wrapped faces. Tuck the ends underneath so the bacon stays put, but don’t pull the strip tight across the filling. Keeping the wrap relaxed gives you the mummy look without turning each pepper into a sealed bacon bundle.
Think of the bacon as the bandages and the exposed cheese as the face. That simple arrangement makes the final garnish look intentional, even when the pepper halves aren’t perfectly identical.
How the Cream Cheese, Cheddar, and Jalapenos Shape the Bite

- Cream cheese — This is the soft base that holds the cheddar and seasonings together. Let it soften before mixing; cold cream cheese tends to leave little lumps, so the filling won’t spread evenly into the pepper halves. Brand matters less than having it soft enough to stir smoothly.
- Sharp cheddar — Sharp cheddar gives the filling its familiar popper flavor and a more pronounced cheese bite than a mild cheese would. The shredded cheese should be dispersed throughout the cream cheese rather than left in a mound, so each pepper gets a balanced filling.
- Jalapenos — Medium peppers give you halves that are practical to fill and wrap. Choose peppers that are fairly similar in size so they cook at a similar pace; very different widths make it harder to divide the filling evenly.
- Bacon — Each slice is divided lengthwise, making narrow strips that spiral around the peppers instead of covering them like a wide blanket. Ordinary sliced bacon is the right shape for this wrap; a much thicker piece would be harder to tuck neatly around the halves.
- Garlic powder and kosher salt — Garlic powder seasons the cheese without adding moisture, while kosher salt brings the cream cheese and cheddar into balance. Mix both through the filling rather than sprinkling them over the top, where the seasoning would be uneven.
- Candy eyeballs — These are a decorative finish, not part of the filling. Keep them ready for the end, when the poppers have cooled enough to hold them in place.
From Smooth Filling to Tender, Bacon-Wrapped Halves
Mix a smooth, evenly seasoned filling
Stir the softened cream cheese, shredded sharp cheddar, garlic powder, and kosher salt in a medium bowl until the mixture looks evenly combined. Break up any cream cheese lumps against the side of the bowl as you mix. The finished filling should be thick but easy to scoop, with cheddar visible throughout rather than gathered at the bottom.
Fill the pepper halves without crowding them
Heat the oven to 400°F and line a rimmed baking sheet with foil. Halve the jalapenos lengthwise, then remove the seeds and membranes before filling each half with the cheese mixture. Press the filling into the cavity so it sits in the pepper rather than perched loosely on top. Keep the halves intact as you move them to the sheet; a split pepper is harder to wrap neatly.
Wrap each half in a loose bacon spiral
Cut each bacon slice lengthwise into two strips, then wind one strip around each jalapeno half. Leave some cheese exposed near the wider end, and tuck both bacon ends underneath the pepper. Set the poppers cut-side up on the prepared baking sheet with a little room between them. If a strip slides as you transfer a pepper, tuck the end under again before baking.
Bake until the bacon browns and the peppers soften
Bake for 25–35 minutes, until the bacon is browned and the jalapenos are tender. Look for bacon that has taken on color rather than remaining pale and soft; the peppers should yield when gently pressed. Oven timing can vary, so use those visual and texture cues together. Let the poppers cool for 5 minutes, then press 2 candy eyeballs into the exposed cheese near the wider end of each.
Two Ways to Change the Mummy Poppers Without Losing Their Shape
Make a bacon-free cheese-stuffed batch
Leave off the bacon and bake the filled jalapeno halves at the same oven temperature until the peppers are tender. The cheese will be more exposed and the finished bite will taste more directly of the pepper and cheddar, without the browned, salty bacon wrap. Keep the halves cut-side up so the filling stays in the pepper as it heats.
Scale the batch down for a smaller group
Halve every ingredient to make a smaller batch, including the filling seasonings, and plan on about four servings. Keep the same assembly and baking cues; the important part is still browned bacon and tender jalapenos. This is a handy way to make only as many as you need without changing the character of the filling.
Storage and Reheating
- Refrigerator: Refrigerate leftovers within 2 hours and keep them covered for 3–4 days. The peppers soften as they sit, and the bacon loses some crispness.
- Freezer: Freezing isn’t my first choice for cooked poppers. The jalapenos soften further after thawing, and the cream cheese filling may lose its smooth texture.
- Reheating: Warm them in the oven until heated through; this brings the bacon back better than the microwave. Avoid microwaving if you want the bacon to stay crisp, since it tends to soften.
Answers to the Jalapeno Popper Questions That Come Up Mid-Prep
Bacon-Wrapped Jalapeno Popper Mummies with Cream Cheese
Ingredients
Equipment
Method
- In a medium bowl, mix the cream cheese, cheddar, garlic powder, and salt until evenly combined.
- Heat the oven to 400°F.
- Line a rimmed baking sheet with foil.
- Halve the jalapenos lengthwise and remove the seeds and membranes.
- Fill each jalapeno half with the cheese mixture.
- Cut each bacon slice lengthwise into 2 strips.
- Wrap one strip in a loose spiral around each jalapeno half, leaving some cheese exposed near the wider end.
- Tuck the bacon ends underneath and arrange the poppers cut-side up on the baking sheet.
- Bake for 25–35 minutes, until the bacon is browned and the jalapenos are tender.
- Let the poppers cool for 5 minutes.
- Press 2 candy eyeballs into the exposed cheese near the wider end of each.