
Strawberry Shortcake Flag Cake
Fluffy vanilla cake, billowy whipped cream, and piles of fresh berries turn this strawberry shortcake flag cake into the kind of dessert people gather around before anyone even cuts a…
By Ava
•
•
Reading time: 11 min
Tip: save now, make later.
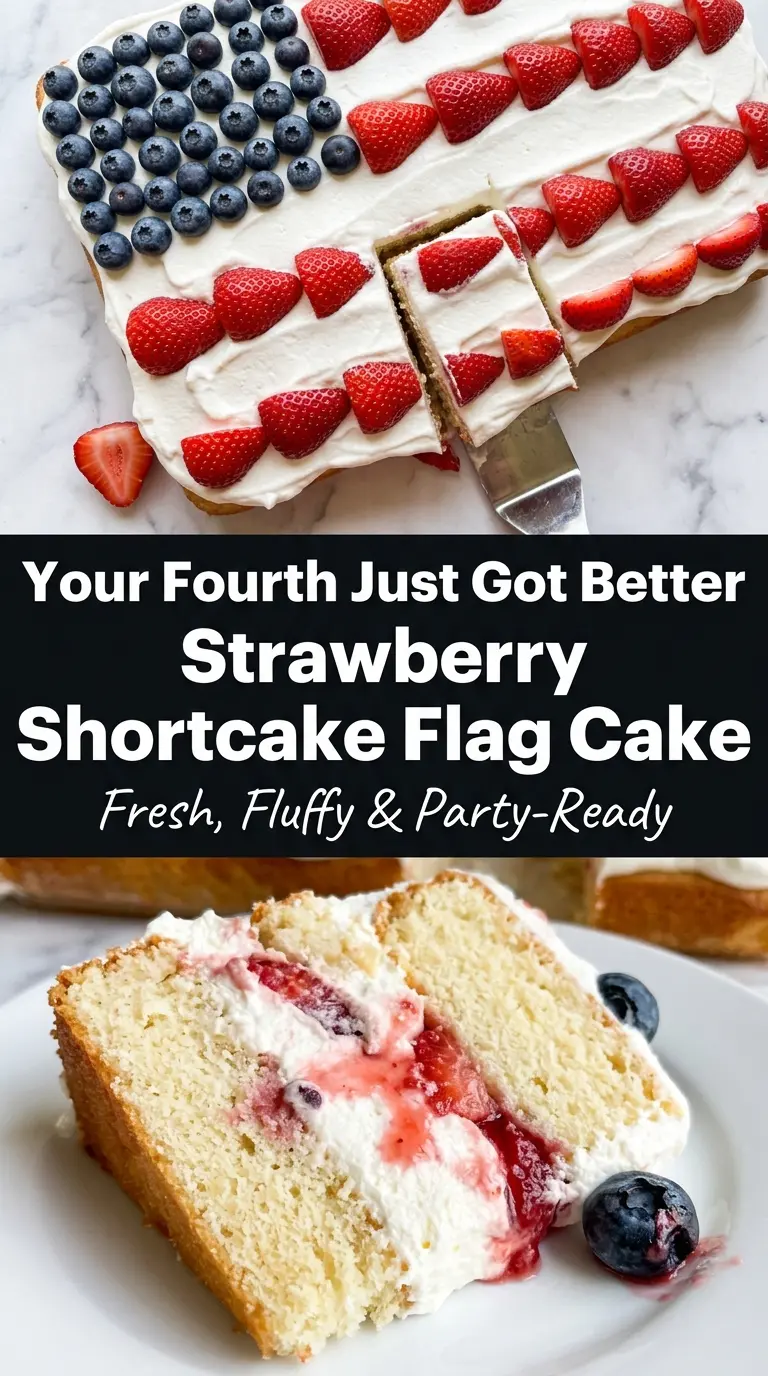
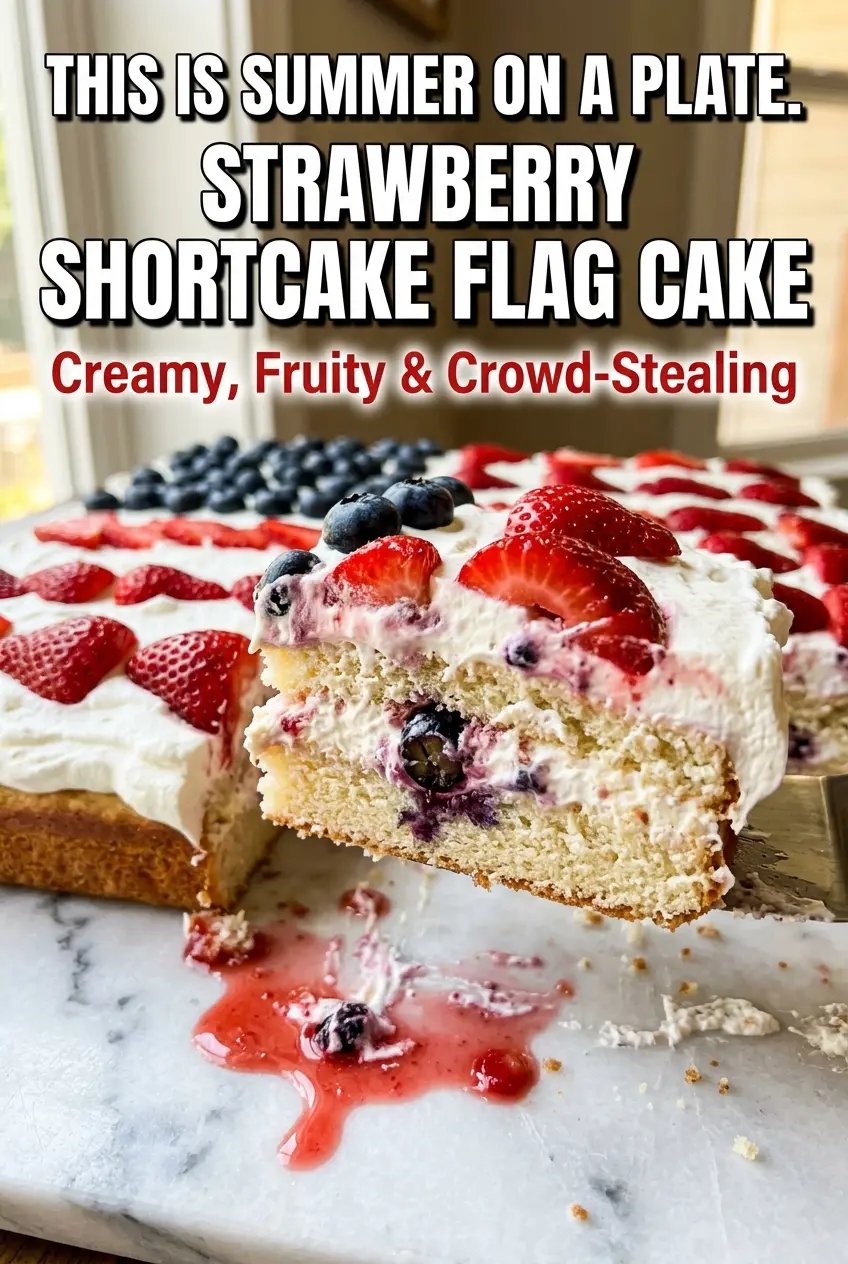
Fluffy vanilla cake, billowy whipped cream, and piles of fresh berries turn this strawberry shortcake flag cake into the kind of dessert people gather around before anyone even cuts a slice. It looks festive, but the real draw is the balance: soft cake that holds its shape, cream that stays cloud-like, and fruit that brings a bright, juicy snap to every bite.
What makes this version work is the structure. The cake is baked in a single 9×13 pan, which gives you a sturdy base for decorating without wrestling with layers. A stabilized whipped cream frosting keeps the top neat long enough to serve, and the berries are arranged after the cake is fully cool so the design stays crisp instead of sliding into a red-and-blue blur.
Below, I’ve included the small details that matter most: how to keep the cake tender, how to get whipped cream that actually pipes and spreads cleanly, and how to build the flag pattern so it still looks sharp at the table.
The whipped cream held its shape beautifully, and the berries stayed in neat rows even after sitting in the fridge. I loved that the cake itself was soft but sturdy enough to slice cleanly.
Save this strawberry shortcake flag cake for the next celebration that needs a dessert centerpiece with real summer fruit and a clean, patriotic finish.
The Trick to Keeping the Flag Design Clean Instead of Soggy
This dessert falls apart visually when the cake is warm or the berries are wet. Warm cake softens the whipped cream from underneath, and excess berry juice bleeds into the white frosting and turns the stripes muddy. Let the cake cool all the way before you frost it, and if you macerate the strawberries, drain off the extra liquid before arranging them on top.
The other mistake is using plain whipped cream that’s too soft to hold shape for more than a few minutes. Cornstarch gives the frosting just enough body to spread smoothly and stay put in the fridge. It won’t turn stiff like buttercream, which is part of the charm here, but it does need to be beaten to firm peaks so the berries don’t sink in.
What Each Ingredient Is Doing in This Strawberry Shortcake Flag Cake
- All-purpose flour — Gives the cake enough structure to support the whipped cream and fruit without turning dense. Cake flour will make it a touch softer, but all-purpose gives a sturdier crumb for slicing and serving.
- Butter and sugar — This is where the cake gets its light, tender base. Beat them long enough to turn pale and fluffy; that step traps air and helps the cake rise evenly.
- Eggs — They add richness and stability. Room-temperature eggs blend into the butter mixture more smoothly, which keeps the batter from breaking or looking curdled.
- Whole milk — The extra fat helps the cake stay soft and plush. Lower-fat milk works in a pinch, but the texture won’t be quite as rich.
- Heavy whipping cream — This is the frosting, so don’t swap in light cream. You need the high fat content for stiff peaks and a finish that can hold the flag design.
- Cornstarch — A small amount thickens the whipped cream just enough to help it hold its shape in the fridge. It’s the difference between a pretty cake and one that slumps before serving.
- Strawberries and blueberries — Fresh fruit matters here. Frozen berries release too much liquid and turn the top messy, so stick with firm, ripe fruit that’s been patted dry.
Building the Cake and Decorating the Flag in the Right Order
Mix the Batter Until It Just Comes Together
Start by creaming the butter and sugar until the mixture looks pale and fluffy, not greasy or grainy. Add the eggs one at a time so the batter stays smooth, then alternate the dry ingredients with the milk on low speed. If you keep mixing after the flour disappears, the cake tightens up and bakes with a heavier crumb, which makes it harder to slice cleanly under the frosting.
Bake for Springy Edges and a Clean Center
The cake is done when the top springs back lightly and a toothpick comes out clean from the center. The edges should pull away from the pan just a bit. If the middle still looks shiny, give it a few more minutes; underbaked cake can collapse once you unload the whipped cream on top.
Whip the Cream to Firm Peaks, Not Butter
Start with a cold bowl and cold cream, then beat until the cream holds firm peaks that stand upright when you lift the whisk. Stop there. If you keep going, the cream goes grainy and starts turning buttery, and it won’t spread smoothly across the cake. The cornstarch helps, but it can’t rescue overwhipped cream.
Lay Out the Berries Before the Cream Softens
Spread the whipped cream over the fully cooled cake, then build the design right away while the surface is still smooth. Blueberries go into the upper-left block first so you have your anchor point, then the strawberry rows can be lined up around them. If the strawberries are especially juicy, let them sit cut-side down on a paper towel for a few minutes before arranging them.
Three Ways to Adapt This Flag Cake Without Losing the Effect
Gluten-Free Version with a Better Crumb
Use a good 1:1 gluten-free baking flour that already contains xanthan gum. The cake will still be tender, but it may be a little more delicate when slicing, so let it cool completely before moving it.
Dairy-Free Swaps That Still Hold Up
Use a plant-based butter for the cake and full-fat coconut cream for the topping. Coconut cream whips differently, so chill the cans overnight and only scoop out the solid portion. The flavor shifts a bit, but the dessert still slices cleanly and keeps the same festive look.
Make It Ahead for a Crowd
Bake the cake a day in advance and wrap it tightly once cool. You can also whip the cream a few hours ahead, but wait to decorate until the day you plan to serve it so the berries stay bright and the pattern stays sharp.
Use Other Berries Without Losing the Flag Look
Raspberries can replace some of the strawberries if you want a sharper red flavor, but they’re softer and bleed faster. Keep at least some firm strawberries in the striped rows so the design doesn’t collapse into juice after chilling.
Storage and Reheating
- Refrigerator: Store covered for up to 2 days. The whipped cream will soften a little, but the cake stays tender and the berries stay fresh if you keep it cold.
- Freezer: I don’t recommend freezing the finished cake. The whipped cream and fresh berries don’t thaw well, and the flag design loses its clean edges.
- Reheating: Don’t reheat this dessert. Serve it chilled straight from the fridge, and use a sharp knife wiped clean between cuts so the slices stay neat.
Questions I Get Asked About This Recipe
Strawberry Shortcake Flag Cake
Ingredients
Equipment
Method
- Preheat your oven to 350°F (175°C). Grease and flour a 9x13-inch baking pan and line the bottom with parchment paper.
- Whisk together the flour, baking powder, and salt in a medium bowl. Set aside for later.
- Beat the softened unsalted butter and granulated sugar in a large bowl on medium-high speed for 4–5 minutes until pale, fluffy, and doubled in volume. Keep the mixer running smoothly.
- Add the eggs one at a time, beating well after each addition. Mix until fully combined.
- Add the pure vanilla extract and mix until combined. Stop once the batter looks uniform.
- Reduce mixer speed to low and alternate adding the flour mixture and whole milk in three additions, starting and ending with flour. Mix just until combined and do not overmix.
- Pour the batter into the prepared pan and smooth the top. Tap the pan lightly to level the surface.
- Bake for 30–35 minutes until a toothpick inserted in the center comes out clean and the edges pull away from the sides. Remove when the center no longer jiggles.
- Let the cake cool in the pan for 10 minutes. Then transfer to a wire rack to cool completely before frosting for at least 1 hour, with the visual cue of fully cooled, no steam.
- Chill your mixing bowl in the freezer for 10 minutes while the cake cools. You want it cold to help the cream whip faster.
- Beat the cold heavy whipping cream, powdered sugar, cornstarch, and pure vanilla extract on medium-high speed until stiff peaks form. The visual cue is peaks that stand straight when you lift the beaters.
- Refrigerate the stabilized whipped cream until ready to use. Keep it cold so it pipes cleanly.
- Toss the halved fresh strawberries with 2 tbsp granulated sugar and let macerate for 15 minutes. Stop when you see syrupy juices forming.
- Place the fully cooled cake on a serving board or sheet pan. Ensure the top is completely cool to prevent melting cream.
- Frost the entire top and sides generously with stabilized whipped cream, smoothing it flat across the top. Use steady pressure so the surface looks even.
- Arrange the blueberries in a rectangular block in the upper-left corner of the cake (about 1/4 of the top surface) to represent the star field. Press lightly so they stay in place.
- Arrange the halved strawberries in neat rows across the remaining top surface, alternating with thin stripes of white whipped cream piped between rows. The visual cue is alternating red berry rows and pale cream stripes.
- Pipe a decorative border around the edges of the cake using remaining whipped cream if desired. Look for a crisp line along the perimeter.
- Refrigerate the finished cake for at least 30 minutes before serving to allow the whipped cream to set. Serve chilled within 24–48 hours for best freshness.