

Honey Garlic Roasted Turnips with Rosemary
The first brown spots on the turnips are your cue to hold off on the honey. Add it too early and the glaze can darken before the centers are tender;…

By Ava
•
•
Reading time: 8 min
Tip: save now, make later.
The first brown spots on the turnips are your cue to hold off on the honey. Add it too early and the glaze can darken before the centers are tender; wait until the turnips have started roasting, and the honey, garlic, and rosemary turn sticky around the edges without losing their fresh, savory character.
I make these honey garlic roasted turnips with rosemary when I want a sheet-pan side that has more going on than plain roasted roots. The turnips start with olive oil, salt, and pepper, so they get a head start on browning before the sweet glaze goes on. Cut them into even pieces and give them space on the pan; the finished turnips should be browned outside, fork-tender inside, and coated in a glaze that clings instead of pooling. They’re earthy and gently sweet, with the garlic and rosemary keeping every bite firmly on the savory side.

Kitchen Note
Line the rimmed baking sheet with parchment before the turnips go on. Honey that escapes the vegetables gets tacky as it cools, and parchment makes the glazed pieces much easier to lift without scraping.
Save these honey garlic roasted turnips with rosemary for a side that pairs browned edges with a sticky, savory-sweet glaze.
Why the Honey Goes on After the Turnips Start Browning
Turnips need time in the oven to soften and begin coloring, while honey is eager to brown. Put the glaze on from the start and its sugars can get dark before the centers are tender. Minced garlic has a similar timing problem: small pieces can scorch if they sit through the whole roast. Keeping the first stretch simple—olive oil, salt, and pepper—lets the turnips roast without asking the honey and garlic to take the heat for too long.
Once the turnips have begun to brown, the glaze has a shorter job. Honey coats the warm surfaces, and the rosemary and garlic have enough oven time to release their aroma and cling to the vegetables. The result isn’t a thick sauce; it’s a glossy, lightly sticky coating with caramelized spots. If you want the turnips tender and the garlic fragrant rather than bitter, keep that order: brown first, glaze afterward.
What Each Part of the Honey-Garlic Rosemary Glaze Actually Does
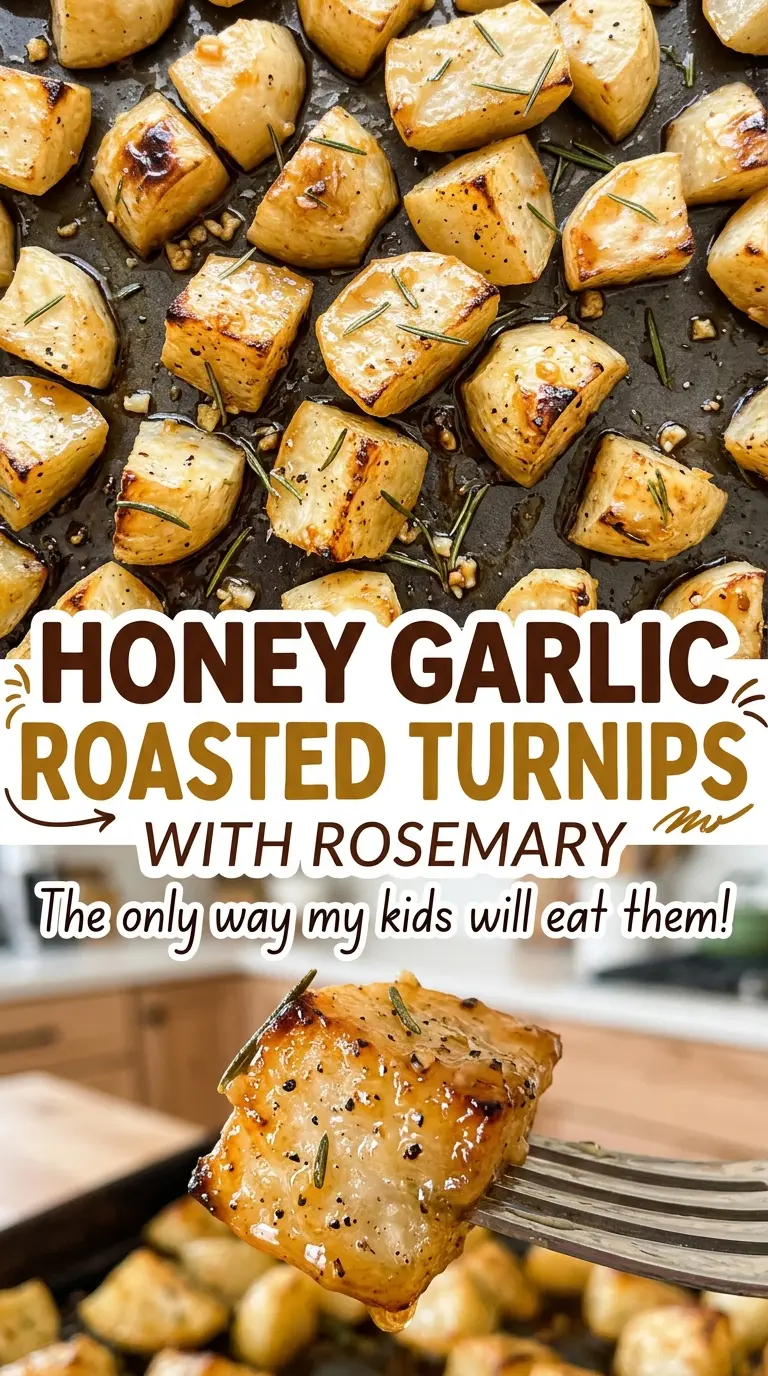
- Turnips — Their mild peppery bite gives the sweet glaze something earthy to balance. Choose firm roots without soft spots; the everyday bunch is fine here. Peel them and cut into even pieces so they roast at a similar pace. Rutabaga is the closest root-vegetable stand-in: peel and cut it into 1-inch pieces, then rely on fork-tenderness rather than the exact same timing because rutabaga is denser.
- Olive oil — A thin coating helps the turnips roast and brown before the honey goes on. There’s no need for a high-priced bottle; a standard olive oil works well. If you’re out, use the same amount of a neutral cooking oil, knowing it won’t add olive oil’s gentle fruitiness.
- Honey — Honey gives the finish its sticky sheen and helps the edges brown. A plain, mild honey lets the garlic and rosemary come through; a strong, dark honey will bring a more pronounced taste. For a vegan version, use the same amount of pure maple syrup instead.
- Garlic — Freshly minced garlic brings a sharper, more aromatic flavor than dried seasoning, and small pieces spread through the glaze. If fresh cloves aren’t available, use 3/4 teaspoon garlic powder in the honey mixture; the flavor will be less bright, but it still seasons the coating.
- Fresh rosemary — Its piney, savory notes hold their own beside the honey. Fresh sprigs are inexpensive and give the glaze a cleaner herbal lift. If you only have dried rosemary, crush it between your fingers and use 1 teaspoon in place of the tablespoon of chopped fresh rosemary.
From Bare Roast to Sticky Honey-Rosemary Finish
Give the Turnips Room to Roast
Heat the oven to 425°F and line an 18×13-inch rimmed baking sheet with parchment paper. Toss the peeled, 1-inch turnip pieces with the olive oil, kosher salt, and black pepper until every surface is lightly coated. Spread them out in a single layer; pieces piled on top of each other will soften in their own moisture instead of browning. Roast for 18 to 20 minutes, stirring once, until the turnips are beginning to pick up color.
Mix the Glaze After the First Roast
While the turnips roast, keep the honey, minced garlic, and chopped rosemary together for the finish. When the first roast is over, stir those three ingredients together, then toss the mixture with the hot turnips. Scrape the honey mixture around the pan so it coats the pieces rather than sitting in one puddle. Spread everything back into a single layer before returning the pan to the oven.
Roast Until the Coating Clings
Roast for another 8 to 12 minutes, watching for browned edges and a glaze that looks sticky rather than watery. Test a piece with a fork; it should slide in easily, with no firm center. If the glaze is glossy but the turnips still resist the fork, give them a little more oven time and check again. Let the pan rest for 5 minutes before serving so the hot glaze settles onto the turnips.
Two Small Changes for a Different Turnip Plate
Make the Glaze Vegan with Maple
Replace the honey with the same amount of pure maple syrup. It keeps the coating glossy and gives the turnips a slightly woodsy sweetness; keep an eye on the glaze as it roasts because its color may look different from honey.
Let the Honey and Garlic Lead
Leave out the rosemary for a simpler, more direct honey-garlic finish. The turnips will taste sweeter and less herbal, while the garlic still gives the glaze a savory edge. No other change to the method is needed.
Storage and Reheating
- Refrigerator: Refrigerate in an airtight container within 2 hours and use within 3 to 4 days. The glaze softens and the browned edges lose some of their crispness.
- Freezer: Freeze cooled turnips in an airtight freezer container for up to 2 months. Thaw overnight in the refrigerator; expect a softer texture after thawing.
- Reheating: Spread them in a single layer in a 400°F oven until hot throughout, or warm them in a skillet over medium heat. Reheat leftovers to 165°F; the microwave works, but it softens the browned edges further.
Questions That Come Up While Roasting Turnips
Honey Garlic Roasted Turnips with Rosemary
Ingredients
Equipment
Method
- Heat the oven to 425°F.
- Line an 18x13-inch rimmed baking sheet with parchment paper.
- Toss the turnips with the olive oil, salt, and pepper.
- Spread the turnips in a single layer on the baking sheet.
- Roast for 18 to 20 minutes, stirring once, until the turnips begin to brown.
- Stir together the honey, garlic, and rosemary.
- Toss the mixture with the turnips.
- Spread the turnips back into a single layer.
- Roast for 8 to 12 minutes more, until the turnips are fork-tender and browned and the glaze is sticky.
- Let rest for 5 minutes before serving.