
Grilled Campfire Pizza
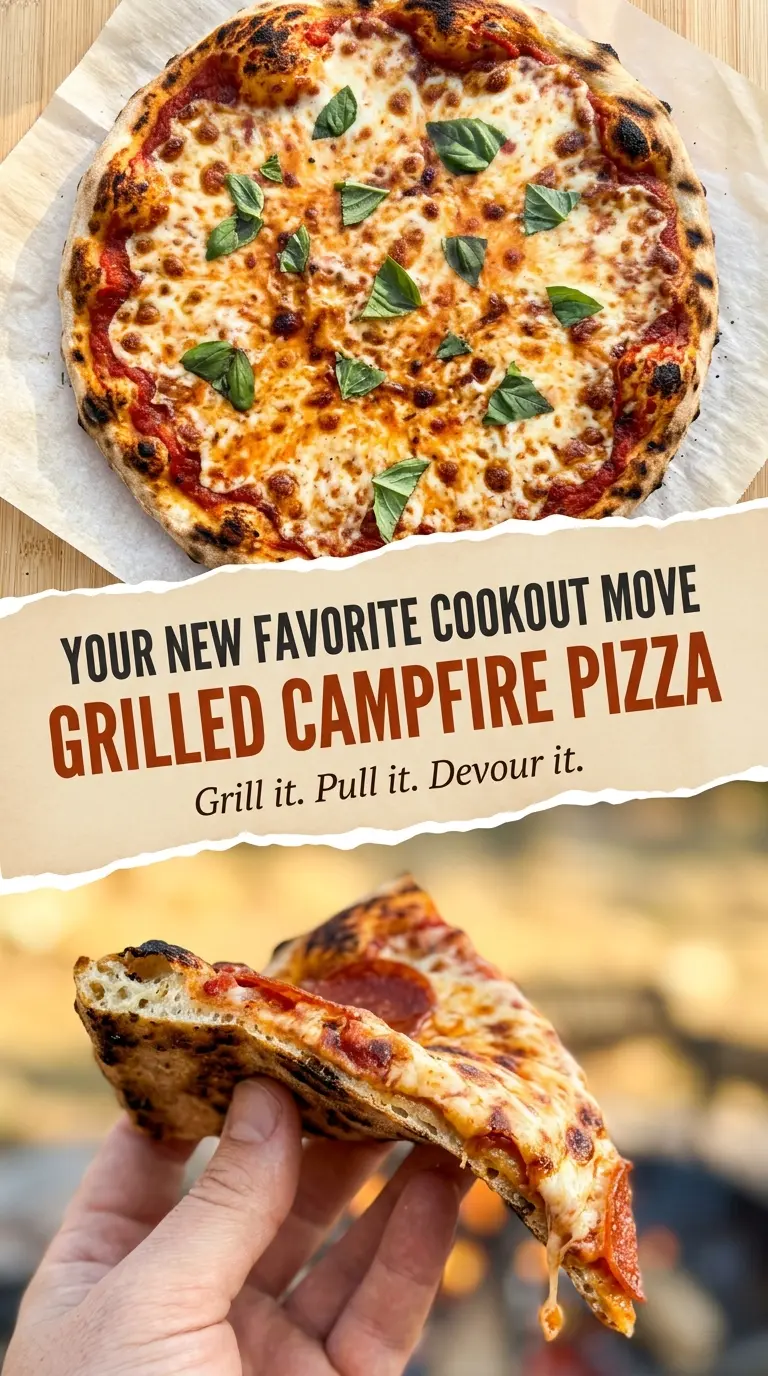
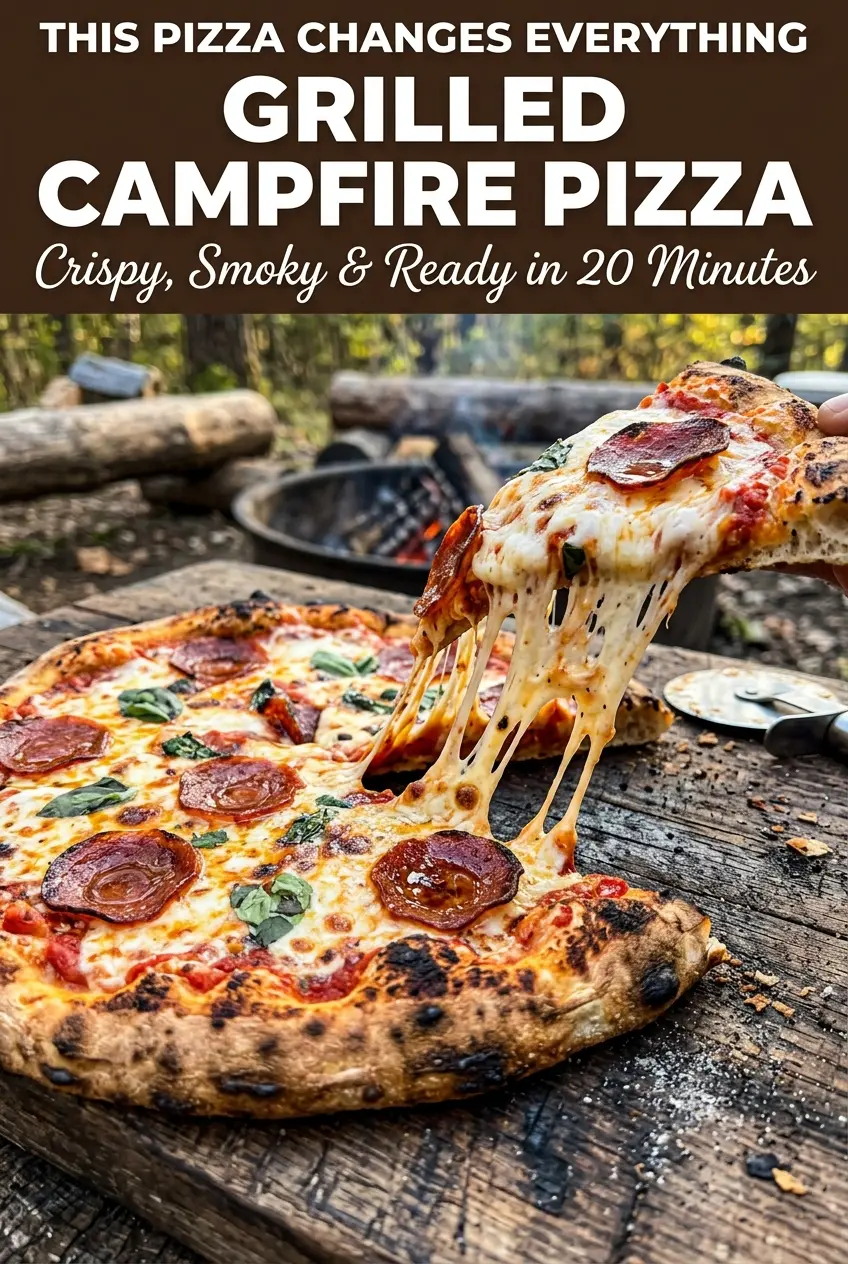
Grilled Campfire Pizza gives you the kind of crust that makes people stop talking for a second. The bottom comes off the grill with deep char marks and a crisp…
By Ava
•
•
Reading time: 11 min
Tip: save now, make later.
Grilled Campfire Pizza gives you the kind of crust that makes people stop talking for a second. The bottom comes off the grill with deep char marks and a crisp edge, the cheese melts into bubbling pockets, and the toppings pick up just enough smoky flavor to taste like you worked a lot harder than you did. It’s the rare pizza that feels casual and special at the same time.
The trick is getting the dough hot and well-oiled before it ever meets the cheese. Cold dough fights you, so letting it come to room temperature pays off fast. A clean, oiled grate matters just as much. That first side needs to set quickly or the dough can stick before it has a chance to release cleanly.
Below, I’ll walk through the parts that matter most: how to keep the crust from tearing, how to move fast once the dough is on the grill, and how to finish it with the right mix of smoky, salty toppings. The method is simple once you know the rhythm.
The crust got those perfect grill marks and held together even with all the toppings. I was nervous about flipping it, but once the first side set, it was easy and the cheese was bubbling by the time the bottom got that deep golden color.
Like this smoky grilled pizza? Save it to Pinterest for the night you want blistered crust, melted cheese, and a fast backyard dinner.
The One Thing That Keeps Grilled Pizza From Sticking
The biggest mistake with grilled pizza is treating it like oven pizza. On the grill, the dough needs to go down hot enough to set fast, but not so wet that it welds itself to the grates. That’s why the oil on the first side matters. It creates a thin barrier that helps the crust release once it has enough structure to lift cleanly.
The other part people miss is timing. If you try to move or flip the dough too early, it tears. If you wait until the bottom is deeply set and the top has started to puff, it comes off much easier. You’re looking for a crust that can hold its shape before you add sauce, cheese, and toppings.
- Pizza dough — Room-temperature dough stretches without springing back. Store-bought dough works fine here, and homemade is great if it’s not too wet. If it keeps shrinking, let it rest another 10 minutes before stretching.
- Olive oil — This is doing more than adding flavor. It helps the dough release from the grates and gives the finished crust a richer, more blistered finish. Brush it on generously, especially on the side that hits the grill first.
- Low-moisture mozzarella — This is the cheese that melts into those stretchy, bubbly pockets without flooding the crust. Fresh mozzarella can work, but it releases more water and can make the pizza slippery unless you blot it first.
- Pizza sauce — Keep it light. Grilled pizza needs a thinner layer than oven-baked pizza because too much sauce makes the crust soggy before the cheese fully melts.
- Parmesan — A small amount adds salt and a sharper edge that keeps the pizza from tasting flat. Freshly grated is best here because pre-grated Parmesan doesn’t melt as smoothly.
Getting the Dough, Toppings, and Heat to Work Together
The dough needs to be stretched to about 10 to 12 inches so it cooks through before the toppings overcook. If it’s too thick, the outside chars before the center sets. If it’s too thin, it can tear when you flip or turn it. A slight oval is fine. Perfection matters less than even thickness.
The toppings should all be ready before the dough touches the grill. Once that first side is cooked, the clock moves fast. Sauce, cheese, and vegetables need to go on immediately so the second side can finish while the top melts. Slice the onion and pepper thin enough that they soften in a few minutes instead of staying raw and sharp.
- Garlic powder and dried oregano — These seasonings are best used on the dough and finished on top, not buried in the sauce. Garlic powder gives the crust a savory edge without burning like fresh garlic would on the grill.
- Pepperoni or sausage crumbles — Pepperoni gives you fast, salty, crisp edges. If you use sausage, cook it first and drain the fat so it doesn’t puddle on the pizza.
- Bell pepper and red onion — Thin slices matter. Thick pieces stay crunchy in the wrong way because the grill time is short. Thin vegetables soften and pick up a little char without turning watery.
- Fresh basil — Add it after the pizza comes off the grill. Basil turns dark and limp over heat, so finish with it at the end for the freshest flavor and color.
How to Grill the Pizza in Two Fast, Controlled Phases
Setting the First Side
Preheat the grill to medium-high and clean the grates well. The dough should hit a hot, oiled surface so it sets quickly instead of sinking into the metal. Lay it down oiled-side first and close the lid. In 2 to 3 minutes, the bottom should show clear grill marks and the top should look duller, with a few bubbles starting to form. If it still looks wet and floppy, give it another minute before you try to move it.
Flipping Without Tearing
Use tongs to lift one edge and check that the dough releases. If it clings, it needs another short minute. Flip it onto the cooked side, then move fast with the sauce and toppings. Once the crust is flipped, the dry side becomes the top side, and it’s that side that will hold the sauce without soaking through as quickly.
Finishing Under the Lid
Close the grill and let the cheese melt for 3 to 5 minutes. You want the mozzarella fully melted, the edges bubbling, and the bottom crust deep golden with a few char spots. If the toppings are melting before the crust is done, the heat is too high. Lower it a little and keep the lid shut so the top cooks from trapped heat instead of direct flame alone.
How to Adapt Grilled Campfire Pizza for Different Setups
Gluten-Free Crust
Use a gluten-free pizza dough that’s designed to be stretched or rolled. It’s usually a little more fragile, so keep the crust slightly thicker and handle it with an oiled spatula if needed. The result is still crisp, but it won’t have quite the same chew as standard dough.
Dairy-Free Version
Swap in a dairy-free mozzarella-style shreds that melts well, then add a little extra olive oil and a stronger finish of oregano and basil. You lose some of the rich stretch from real mozzarella, but the grill flavor still carries the pizza.
Vegetarian Grill Pizza
Skip the pepperoni and use mushrooms, extra peppers, or olives. Mushrooms should be sliced and cooked quickly on the grill or sautéed first if you want to avoid extra moisture. The pizza still gets plenty of savory depth from the cheese, sauce, and charred crust.
Storage and Reheating
- Refrigerator: Store leftovers in an airtight container for up to 3 days. The crust softens a little, but it still reheats well.
- Freezer: Freeze slices wrapped tightly and layered with parchment for up to 2 months. Reheat from frozen for the best texture, rather than thawing first.
- Reheating: Use a hot skillet, oven, or air fryer to bring the crust back to life. The microwave makes the cheese soft but turns the bottom leathery, which is the fastest way to ruin the texture.
Questions I Get Asked About This Recipe
Grilled Campfire Pizza
Ingredients
Equipment
Method
- Remove the pizza dough from the refrigerator at least 30 minutes before cooking so it comes to room temperature, which makes it easier to stretch without springing back.
- Preheat your grill to medium-high heat, about 450°F, and clean and oil the grates well to prevent sticking.
- Stretch or roll the dough into a roughly oval or round shape, about 10–12 inches, keeping it thin enough to cook through but thick enough to hold toppings.
- Brush one side of the dough generously with olive oil, then sprinkle with garlic powder and kosher salt.
- Lay the dough oiled-side down onto the hot grill, close the lid, and grill for 2–3 minutes until the bottom is set with grill marks and the top starts to bubble.
- Brush the uncooked side with olive oil, then flip the crust using tongs.
- Working quickly, spread pizza sauce over the grilled side, leaving a 1-inch border.
- Scatter the mozzarella and Parmesan over the sauce, then add pepperoni, bell pepper, and red onion.
- Close the grill lid and cook for another 3–5 minutes at about 450°F until the cheese is fully melted and bubbly and the bottom crust is deep golden with char spots.
- Remove the pizza from the grill with a pizza peel or large spatula, then let it rest for 2 minutes.
- Scatter fresh basil leaves over the top, sprinkle with dried oregano and crushed red pepper flakes, slice, and serve immediately.