
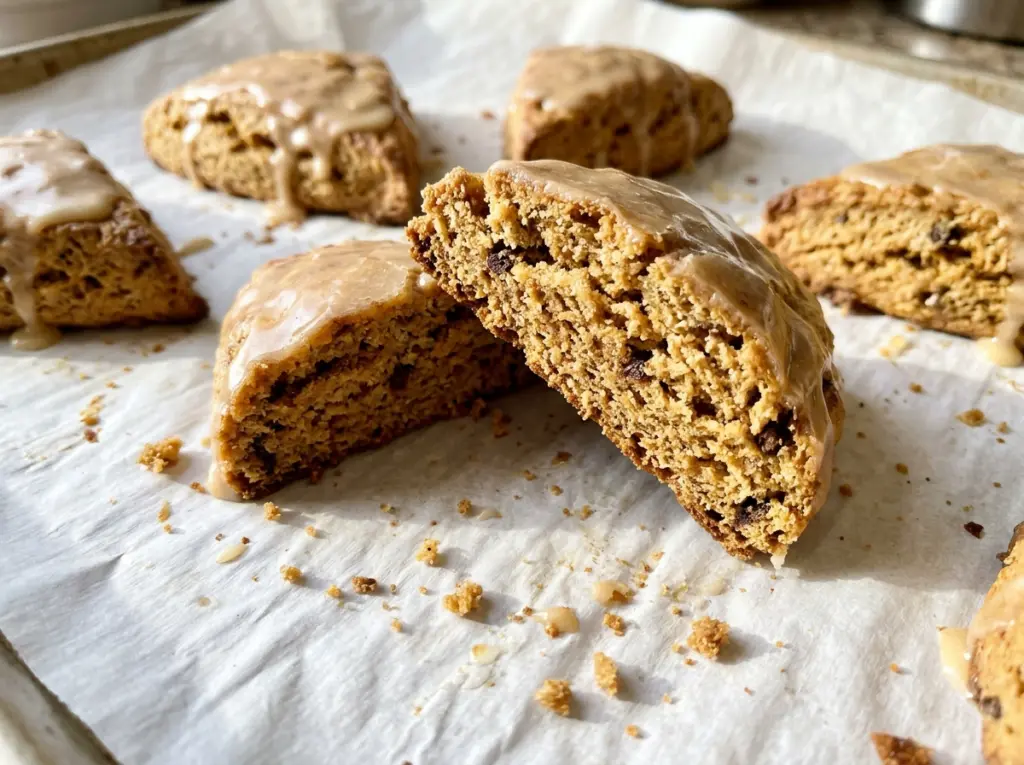
Gingerbread Scones with Maple Glaze
The butter should still look like little pebbles when you finish cutting it into the flour. That’s what keeps gingerbread scones from baking up like sweet, heavy biscuits, even with…

By Ava
•
•
Reading time: 9 min
Tip: save now, make later.
The butter should still look like little pebbles when you finish cutting it into the flour. That’s what keeps gingerbread scones from baking up like sweet, heavy biscuits, even with molasses in the dough. I like this version because the warm spice comes through clearly, while the maple glaze adds sweetness without making each bite feel sugary.
Molasses makes the dough softer and stickier than a plain scone dough, so a light touch matters once the wet ingredients go in. Stir just until the flour is moistened, then use the reserved flour to keep the work surface manageable as you shape the round. The wedges bake up risen and firm, with a tender middle and a crisp edge under the maple drizzle.
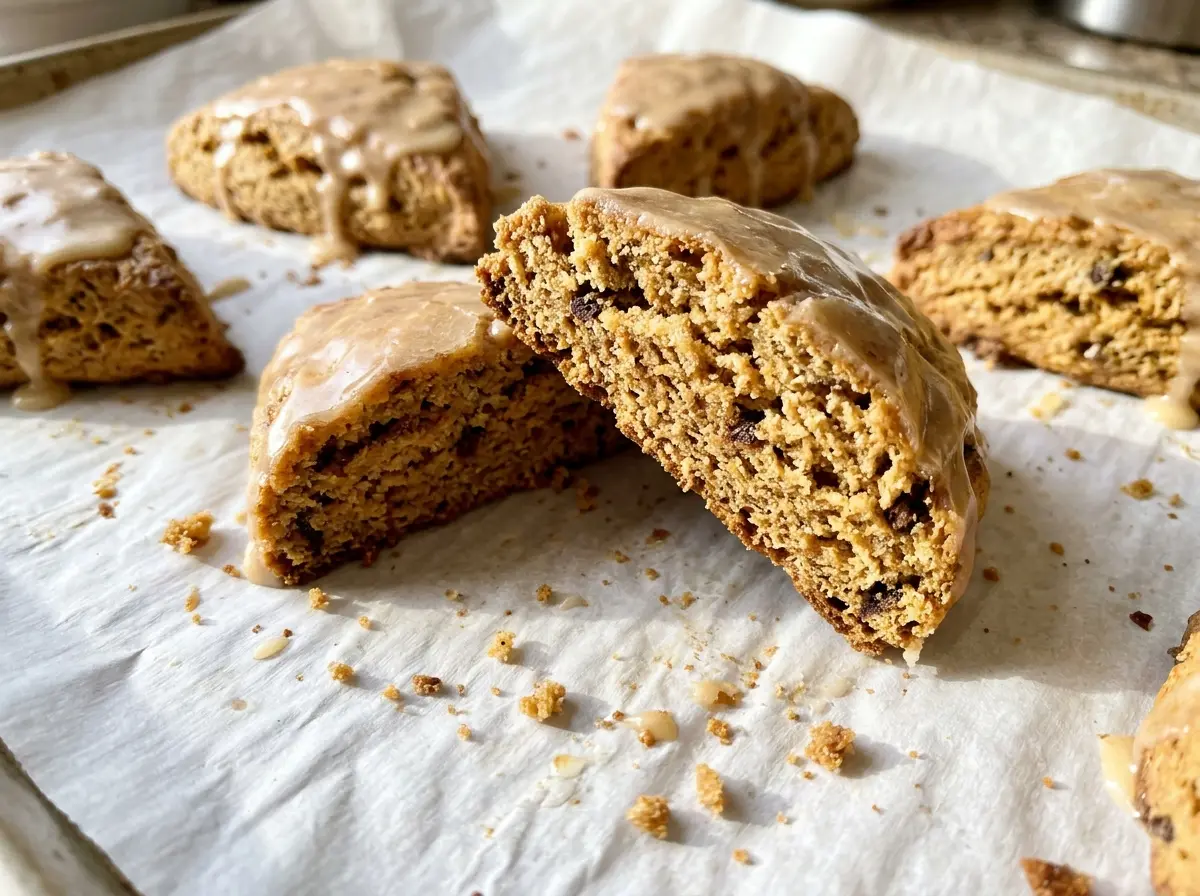
Kitchen Note
Keep the reserved tablespoon of flour separate until you’re ready to shape. It dusts the counter without adding extra flour to the dough, which can make these scones dry.
Save these gingerbread scones with maple glaze for a cozy bake: tender centers, warm ginger, and a smooth maple finish.
Why Cold Butter Matters More Than Extra Flour in Gingerbread Scones
Gingerbread dough can feel soft because molasses and heavy cream bring moisture to the bowl. Adding flour until it feels firm is an easy way to end up with dry, dense scones. Keep the flour mixture as measured, and use the small reserved portion only on the counter and your hands while shaping.
Cold butter gives the dough a different kind of structure. When you cut it into pea-size pieces, those small bits stay distinct instead of blending completely into the flour. As the scones bake, the butter helps create a tender, layered texture rather than a uniform, cakey crumb. If the butter smears into the flour or the dough gets worked hard, you lose that contrast.
That’s also why I don’t knead this dough. Once the egg, molasses, and cream go in, stir only until a shaggy dough forms. It won’t look perfectly smooth, and that’s fine; a few rough patches are better than a tight dough that bakes up tough.
What Molasses, Cold Butter, and Maple Each Bring to These Scones

- Unsulphured molasses — This gives the scones their deep, slightly bittersweet gingerbread character and contributes moisture. It’s worth using unsulphured molasses for the rounded flavor; blackstrap is more bitter and can overwhelm the spice. There isn’t a direct swap that keeps the same taste.
- Cold unsalted butter — The butter needs to stay cold so it can be cut into small pieces rather than disappearing into the flour. Unsalted butter also lets you control the salt in the dough. For a dairy-free batch, use cold block-style dairy-free baking sticks in the same amount; soft tub spread is too loose for this job.
- Heavy cream and egg — Cream brings richness and helps the dough come together, while the egg helps bind the molasses-rich mixture. Half-and-half can replace the cream in the same amount, though the crumb will be a little less rich. The egg is doing useful structural work, so I wouldn’t leave it out without a tested replacement.
- Ground ginger, cinnamon, and cloves — The ginger leads, cinnamon rounds it out, and cloves bring a darker note in the background. Freshness matters more than brand here; old ground spices lose their aroma and make the finished scones taste muted. Keep the amounts balanced for the intended gingerbread flavor.
- Pure maple syrup — Use pure maple syrup in the glaze for its distinct maple taste. Pancake syrup will make the glaze sweeter but won’t give it the same flavor. Confectioners’ sugar forms the smooth base, and the small amount of salt keeps the finish from tasting flat.
From Pea-Size Butter Pieces to a Smooth Maple Drizzle
Mix the dry ingredients and cut in the butter
Heat the oven to 400°F and line a baking sheet with parchment paper. Set aside 1 tablespoon of the flour for shaping, then whisk the remaining flour with the brown sugar, baking powder, baking soda, kosher salt, ginger, cinnamon, and cloves. Cut in the cold butter with a pastry cutter or your fingertips until you see pea-size pieces throughout the mixture. If the butter starts to feel soft, pause and work quickly rather than rubbing it in until the mixture looks like fine crumbs.
Bring the molasses dough together and shape
Whisk the egg, molasses, and heavy cream in a small bowl, then stir the wet mixture into the dry ingredients just until a shaggy dough forms. Lightly dust your work surface with the reserved flour and turn out the dough. Gently pat it into a 7-inch round about 1 inch thick; don’t press or knead it smooth. Cut the round into 8 wedges and place them on the prepared baking sheet.
Bake until risen, then let the scones cool
Bake for 18 to 22 minutes, until the scones have risen and feel firm to the touch. Start checking at the shorter end of the range, since ovens can vary. Let them cool on the baking sheet for 10 minutes; they’re delicate when they first come out, and the short rest makes them easier to handle. The glaze goes on after the scones have cooled.
Whisk and drizzle the maple glaze
Whisk the confectioners’ sugar, pure maple syrup, milk, and kosher salt until the glaze is smooth. It should fall from the whisk in a steady drizzle rather than in stiff clumps. Drizzle it over the cooled scones and give the glaze a moment to settle before serving. If the scones are still warm, the glaze will run instead of sitting in a defined layer on top.
Two Easy Ways to Change the Gingerbread Scone Finish
Make the scones dairy-free
Replace the butter with the same amount of cold, block-style dairy-free baking sticks, the heavy cream with the same amount of unsweetened oat creamer, and the glaze milk with unsweetened oat milk. The scones keep their gingerbread character, with a slightly different richness from the butter and cream. The egg stays in this adaptation.
Skip the glaze for a less-sweet finish
Leave off the maple glaze and serve the cooled scones plain. The molasses and warm spices come through more directly, and the tops stay dry instead of carrying a sweet finish. This is a good choice if you want a less-sweet breakfast scone.
Storage and Reheating
- Room temperature: Keep cooled, glazed scones in an airtight container for up to 2 days. The glaze may soften a little in the container.
- Freezer: Freeze the scones without glaze, wrapped individually and packed in an airtight freezer container, for up to 2 months. Thaw at room temperature, then glaze once they’re fully thawed.
- Reheating: Warm plain or thawed scones in a 300°F oven for 5 to 8 minutes. Don’t heat glazed scones in the oven; the glaze will melt and run.
Questions That Come Up When Baking Gingerbread Scones
Gingerbread Scones with Maple Glaze
Ingredients
Equipment
Method
- Heat the oven to 400°F.
- Line a baking sheet with parchment paper.
- Reserve 1 tablespoon of the flour for shaping.
- Whisk the remaining flour with the brown sugar, baking powder, baking soda, 1/2 teaspoon salt, ginger, cinnamon, and cloves in a large bowl.
- Cut in the cold butter with a pastry cutter or your fingertips until the mixture has pea-size pieces of butter.
- Whisk the egg, molasses, and heavy cream in a small bowl.
- Stir the egg mixture into the flour mixture just until a shaggy dough forms.
- Lightly dust a work surface with the reserved flour and turn out the dough.
- Gently pat the dough into a 7-inch round about 1 inch thick, cut it into 8 wedges, and place them on the prepared baking sheet.
- Bake for 18 to 22 minutes, until the scones are risen and firm to the touch.
- Cool the scones on the baking sheet for 10 minutes.
- Whisk the confectioners’ sugar, maple syrup, milk, and 1/8 teaspoon salt until smooth.
- Drizzle the glaze over the cooled scones.