
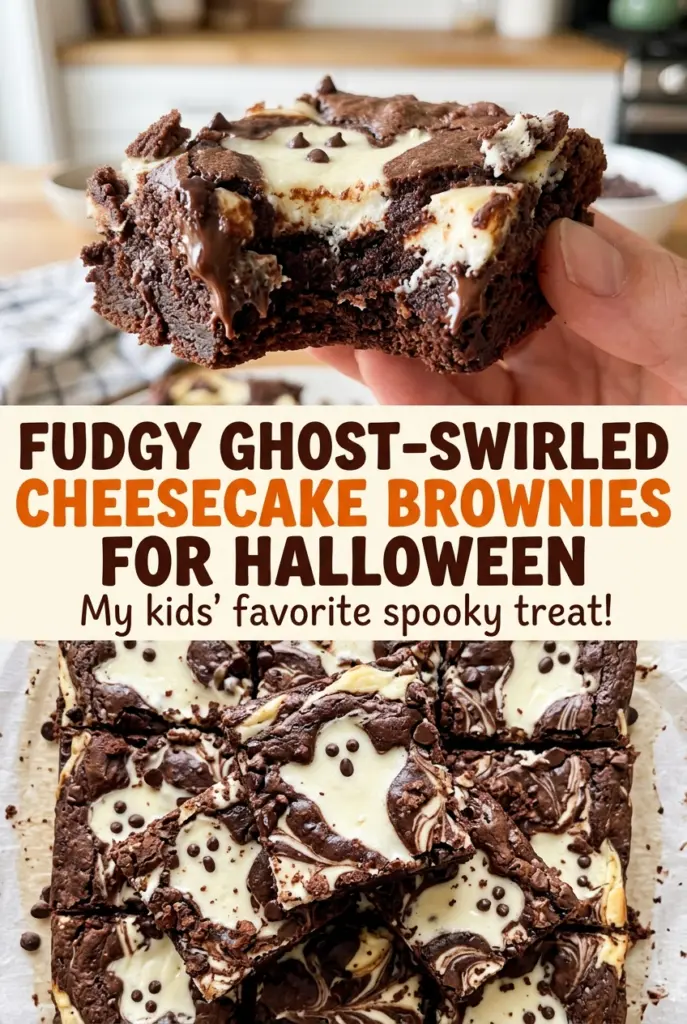
Fudgy Ghost-Swirled Cheesecake Brownies for Halloween
The pale cheesecake layer looks almost too neat against the dark brownie batter, right up until a toothpick draws the two together. A few gentle passes make a marbled top,…
By Ava
•
•
Reading time: 10 min
Tip: save now, make later.
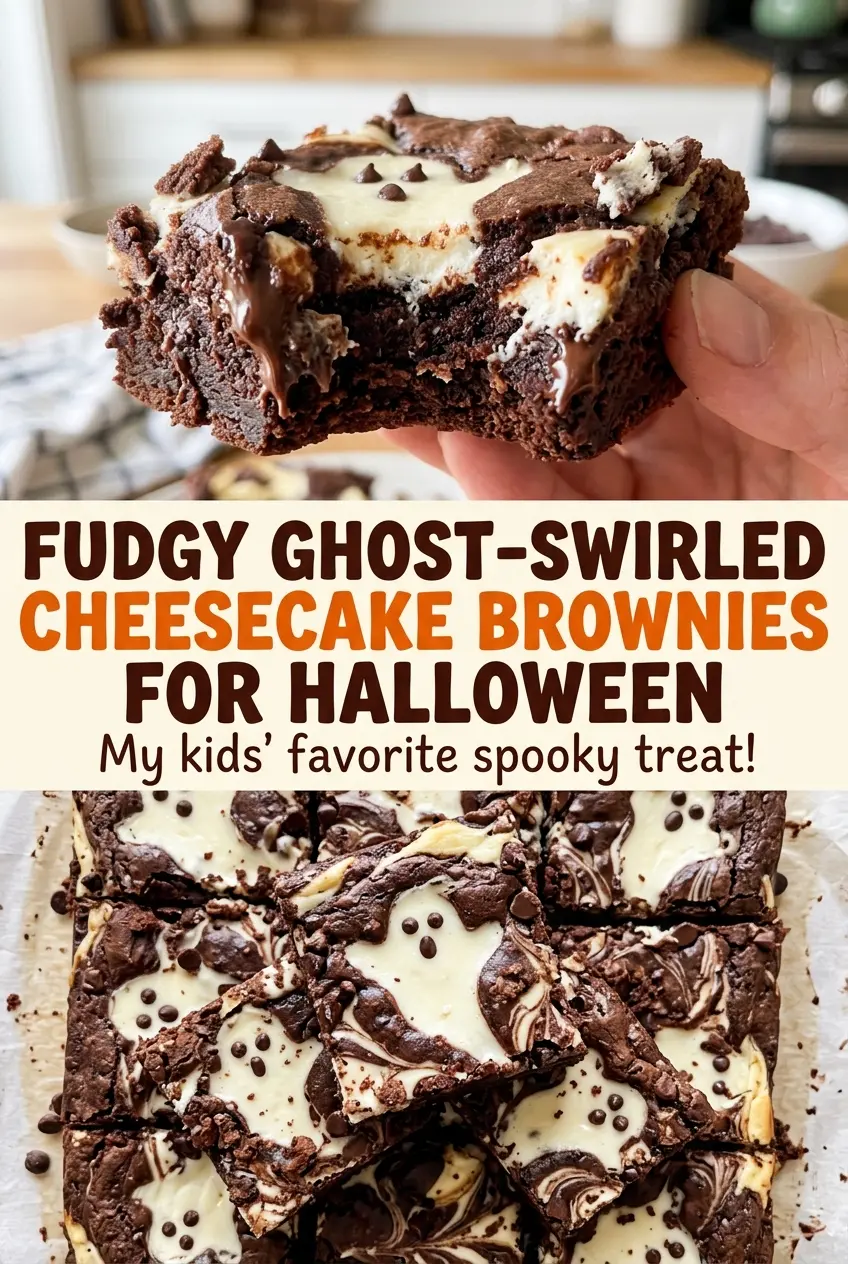
The pale cheesecake layer looks almost too neat against the dark brownie batter, right up until a toothpick draws the two together. A few gentle passes make a marbled top, while the little piped ghosts stay separate and easy to recognize. I built these fudgy ghost-swirled cheesecake brownies around that contrast: a rich chocolate base, a smooth cream cheese layer, and just enough decoration to make each square feel special.
Reserving a little of both batters before spreading is what gives you control over the finish. The brownie portion makes the dark swirls, and the extra cheesecake mixture pipes into eight small ghosts instead of disappearing into the top. Keep the swirl light, and the layers stay distinct when you cut through them. Once the brownies are fully chilled, the edges slice cleanly and the middle stays dense and fudgy.
Kitchen Note
Test the brownie in a spot without cheesecake, since the cream cheese layer can make the toothpick look wetter than the brownie actually is. A few moist crumbs are the cue to stop; waiting for a completely clean pick can dry out the fudgy base.
Save these fudgy ghost-swirled cheesecake brownies for a Halloween bake — chocolatey squares with a creamy swirl and little piped ghosts.
Why the Ghosts Need a Clean Cheesecake Canvas
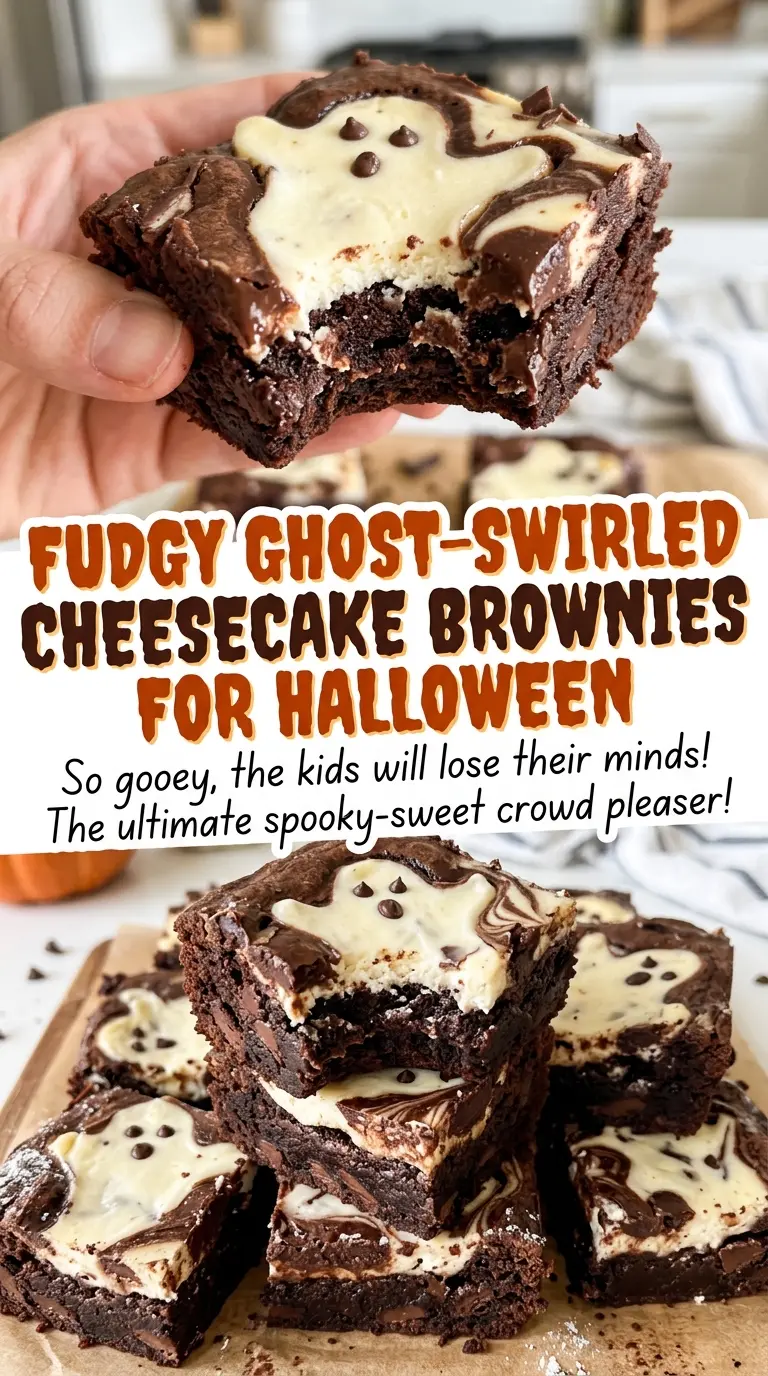
There are three visual jobs happening on this brownie top, and keeping them separate is what makes the decoration read clearly. The cheesecake layer is the pale background. Small drops of brownie batter become the dark marbling. The reserved cream cheese mixture sits on top in teardrop shapes, where the chocolate-chip eyes give each ghost its face.
When the brownie batter gets swirled too deeply or too many times, it blends into the cream cheese instead of leaving defined ribbons. The opposite problem is spreading the cheesecake unevenly: thin patches expose the brownie base, and the ghosts have no smooth surface to sit on. I spread the cheesecake in an even layer, add the brownie dollops, then make a few relaxed passes with a toothpick or thin knife. The goal isn’t a perfectly uniform pattern. It’s a pale top with visible chocolate curves, plus enough untouched space for the ghosts to stand out.
That little bit of restraint makes the pan easier to decorate and the finished squares easier to read. You get creamy pockets in the brownie without turning the whole top into one muddy color.
Why Semisweet Chocolate and Softened Cream Cheese Matter Here
- Semisweet chocolate and cocoa — Chopped semisweet chocolate melts into the butter for the brownie’s rich, smooth base, while unsweetened cocoa deepens the chocolate taste without adding more sweetness. A basic semisweet baking bar is fine; chop it into similar-size pieces so it melts evenly. Bittersweet chocolate works as a swap if you prefer a less-sweet brownie, though the chocolate flavor will taste more intense.
- Cream cheese — Use softened cream cheese so it beats smooth with the sugar rather than leaving small lumps in the swirl. A brick-style package is easier to control than a soft, spreadable tub. There isn’t a close dairy-free swap that keeps this same creamy layer and piping texture.
- Eggs and egg yolk — The whole eggs give the brownie batter its structure, while the yolk enriches the cheesecake mixture without thinning it as much as another whole egg would. Bring the cream cheese to room temperature before mixing; cold cream cheese is much more likely to stay lumpy.
- All-purpose flour — It gives the brownie base enough structure to support the cheesecake layer while keeping the crumb dense. For a gluten-free version, use a cup-for-cup gluten-free baking blend in place of the all-purpose flour; blends vary, so choose one intended as a direct baking substitute.
The Order That Keeps the Swirls and Ghosts Distinct
Line the Pan Before You Melt
Heat the oven to 350°F and line an 8-inch square metal baking pan with parchment, leaving overhang on two sides. Lightly coat the parchment and the exposed pan sides with nonstick cooking spray. The overhang gives you handles for lifting the chilled brownies out later, so leave enough parchment to grip rather than trimming it flush. Set the prepared pan aside while you make both mixtures.
Melt the Chocolate and Mix the Brownie Base
Combine the butter and chopped semisweet chocolate in a microwave-safe bowl, heating in 20-second bursts and stirring between each one. Stop when the mixture is smooth, then let it cool for 5 minutes so it isn’t piping hot when the eggs go in. Whisk in the sugar, eggs, and vanilla, then fold in the flour, cocoa powder, and salt just until the dry streaks disappear. Set aside 1/4 cup of brownie batter for the swirls.
Beat the Cheesecake and Build the Layers
Beat the softened cream cheese and sugar in a medium bowl until smooth, then beat in the egg yolk and vanilla. Spread the remaining brownie batter across the prepared pan before adding the cheesecake mixture on top. Hold back 1/4 cup of the cheesecake mixture for the ghosts, and spread the rest evenly so the pale layer reaches the edges. Spoon small brownie-batter dollops over the surface and draw a toothpick or thin knife through them gently.
Pipe the Ghosts and Bake Until Set at the Edges
Transfer the reserved cheesecake mixture to a piping bag or a small zip-top bag, then snip a 1/2-inch opening. Pipe eight small teardrop-shaped mounds over the top and press two mini semisweet chocolate chips into each ghost for eyes. Bake for 38 to 43 minutes, until the edges are set; use the brownie area for the toothpick check. If the center still looks a little soft, remember that the cheesecake layer will firm as the pan cools.
Chill Before You Slice
Cool the brownies completely in the pan before refrigerating them for at least 2 hours. That rest gives the cream cheese layer time to set, which helps the squares hold their shape instead of smearing when cut. Lift the slab out using the parchment overhang and cut it into 16 squares. A sharp knife makes it easier to keep the piped details intact.
Three Ways to Change the Brownie Base Without Losing the Cheesecake
Make the Brownie Base Gluten-Free
Replace the all-purpose flour with the same amount of a cup-for-cup gluten-free baking blend made for baking. The cream cheese swirl and chocolate decoration stay the same; depending on the blend, the brownie crumb may be a little more tender or slightly less chewy.
Use Bittersweet Chocolate for a Darker Bite
Swap the semisweet chocolate for the same amount of bittersweet chocolate. The brownie will taste less sweet and more deeply chocolatey, which makes the cream cheese layer stand out more; keep the cocoa powder unsweetened.
Turn the Top Into a Simple Marble
For a no-ghost finish, skip piping and the chocolate-chip eyes. Spread all the cheesecake mixture over the brownie base, then use the reserved brownie batter to make the marbled top. You’ll keep the same fudgy-and-creamy contrast with less decorating.
Storage and Reheating
- Refrigerator: Store covered in an airtight container for up to 4 days. The chilled brownie stays dense, and the cheesecake layer firms further.
- Freezer: Freeze individual squares, wrapped well and placed in a freezer-safe container, for up to 2 months. Thaw in the refrigerator before serving.
- Reheating: These are best served chilled, so I don’t reheat them; warming can soften the cheesecake swirl and blur the decoration.
Questions That Come Up While These Brownies Bake
Fudgy Ghost-Swirled Cheesecake Brownies for Halloween
Ingredients
Equipment
Method
- Heat the oven to 350°F.
- Line an 8-inch square metal baking pan with parchment paper, leaving overhang on two sides, then lightly coat the parchment and pan sides with nonstick cooking spray.
- Melt the butter and chopped semisweet chocolate in a microwave-safe bowl in 20-second bursts, stirring between bursts.
- Set the melted chocolate mixture aside to cool for 5 minutes.
- Whisk the granulated sugar, eggs, and vanilla extract into the melted chocolate mixture.
- Fold in the flour, cocoa powder, and kosher salt just until combined, then reserve 1/4 cup of the brownie batter.
- Beat the softened cream cheese and granulated sugar in a medium bowl until smooth.
- Beat in the egg yolk and vanilla extract.
- Spread the remaining brownie batter in the prepared pan.
- Spread the cheesecake mixture over the brownie batter, reserving 1/4 cup of the cheesecake mixture for the ghosts.
- Spoon the reserved brownie batter in small dollops over the cheesecake and gently swirl with a toothpick or thin knife.
- Transfer the reserved cheesecake mixture to a piping bag or small zip-top bag and snip a 1/2-inch opening.
- Pipe 8 small teardrop-shaped ghost mounds on top.
- Press 2 mini semisweet chocolate chips into each ghost mound for eyes.
- Bake for 38 to 43 minutes, until the edges are set and a toothpick inserted into a brownie area comes out with a few moist crumbs.
- Cool completely in the pan.
- Refrigerate for at least 2 hours, then lift the brownies out by the parchment and cut into 16 squares.