
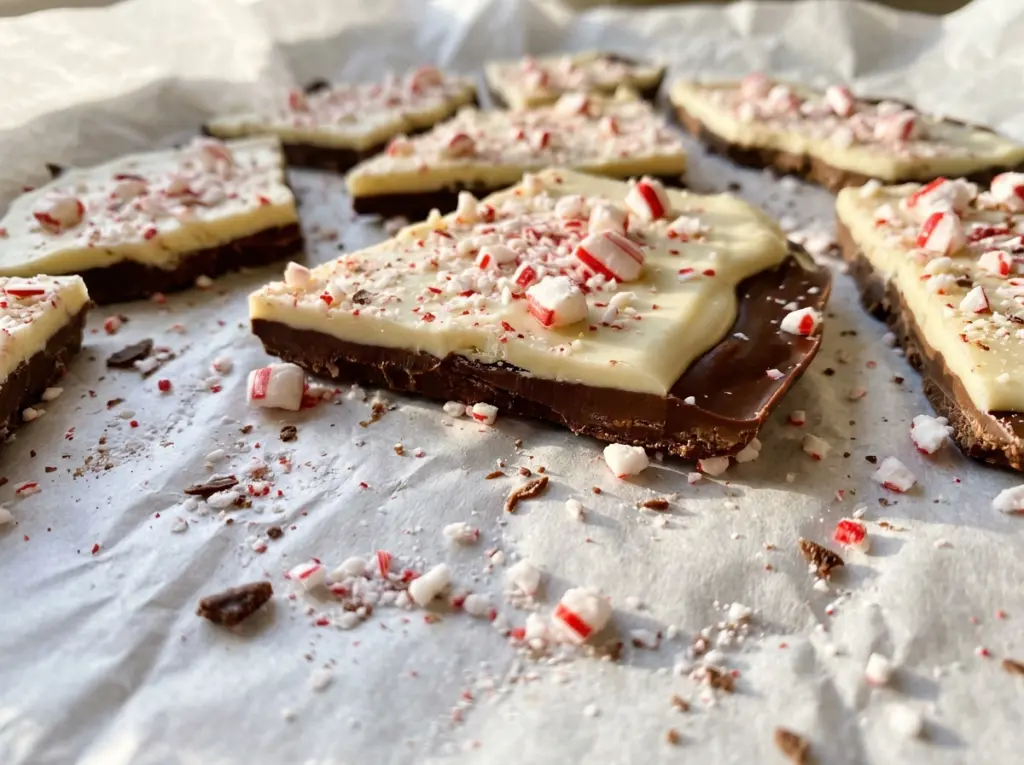
Chocolate Peppermint Bark
The semisweet layer needs to be set enough to hold the white chocolate, but not so cold and hard that the two layers behave like separate sheets. That short pause…

By Ava
•
•
Reading time: 8 min
Tip: save now, make later.
The semisweet layer needs to be set enough to hold the white chocolate, but not so cold and hard that the two layers behave like separate sheets. That short pause in the refrigerator is easy to rush, and it’s the difference I watch most closely when making chocolate peppermint bark. Once the layers are together, the crushed candy canes add a crisp peppermint bite and a bright finish against the chocolate.
I melt both chocolates gently in the microwave, stirring between short bursts instead of waiting for them to melt all at once. White chocolate is especially easy to overheat, so I let it stand until it’s warm rather than hot before spreading it over the darker layer. A light crosshatch on the semisweet chocolate gives the top layer something to grip, and the finished bark breaks into pieces with both chocolates still together.
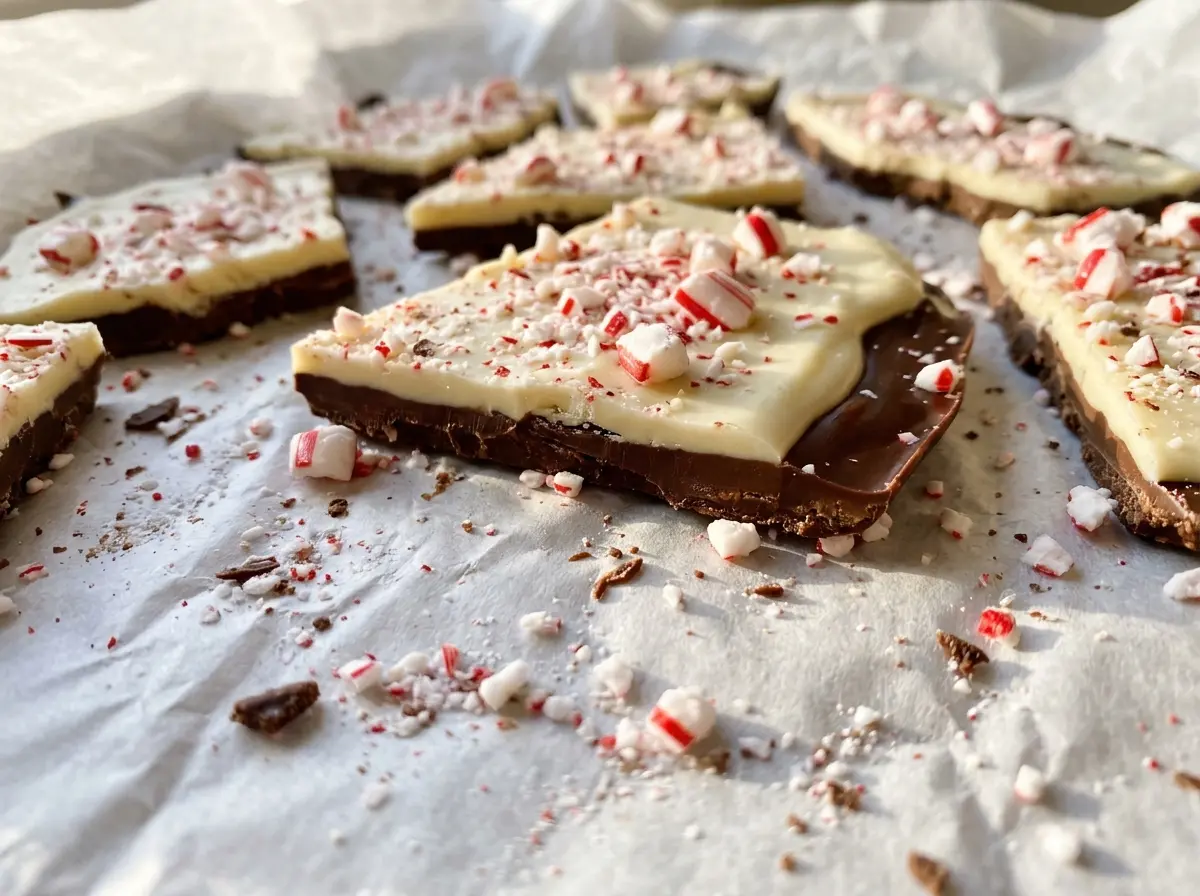
Kitchen Note
White chocolate can look ready before it’s cool enough to spread. I let it stand for 3 to 5 minutes, then work while it’s still fluid and warm, not hot.
Save this chocolate peppermint bark for a holiday treat tray or an easy homemade gift: two chocolate layers with a crisp candy cane topping.
Why the Two Chocolate Layers Need a Textured Meeting Point
Chocolate hardens into a smooth, firm surface as it chills. If you spread a second layer over that unbroken surface, the white chocolate has very little to hold on to; when you snap the bark, the layers can separate. A light crosshatch gives the layers a better connection without mixing the colors together.
Use a fork to score the semisweet layer after its surface has set, but keep the tines shallow. You’re aiming for fine marks, not grooves that reach through the chocolate to the parchment. That small detail preserves a clean dark layer while giving the white chocolate a slightly textured landing place. The timing matters, too: score while the layer is set but not completely cold and hard, when the surface is firm enough to mark without dragging.
This is also why the first chill is short. Refrigerating the semisweet chocolate for 8 to 10 minutes gives the top a chance to set, while leaving the layer workable for scoring. It’s a different job from the final chill, which firms the whole slab so it can be lifted and broken cleanly.
What the Three Ingredients Contribute to Peppermint Bark

- Semisweet chocolate — This makes the darker, less-sweet base and keeps the finished bark from tasting sugary all the way through. Finely chopping it helps the pieces melt evenly in short microwave intervals. Choose chocolate whose flavor you enjoy on its own; it makes up half of the layers, so there’s nowhere for a flat-tasting chocolate to hide.
- White chocolate — The pale top layer brings sweetness and a creamy contrast to the semisweet base. Use actual white chocolate, finely chopped, rather than a white-colored coating; they don’t melt or taste the same. A clean microwave-safe bowl matters here, since the white layer should stay visually distinct from the darker chocolate.
- Candy canes — Finely crushed candy canes give the bark its peppermint character and a crisp finish. Crush them finely enough to sprinkle across the surface rather than leaving large pieces that are awkward to bite. Fresh, crisp candy canes are easiest to crush; if they’ve become sticky or soft, they won’t give the same clean crunch.
Building the Layers Without Overheating the Chocolate
Line the Pan and Melt the Semisweet Chocolate
Line a 9×13-inch baking pan with parchment paper, leaving enough overhang to lift the bark out later. Put the finely chopped semisweet chocolate in a microwave-safe bowl and heat it at 50% power for 30 seconds. Stir, then continue in 15-second intervals, stirring every time, until the chocolate is smooth. Short bursts give you a chance to catch any unmelted pieces before the bowl gets too hot.
Set and Score the Dark Base
Spread the melted semisweet chocolate evenly in the prepared pan. Refrigerate it for 8 to 10 minutes, until the surface looks set but the layer isn’t completely cold and hard. Lightly score the surface in a crosshatch pattern with a fork. Keep the marks shallow; if you cut through the layer, the white chocolate can run into the dark base.
Melt and Spread the White Chocolate
Put the chopped white chocolate in a clean microwave-safe bowl and heat it at 50% power for 20 seconds. Stir, then continue in 15-second intervals, stirring each time, until smooth. Let it stand for 3 to 5 minutes so it’s warm but not hot, then spread it over the semisweet layer. Don’t wait once it’s spread: sprinkle the finely crushed candy canes evenly over the top while the white chocolate is still soft enough for them to cling.
Chill Until Firm, Then Break
Refrigerate the pan for 30 to 40 minutes, until the bark is completely firm. Let it stand at room temperature for 5 minutes, then use the parchment overhang to lift it out. Break it into pieces by hand for irregular shards, or cut it with a large knife for neater pieces. If the slab resists, give it a little more time at room temperature rather than forcing the knife through it.
Two Ways to Shape the Bark for Different Occasions
Irregular shards for a casual candy plate
Break the firm slab by hand into a mix of small and medium pieces. The uneven edges make the layered chocolate easy to arrange loosely, and the smaller shards are handy when you want a bite-sized treat. Keep the candy cane topping distributed across the slab so the pieces don’t all end up plain.
Neater pieces for a gift box
Cut the chilled slab with a large knife when you want pieces that stack more evenly. The edges will look cleaner than hand-broken shards, though a few small chips are normal with firm chocolate. Choose this shape when consistent portions matter more than a rustic look.
Storage and Serving
- Refrigerator: Store in an airtight container for up to 2 weeks. The bark will be firmer straight from the fridge.
- Freezer: Freeze in an airtight container for up to 2 months, separating layers with parchment if stacking. Thaw while still covered to limit condensation on the chocolate.
- Serving: Serve cool and dry. Avoid leaving the bark in a warm spot, where the chocolate can soften and the candy cane topping can become sticky.
Questions That Come Up When Making Chocolate Peppermint Bark
Chocolate Peppermint Bark
Ingredients
Equipment
Method
- Line a 9x13-inch baking pan with parchment paper, leaving enough overhang to lift out the bark.
- Put the semisweet chocolate in a microwave-safe bowl and microwave at 50% power for 30 seconds; stir, then continue in 15-second intervals, stirring each time, until smooth.
- Spread the chocolate evenly in the prepared pan.
- Refrigerate for 8 to 10 minutes, until the surface is set but the layer is not completely cold and hard.
- Lightly score the chocolate surface in a crosshatch pattern with a fork, taking care not to cut through the layer.
- Put the white chocolate in a clean microwave-safe bowl and microwave at 50% power for 20 seconds; stir, then continue in 15-second intervals, stirring each time, until smooth.
- Let the white chocolate stand for 3 to 5 minutes, until warm but not hot.
- Spread the white chocolate over the semisweet layer.
- Immediately sprinkle evenly with the crushed candy canes.
- Refrigerate for 30 to 40 minutes, until completely firm.
- Let stand at room temperature for 5 minutes.
- Lift the bark out using the parchment.
- Break the bark into pieces by hand or cut it with a large knife.