

Candy Cane Meringue Kisses
The beaters start with a quiet foamy hiss, then the egg whites turn bright white and hold their shape. That change happens quickly, but the sugar needs patience: add it…

By Ava
•
•
Reading time: 8 min
Tip: save now, make later.
The beaters start with a quiet foamy hiss, then the egg whites turn bright white and hold their shape. That change happens quickly, but the sugar needs patience: add it too fast and the meringue can feel gritty even when it looks ready. These candy cane meringue kisses bake at a low temperature, so they dry into crisp little shells without taking on color.
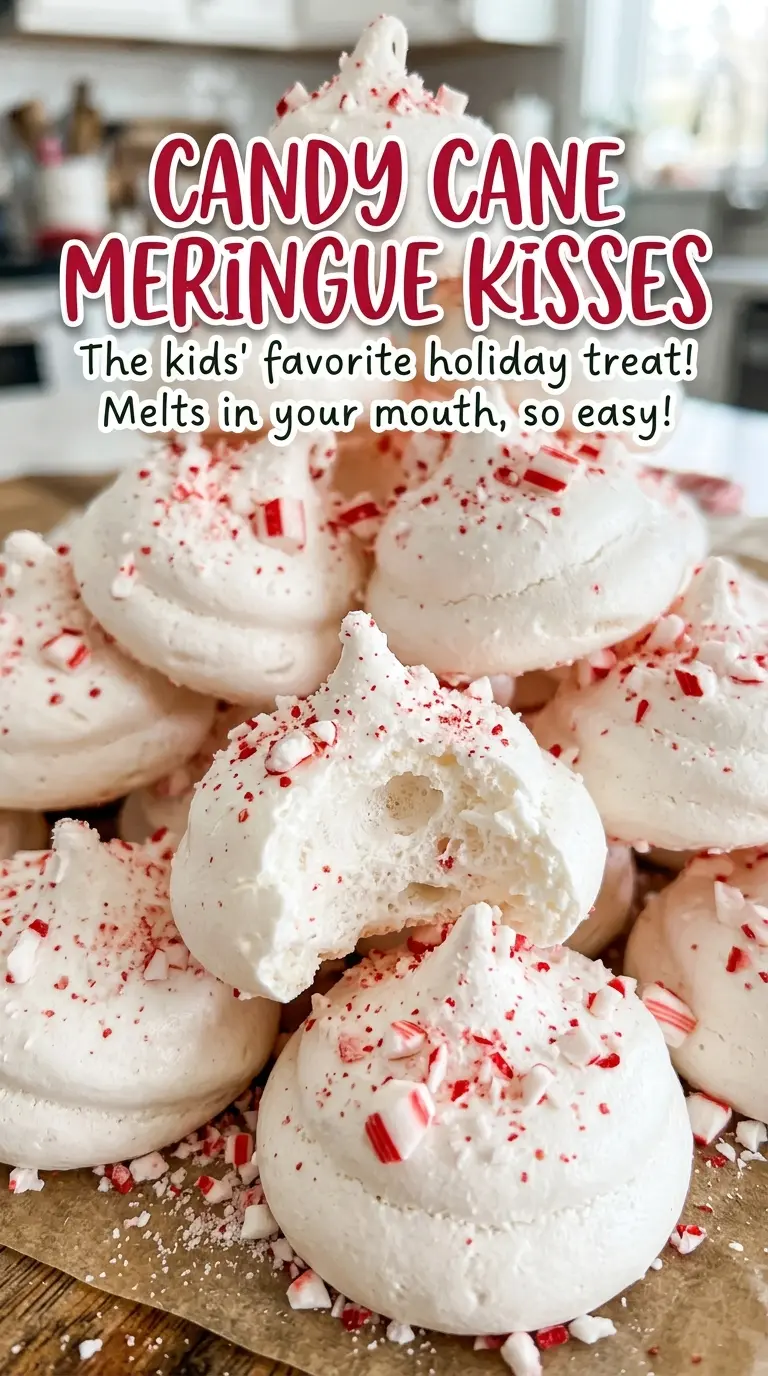
I like how little is needed to make each one feel finished. A small star tip gives the kisses ridged edges, and finely crushed candy cane adds a peppermint crunch right on top. The contrast is lovely: a shell that snaps lightly, then melts away, with a cool hint of peppermint. Once the meringue is glossy and the sugar has dissolved, the rest is mostly gentle drying time.

Kitchen Note
Don’t rush the cool-down. After the oven is off, leave the kisses inside with the door closed for at least an hour; moving them while they’re warm makes these delicate shells easier to crack.
Save these candy cane meringue kisses for crisp peppermint bites with a light, delicate crunch.
Why These Meringues Dry White Instead of Turning Tan
Meringue kisses need time for moisture to leave, not high heat to brown them. At 200°F, the shells dry gradually and keep their pale color. A hotter oven can color the outside before the centers have dried, leaving you with a tan shell and a softer middle. That low temperature is doing a different job from the heat you’d use to bake a cookie.
The long bake is part of the texture, not a sign that anything has gone wrong. The kisses are ready when they feel dry and lift easily from the parchment without browning; the exact point can fall anywhere in the 1 1/2-to-2-hour window. Resist the urge to raise the oven temperature to speed things up. A slow, even dry gives the shells time to become crisp all the way through.
What the Egg Whites, Sugar, and Peppermint Each Bring
- Egg whites — Room-temperature whites whip more readily into a generous foam. Keep the beaters clean and grease-free, and take care not to let any yolk slip in; fat makes it harder for the whites to build a stable meringue. Separate the eggs while they’re cold, then let the whites come to room temperature.
- Cream of tartar — This small amount helps steady the egg-white foam as it grows. It isn’t a flavoring, so you won’t taste it in the finished kisses. I don’t leave it out; without it, the foam has less support as you beat in the sugar.
- Granulated sugar — Sugar sweetens the kisses and gives their dried shells structure. Regular granulated sugar is the right choice here; coarse crystals take longer to dissolve, while powdered sugar changes the texture. Use fresh, dry sugar rather than one that has clumped from moisture.
- Peppermint extract — Extract gives the meringue its clear peppermint note without adding liquid from a larger flavoring ingredient. Peppermint can become overpowering quickly, so stick to the small amount in the formula. A bottle with a clean, fresh aroma makes the flavor taste brighter.
- Candy cane — The topping brings sweetness, color, and a little crunch against the airy shell. Crush it finely so the pieces sprinkle over the small kisses instead of weighing down one spot. A candy cane that’s still crisp is easier to crush cleanly than one that’s sticky.
Build the Foam, Pipe Neat Kisses, Then Let Them Dry
Start with a Stable Foam
Preheat the oven to 200°F and line a 13×18-inch baking sheet with parchment paper. With clean, grease-free beaters, beat the room-temperature egg whites, cream of tartar, and salt on medium speed until foamy, about 1 minute. Raise the speed to medium-high and beat for 2 to 3 minutes, until soft peaks form. If the whites still look loose and bubbly, give them more time before adding sugar.
Add Sugar Until the Meringue Turns Glossy
Add the granulated sugar gradually, about 1 tablespoon at a time, while beating. Continue for 5 to 7 minutes, until the meringue holds stiff, glossy peaks and the sugar feels dissolved when you rub a little between your fingers. If you feel grit, keep beating rather than moving on; undissolved sugar can leave the kisses sandy. Beat in the peppermint extract once the meringue is ready.
Pipe and Top Each Kiss
Transfer the meringue to a piping bag fitted with a 1/2-inch star tip. Pipe 1-inch kisses onto the parchment, leaving about 1 inch between them so they’re easy to lift later. Sprinkle the finely crushed candy cane over the tops. Keep the pieces small and distribute them across the kisses instead of piling them in the center.
Dry Slowly, Then Cool in the Oven
Bake for 1 1/2 to 2 hours, until the kisses are dry and lift easily from the parchment without browning. If a kiss sticks or feels damp underneath, it needs more drying time. Turn off the oven when they’re ready and leave the door closed while the kisses cool inside for at least 1 hour. This last quiet stretch lets them cool before you handle the fragile shells.
Two Easy Ways to Change the Peppermint Finish
Leave Off the Candy Cane
For a smoother top and a less sweet finish, omit the candy cane and pipe the peppermint meringue on its own. For a gluten-free adaptation, leaving off the candy topping removes that confectionery ingredient; use ingredients that meet your own gluten-free requirements. The kisses keep their crisp shell but lose the crunchy garnish.
Make Plain Sugar Meringue Kisses
Omit both the peppermint extract and the candy cane for a simple, sweet meringue. The egg-white-and-sugar base still pipes and dries the same way, but the finished kisses taste cleaner and less minty. This is a good option when you want the delicate crisp shell to be the whole point.
Storage and Reheating
- Refrigerator: Skip refrigeration; moisture can make the crisp shells tacky. Store them at room temperature instead.
- Freezer: Freeze in an airtight container for up to 1 month, with parchment between layers. Let the closed container come to room temperature before opening to limit condensation on the kisses.
- Reheating: These don’t need reheating. Avoid warming them, which can soften the shells; if frozen, let them thaw sealed at room temperature.
Questions That Come Up When Making Meringue Kisses
Candy Cane Meringue Kisses
Ingredients
Equipment
Method
- Preheat the oven to 200°F.
- Line a 13x18-inch baking sheet with parchment paper.
- With clean, grease-free beaters, beat the egg whites, cream of tartar, and salt on medium speed until foamy, about 1 minute.
- Increase to medium-high and beat to soft peaks, 2 to 3 minutes.
- Add the sugar gradually, about 1 tablespoon at a time, and beat until stiff, glossy peaks form and the sugar feels dissolved when rubbed between your fingers, 5 to 7 minutes.
- Beat in the peppermint extract.
- Transfer the meringue to a piping bag fitted with a 1/2-inch star tip and pipe 1-inch kisses onto the prepared baking sheet, spacing them about 1 inch apart.
- Sprinkle with the crushed candy cane.
- Bake for 1 1/2 to 2 hours, until the kisses are dry and lift easily from the parchment without browning.
- Turn off the oven and let the kisses cool inside with the door closed for at least 1 hour.