Winter Vanilla Snowflake Cake
Winter Vanilla Snowflake Cake is a lovely treat that brings the cozy feeling of snowy days right to your table. It’s a soft and fluffy vanilla cake, topped with gentle,…
By Ava
•
•
Reading time: 6 min
Tip: save now, make later.
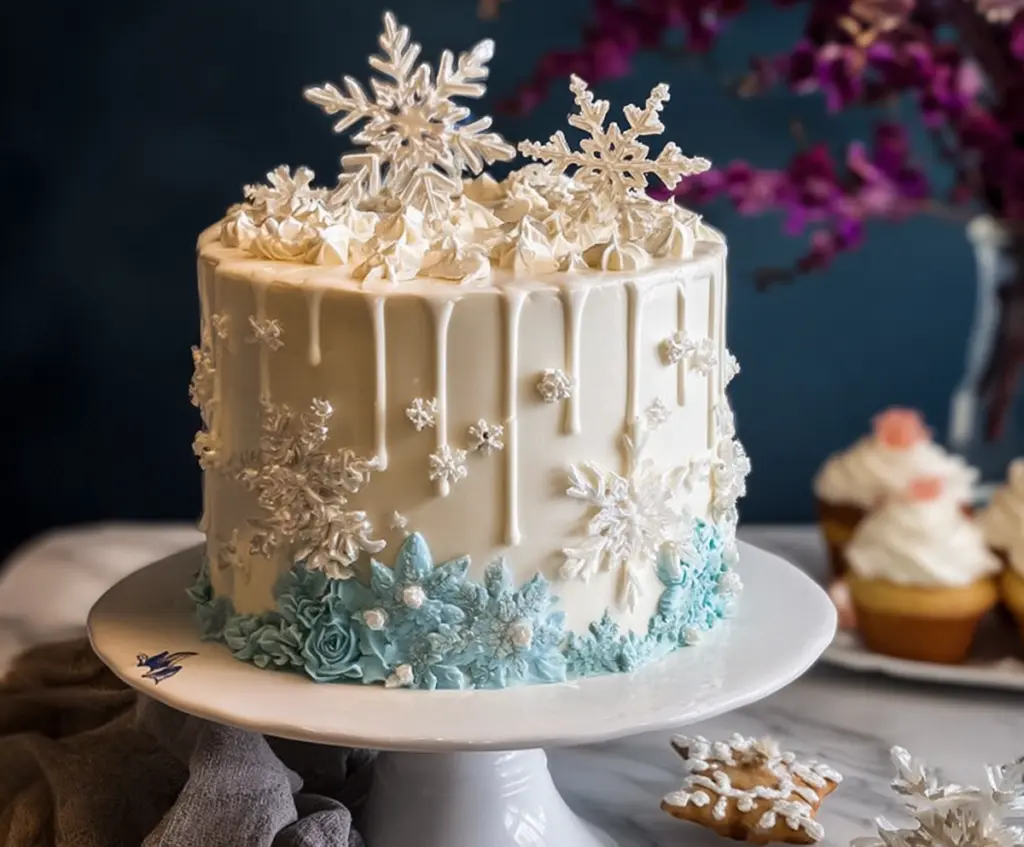
Winter Vanilla Snowflake Cake is a lovely treat that brings the cozy feeling of snowy days right to your table. It’s a soft and fluffy vanilla cake, topped with gentle, snowy frosting and delicate snowflake decorations that make it perfect for chilly winter celebrations or just a sweet pick-me-up during the season.
I love how this cake feels both festive and simple at the same time. What makes it special for me is the smooth vanilla flavor that’s sweet without being too much, and how the snowflake details add a little winter magic without needing anything complicated. It’s one of those desserts that looks beautiful but is easy enough to make at home, which always feels like a win.
My favorite way to enjoy this cake is with a warm cup of tea or cocoa while sitting by a window watching the snow fall outside. It’s just the right kind of sweet to share with friends or family, and I always find myself wanting just one more slice, even after dessert. If you’re looking for a cheerful winter cake that’s made with love and simple flavors, this one’s a great choice.
Key Ingredients & Substitutions
All-Purpose Flour: This gives the cake structure and tenderness. If you want a lighter crumb, cake flour can be swapped in, but measure carefully for best results.
Butter: Using unsalted butter lets you control saltiness. I always soften it to room temp for smooth mixing. You can try margarine if needed, but flavor may differ.
Milk & Sour Cream: These add moisture and richness. Whole milk is best, but you can use almond or oat milk for a dairy-free option. Sour cream adds slight tanginess but can be swapped for yogurt.
Vanilla Extract: Pure vanilla extract provides that classic warm flavor. Avoid imitation vanilla for best taste.
Eggs: Eggs help bind and add richness. Large eggs at room temperature blend better for a smooth batter.
Powdered Sugar for Frosting: Sifted powdered sugar ensures a creamy, lump-free frosting. If heavier sweetness isn’t desired, reduce slightly and balance with cream.
White Chocolate or Candy Melts: These create the lovely snowflake toppers and drips. If unavailable, royal icing snowflakes also work well for decorating.
How Do You Get Smooth Buttercream and Perfect Snowflake Decorations?
Making smooth buttercream is key to a polished cake look. Softened butter is essential; beat it well before adding powdered sugar to avoid clumps. Add cream or milk gradually to adjust thickness.
- Beat butter alone for 2 minutes till creamy.
- Add sugar slowly on low speed, then increase speed for fluffiness.
- Mix in vanilla and liquid, beat on high for a few minutes for airy texture.
- If too thick, add a tiny bit more milk; if too thin, add more sugar.
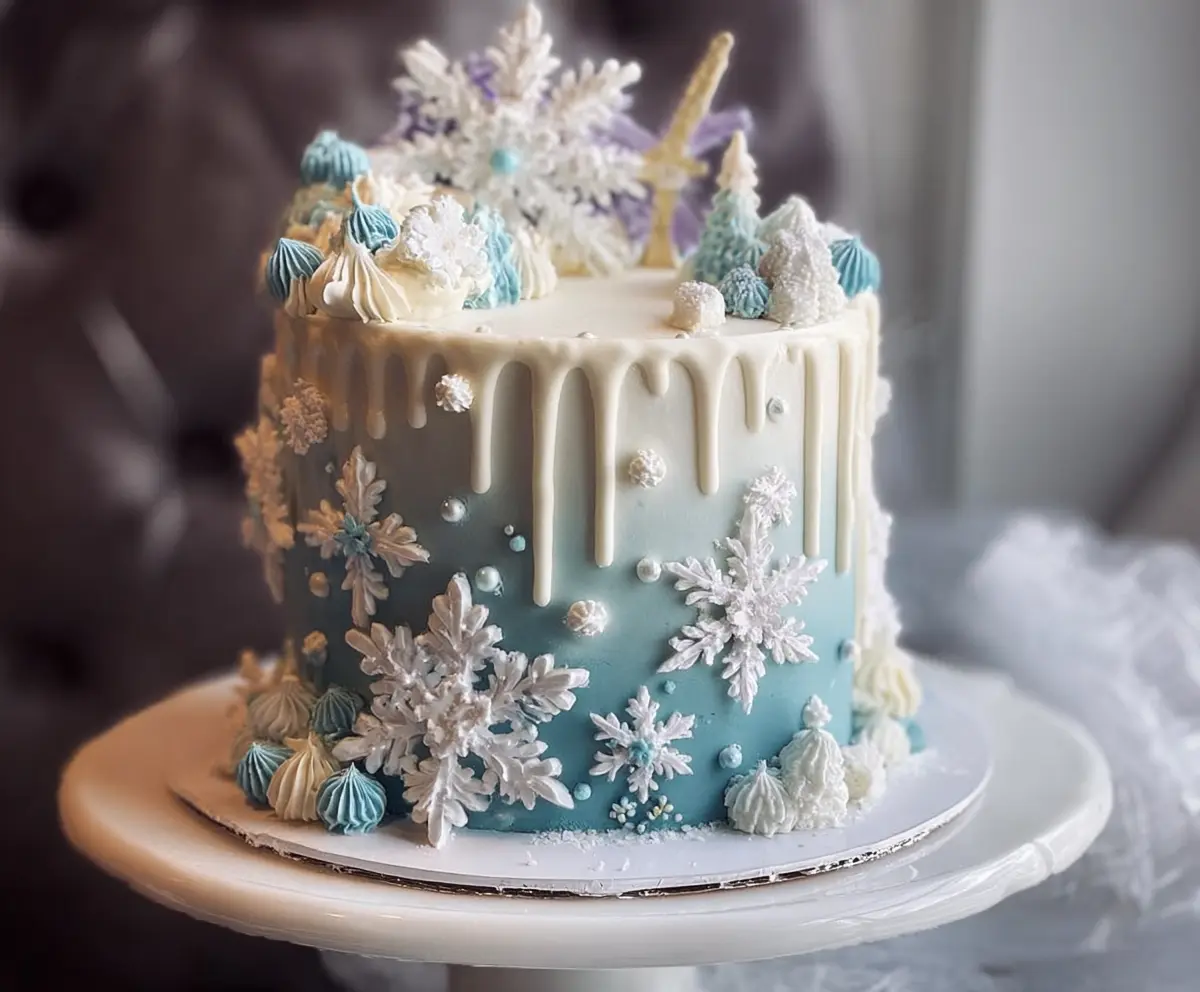
For snowflake toppers, piping melted white chocolate on parchment works great.
- Use a fine piping tip for details.
- Pipe slowly and evenly to shape snowflakes.
- Chill in fridge until firm, handle gently to avoid breakage.
Practice patience with dripping chocolate—warm it gently to keep flow smooth but not runny. Use a spoon or piping bag to control drips around edges.
Equipment You’ll Need
- Three 8-inch round cake pans – perfect size for stacking the layers evenly.
- Electric mixer – makes creaming butter and sugar easy and smooth.
- Mixing bowls – for combining dry and wet ingredients separately.
- Serrated knife or cake leveler – helps create flat cake layers for neat stacking.
- Piping bags and decorating tips – essential for piping frosting flowers and snowflakes with control.
- Spatula and offset spatula – great for spreading and smoothing the frosting evenly.
- Baking rack – allows cakes to cool evenly without sogginess.
- Spoon or squeeze bottle – handy for dripping melted white chocolate down the sides of the cake.
- Parchment paper – ideal for piping snowflake decorations to chill before placing on cake.
Flavor Variations & Add-Ins
- Add a touch of almond extract instead of vanilla for a nutty twist that pairs well with winter flavors.
- Fold in finely chopped white chocolate or shredded coconut into the batter for texture and subtle sweetness.
- Try adding a layer of raspberry or cranberry jam between the cake layers for a bright, tart contrast.
- Swap blue food coloring for soft lavender and add a hint of lemon zest to the frosting for a fresh, floral note.
Equipment You’ll Need
- Three 8-inch round cake pans – for baking even layers
- Electric mixer – to cream butter and sugar and whip the frosting smoothly
- Mixing bowls – to combine dry and wet ingredients separately
- Serrated knife or cake leveler – to level the cake layers for stacking
- Spatulas (rubber and offset) – for mixing, folding, and spreading frosting evenly
- Piping bags and decorating tips (star and leaf tips) – to pipe flowers, foliage, and snowflake details
- Spoon or squeeze bottle – to create the drip effect with melted chocolate
- Parchment paper – for piping snowflake toppers to set before placing them on cake
- Cooling racks – to cool the cakes evenly without sogginess
Variations and Flavor Twists
- Almond or Amaretto Flavor: Add 1 tsp almond extract to the cake batter or frosting for a nutty twist.
- Berry Filling: Spread a layer of raspberry or cranberry jam between cake layers for a pop of fruity tartness.
- Citrus Touch: Add lemon or orange zest to the batter or frosting for a fresh, bright note.
- Chocolate Addition: Swirl melted white or milk chocolate into the batter for a marbled effect.
- Dairy-Free Version: Use dairy-free butter and plant-based milk in the cake and frosting recipes.
- Different Colors: Swap the blue gel food coloring for soft purple, silver, or pale pink to match your winter theme.
Can I Use Frozen Cake Layers for This Recipe?
Yes! If you bake the layers ahead, let them cool completely, wrap tightly in plastic wrap, then freeze. When ready to assemble, thaw in the fridge overnight and bring to room temperature before frosting.
How Do I Store Leftover Cake?
Store leftovers in an airtight container in the refrigerator for up to 4 days. To keep frosting fresh and moist, let the cake sit at room temperature for about 30 minutes before serving.
Can I Substitute Butter with Oil in the Cake?
Butter adds flavor and structure, but you can replace it with an equal amount of neutral oil like vegetable or canola. The texture may be a bit more tender but still delicious!
What’s the Best Way to Prevent Frosting from Melting?
Keep the cake refrigerated until serving time, especially in warm environments. Avoid frosting the cake immediately if your kitchen is hot; chill the crumb coat first to create a stable base before the final coat.