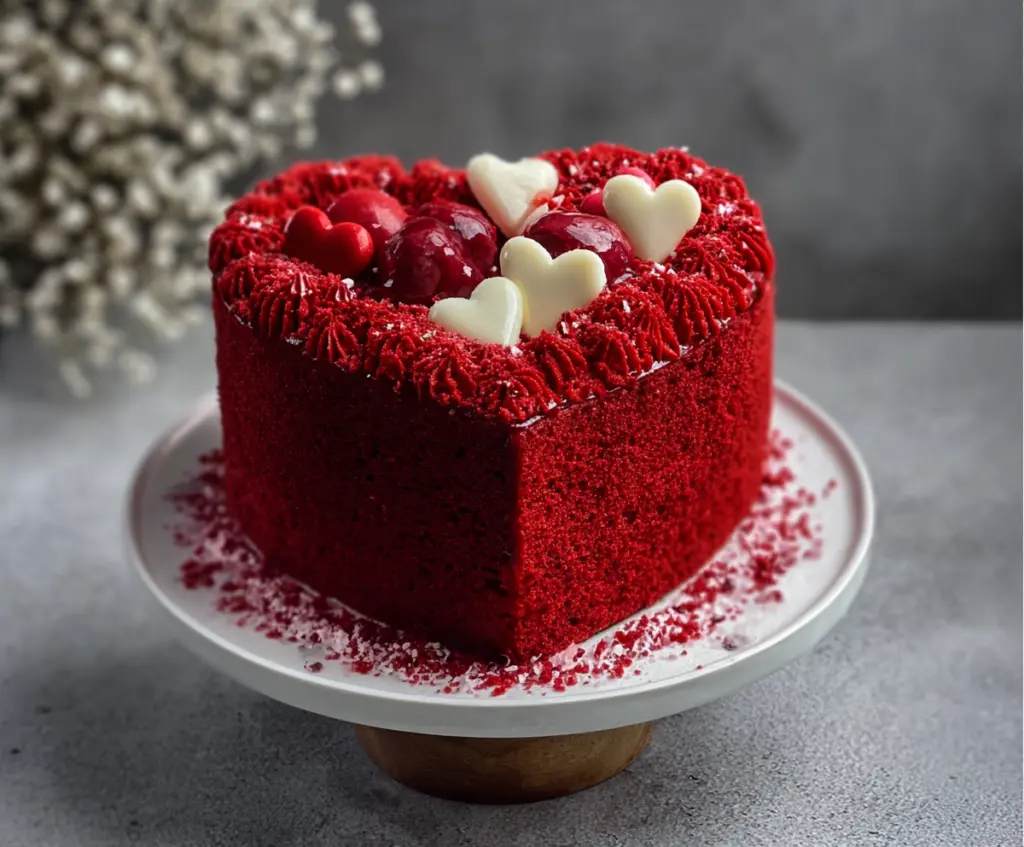
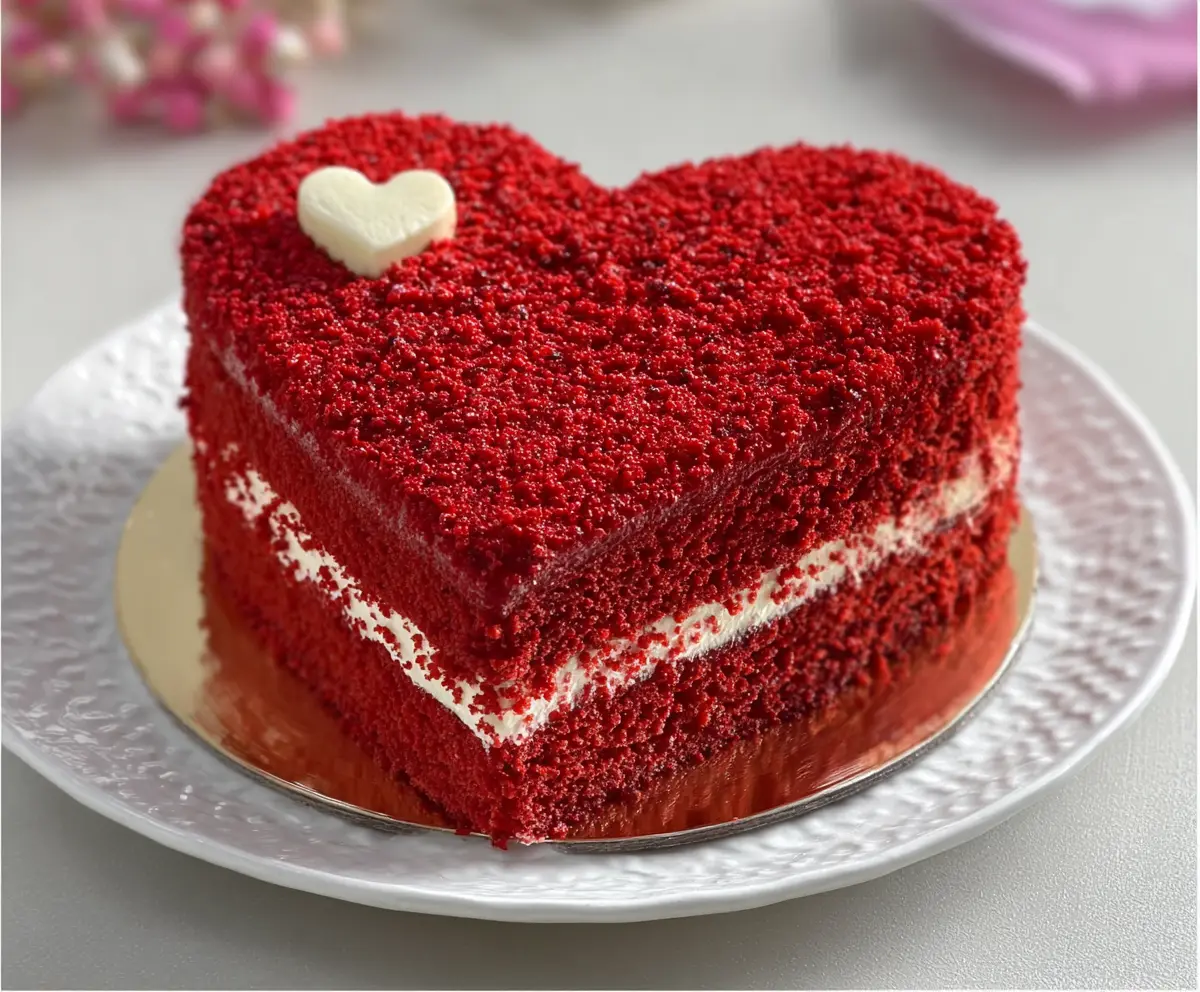
Valentine’s Heart Red Velvet Cake
Valentine's Heart Red Velvet Cake is a sweet, tender dessert that’s as lovely to look at as it is to eat. With its rich red sponge and creamy cream cheese…
By Ava
•
•
Reading time: 7 min
Tip: save now, make later.
Valentine’s Heart Red Velvet Cake is a sweet, tender dessert that’s as lovely to look at as it is to eat. With its rich red sponge and creamy cream cheese frosting, it’s the perfect way to share a little love and joy on a special day. The heart shape makes it extra charming and festive, catching everyone’s eye before that first delicious bite.
I love making this cake because it always brings a smile to friends and family. The slightly tangy cream cheese frosting pairs so well with the soft, chocolatey cake, and the bright red color adds a playful touch. It’s a dessert that feels both classic and a little special, easy enough to pull together but sure to impress.
When I serve this cake, I like to keep things simple—just a few fresh berries or a sprinkle of powdered sugar to complement the rich flavors. Cutting into those perfect heart shapes makes every slice feel like a little celebration. It’s a fun and sweet way to share some love, any day of the year, but especially on Valentine’s Day.
Key Ingredients & Substitutions
Buttermilk: This adds tanginess and moisture to the cake. If you don’t have buttermilk, mix 1 tablespoon lemon juice or vinegar with 1 cup milk and let it sit for 5 minutes. It works just as well.
Red Food Coloring: This gives the iconic red look. You can use gel color for a more vibrant hue or natural alternatives like beet juice, though color may be softer.
Cream Cheese & Butter: Using softened cream cheese and butter is key for smooth frosting. Avoid cold ingredients to prevent lumps. For a dairy-free option, try vegan cream cheese and margarine.
Cocoa Powder: A small amount is needed to bring out the mild chocolate flavor. Use unsweetened for best results. Dutch-processed cocoa can be a substitute but may change the cake’s color slightly.
How Do I Achieve a Perfect Heart Shape and Smooth Frosting?
Getting a clean heart shape and smooth frosting is easier with a few tricks:
- Heart Pan Prep: Grease the pan well and dust with flour or use parchment paper. This helps the cake release without breaking the shape.
- Level the Cake: After baking, level the cake with a serrated knife for even layers. This helps the cake stack neatly.
- Crumb Coat: Apply a thin layer of frosting all over the cake first. Chill it to trap crumbs before the final frosting. This keeps your outside smooth and clean.
- Piping Tips: Use a star tip to pipe around the edges for a decorative and tidy finish. Practice on parchment paper before piping on the cake.
- Decorations: Press the cake crumbs gently onto the frosting to avoid smudging. Place chocolate hearts and cherries after the frosting sets slightly so they stay put.
Patience makes all the difference. Chill between steps, and take your time piping and decorating. Your heart-shaped red velvet cake will look as great as it tastes!
Equipment You’ll Need
- Heart-shaped cake pan – perfect for getting that classic Valentine’s Day shape easily.
- Mixing bowls – a couple of sizes to mix cake batter and frosting separately without mess.
- Electric mixer – makes beating cream cheese frosting smooth and fluffy.
- Serrated knife – helps you level the cake layers cleanly for even stacking.
- Piping bag with star tip – lets you add pretty frosting details around the edges.
- Wire cooling rack – cools the cake evenly so it doesn’t get soggy on the bottom.
Flavor Variations & Add-Ins
- Add a teaspoon of espresso powder to the batter to deepen the chocolate flavor in the cake.
- Try mixing fresh raspberries or chopped strawberries into the frosting for a fruity twist.
- Swap cream cheese frosting for whipped mascarpone and powdered sugar for a lighter finish.
- Sprinkle chopped toasted pecans or walnuts inside the layers or on top for extra crunch.
Valentine’s Heart Red Velvet Cake
Ingredients You’ll Need:
For the Cake:
- 2 ½ cups (315g) all-purpose flour
- 1 ½ cups (300g) granulated sugar
- 1 teaspoon baking soda
- 1 teaspoon fine salt
- 1 teaspoon cocoa powder (unsweetened)
- 1 ½ cups (360ml) vegetable oil
- 1 cup (240ml) buttermilk, room temperature
- 2 large eggs, room temperature
- 2 tablespoons (30ml) red food coloring
- 1 teaspoon pure vanilla extract
- 1 teaspoon white vinegar
For the Cream Cheese Frosting:
- 16 oz (450g) cream cheese, softened
- ½ cup (113g) unsalted butter, softened
- 4 cups (480g) powdered sugar, sifted
- 1 teaspoon vanilla extract
For Decoratons:
- Red velvet cake crumbs (from trimming the cake)
- White chocolate hearts (made by melting, spreading, chilling, and cutting white chocolate)
- Red and white heart sugar decorations or marzipan hearts
- Cherry or red fruit glaze or preserves (optional)
How Much Time Will You Need?
Plan for about 15 minutes to prep your ingredients and batter, 30-35 minutes to bake, plus around 1 to 2 hours for cooling, frosting, decorating, and chilling the cake before it’s perfect to serve.
Step-by-Step Instructions:
1. Prepare the Cake Batter:
Preheat your oven to 350°F (175°C). Grease and flour a heart-shaped cake pan or line it with parchment paper. In a large bowl, sift together the flour, sugar, baking soda, salt, and cocoa powder.
In another bowl, whisk the vegetable oil, buttermilk, eggs, red food coloring, vanilla extract, and vinegar until smooth. Slowly mix the wet ingredients into the dry, stirring just until everything is combined. Avoid overmixing to keep the cake tender.
Pour the batter evenly into the prepared pan.
2. Bake and Cool:
Bake for 30-35 minutes until a toothpick inserted in the center comes out clean. Let cool 10 minutes in the pan, then remove the cake and place on a wire rack until completely cool.
3. Make the Cream Cheese Frosting:
Beat the softened cream cheese and butter until creamy. Gradually add powdered sugar and beat on low, then add vanilla and beat on high until fluffy and smooth.
4. Frost and Decorate the Cake:
If needed, level the cake top with a serrated knife, then slice into two layers if you want. Spread frosting on the bottom layer and stack the top layer on it (if any).
Coat the whole cake with a thin “crumb coat” layer of frosting to trap crumbs. Chill for 30 minutes.
Then, spread a thicker layer of frosting all over the cake. Use a piping bag with a star tip to pipe pretty rosettes or shells around the edges.
Sprinkle red velvet crumbs around the base and on the frosting border for texture.
Arrange white chocolate hearts and sugar decorations on top, adding a few dollops of cherry glaze if you like.
Chill the cake for at least an hour before serving to let everything set nicely.
Enjoy your lovely, heartfelt red velvet cake — a sweet treat made for sharing!
Can I Use Frozen Red Velvet Cake Layers?
Yes! Just make sure to thaw the cake layers completely in the refrigerator overnight before frosting. Bring them to room temperature for about 30 minutes before assembling to avoid frosting melt.
Can I Substitute Buttermilk in the Recipe?
Absolutely! If you don’t have buttermilk, mix 1 tablespoon of lemon juice or vinegar with 1 cup of regular milk and let it sit for 5 minutes. This homemade substitute works great in the cake batter.
How Should I Store Leftover Cake?
Store the cake in an airtight container or cover it tightly with plastic wrap. Keep it refrigerated for up to 4 days. Take it out about 30 minutes before serving to let it soften a bit.
Can I Make This Cake Ahead of Time?
Yes! You can bake the cake layers a day ahead and keep them wrapped tightly at room temperature or chilled. Make the frosting and assemble a few hours before serving for the freshest taste and best texture.