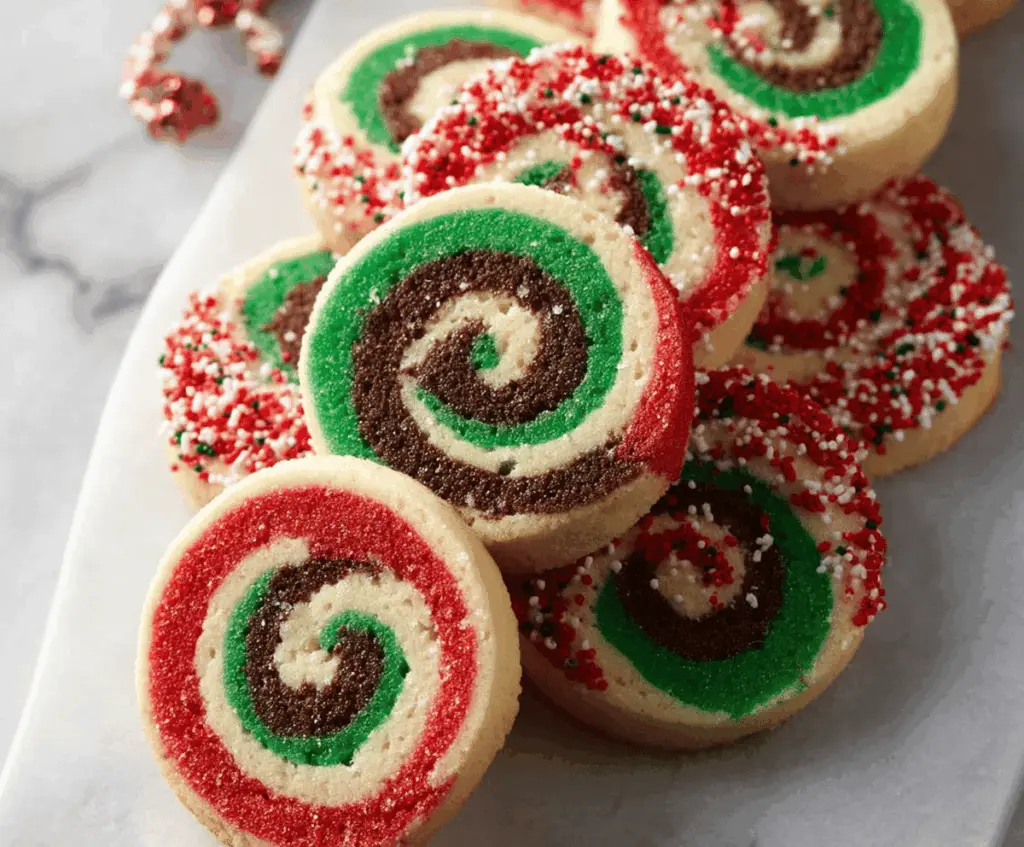
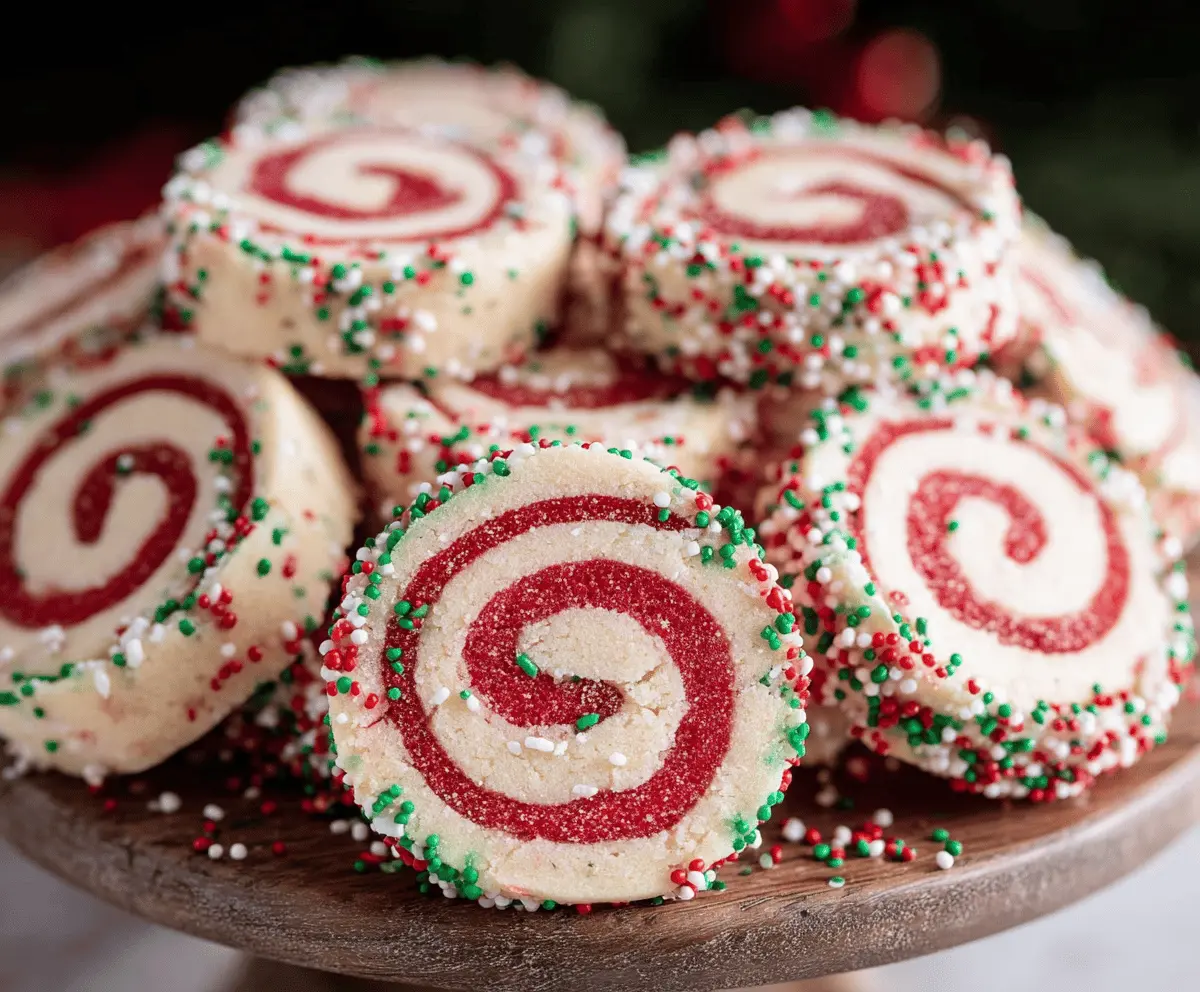
Christmas Pinwheel Cookies
Christmas Pinwheel Cookies are the perfect festive treat, swirling with pretty red and white dough that catches your eye before you even take a bite. These fun, spiral-shaped cookies have…
By Ava
•
•
Reading time: 7 min
Tip: save now, make later.
Christmas Pinwheel Cookies are the perfect festive treat, swirling with pretty red and white dough that catches your eye before you even take a bite. These fun, spiral-shaped cookies have a soft, buttery texture with a hint of vanilla and just the right amount of sweetness to brighten up any holiday gathering.
I love making these cookies because they’re as fun to bake as they are to eat! Rolling out the dough and creating those perfect pinwheels always feels like a little holiday project, and the kids love helping. Plus, they’re a great way to bring some classic Christmas colors to your cookie plate without any fancy decorations needed.
The best part? These cookies taste even better with a glass of milk or a cup of hot cocoa. I like to arrange them on a festive plate and watch how quickly they disappear—everyone always asks for the recipe! They’re a simple, cheerful way to add some holiday cheer to your kitchen and your heart.
Key Ingredients & Substitutions
Butter: Unsalted butter is best for controlling salt in the dough and giving a tender texture. You can use salted butter but skip extra salt. Avoid margarine for this recipe as it changes the texture.
Food Coloring: Gel food coloring works best—it adds vibrant colors without changing dough consistency like liquid coloring can.
Cocoa Powder: Use unsweetened cocoa powder for rich chocolate flavor. You can swap with Dutch-processed, but it may affect color and taste slightly.
Extracts: Vanilla is a must for flavor depth. Almond extract adds a festive note but is optional and can be skipped or replaced with peppermint extract for a holiday twist.
Sugar Sprinkles: These add fun texture and color. You can use crushed candy canes or colored sanding sugar as alternatives.
How Can I Roll and Slice the Dough Without Losing the Pinwheel Shape?
Rolling the layers evenly and slicing carefully is key. Here’s how I keep the pinwheels perfect:
- Roll each colored dough sheet to the same size and thickness (about 1/4 inch) between parchment paper to prevent sticking.
- Stack the layers gently and press lightly to stick them together without squishing dough.
- Roll the dough log slowly and tightly, starting from one edge, to form a firm spiral.
- Chill the log well (at least 2 hours). This firms up the dough, making it easier to slice thin, even rounds without distortion.
- Use a sharp knife to slice the dough into uniform 1/4 inch slices. Wipe the knife clean between cuts for smooth edges.
- If slices soften, pop the tray into the fridge for a few minutes before baking.
Equipment You’ll Need
- Mixing bowls – one for dry ingredients and one for wet, keeping things organized.
- Electric mixer or stand mixer – it makes creaming butter and sugar quick and smooth.
- Measuring cups and spoons – to get your ingredients just right.
- Rolling pin – helps you roll dough evenly between parchment sheets without sticking.
- Parchment paper – perfect for rolling dough flat and easy cleanup.
- Sharp knife – to slice your dough log cleanly into neat pinwheel rounds.
- Baking sheets – flat and sturdy for even cookies that bake consistently.
- Wire cooling rack – lets your cookies cool down without getting soggy.
Flavor Variations & Add-Ins
- Swap almond extract for peppermint for a cool holiday twist that pairs well with chocolate.
- Add finely chopped nuts like pistachios or pecans between layers for extra crunch and flavor contrast.
- Replace cocoa powder with cinnamon or ginger for a warm, spicy note in your pinwheels.
- Mix in mini chocolate chips or white chocolate chips into the dough for a melty surprise inside.
Christmas Pinwheel Cookies
Ingredients You’ll Need:
Dry Ingredients:
- 3 cups all-purpose flour
- 1 teaspoon baking powder
- ½ teaspoon salt
Wet Ingredients:
- 1 cup (2 sticks) unsalted butter, softened
- 1 cup granulated sugar
- 1 large egg
- 1 teaspoon vanilla extract
- 1 teaspoon almond extract (optional)
Color and Decoration:
- Red food coloring
- Green food coloring
- 2 tablespoons unsweetened cocoa powder
- Colored sugar sprinkles (red, white, green), for decoration
How Much Time Will You Need?
This recipe takes about 15-20 minutes to prepare, plus at least 2 hours to chill the dough log. Baking takes an additional 10-12 minutes per batch. Most of the time is hands-off chilling, making this a great recipe for preparing ahead during your holiday baking.
Step-by-Step Instructions:
1. Mix the Dry Ingredients:
In a medium bowl, whisk together the flour, baking powder, and salt. This ensures your dry ingredients are well combined and ready to mix with the butter and sugar.
2. Cream Butter and Sugar:
Using a large mixing bowl, beat the softened butter and sugar together until light and fluffy; this usually takes about 3-4 minutes. This will give your cookies a nice, tender texture.
3. Add Egg and Extracts:
Beat in the egg, vanilla extract, and almond extract (if using) until everything is fully combined. These add flavor and help bind the dough.
4. Combine Dry and Wet Ingredients:
Gradually add the dry ingredients into the butter mixture and stir until just combined. Be careful not to overmix—stop as soon as you have a dough.
5. Divide and Color the Dough:
Split your dough evenly into four portions. Leave one plain (white), then knead red food coloring into the second, green into the third, and cocoa powder into the fourth to get the colorful layers ready.
6. Roll and Layer the Dough:
Roll each dough portion between parchment paper into rectangles about ¼ inch thick, making sure all rectangles are roughly the same size. Carefully stack them in any order you like—for classic Christmas colors, try white, red, green, and chocolate. Press gently so the layers stick together.
7. Roll Into a Log and Chill:
Starting with one long edge, roll the layered dough tightly into a log shape. Wrap it in plastic wrap and place it in the refrigerator for at least 2 hours until firm.
8. Slice and Decorate:
Preheat your oven to 350°F (175°C) and line cookie sheets with parchment paper. Remove the chilled log and slice it into ¼ inch thick rounds. If you like, dip the edges of each slice in colored sugar sprinkles for a festive touch.
9. Bake:
Arrange the cookie slices on your baking sheets, leaving about 2 inches between each. Bake for 10-12 minutes, or until the edges are set and just starting to turn golden.
10. Cool and Enjoy:
Let the cookies cool on the baking sheet for about 5 minutes to firm up, then transfer them to a wire rack to cool completely. Now, your beautiful Christmas Pinwheel Cookies are ready to share and enjoy!
Can I use liquid food coloring instead of gel?
Yes, but use sparingly—liquid coloring may soften the dough slightly, so start with a few drops and add more if needed to avoid changing the texture.
Can I prepare the dough ahead of time?
Absolutely! After rolling into a log, wrap tightly and refrigerate for up to 2 days or freeze for up to 1 month. Thaw in the fridge before slicing and baking.
How should I store leftover cookies?
Store your pinwheel cookies in an airtight container at room temperature for up to 5 days. They also freeze well—just thaw to room temperature before serving.
Can I customize the flavors or colors?
Yes! Swap almond extract for peppermint or vanilla for a festive twist. You can also change the colored layers by using different food colorings or adding spices like cinnamon to the dough.